Happy Sunday y’all! While I firmly believe weekends are meant for relaxation and fun times connecting with friends/family, I know we can’t help but look around our house in judgement. Especially in these upside down times where you might be home significantly more than the past. Trust me when I say, I KNOW this feeling of discouragement where your expectations and the reality of your home are just not lining up. The struggle is real! So I thought this was a good time to provide my blog audience with background on why I’ve launched my Virtual Design Strategy Sessions. Because this could be EXACTLY what you need to incite great change in your home.
If you’ve been following since my very first blog post, then you know that 2020 has been a fun year of experimentation at my own house. I love trying things here – especially projects on a budget – so I can advise on whether a client or friend should try the same thing. Today we’re trying three (3) experimental paint techniques on some home decor items.

Rewind a few weeks back, and you may have joined me on my Thrift with Me blog post where I found some cool items I wanted to makeover for the mini-farm. I rode the high of excitement over to Michael’s craft store and picked up supplies to start these DIYs. Between waiting out summer non-stop showers to paint and having one fail pretty fast…this post was almost #cancelled. But since this blog is in the spirit of experimentation, I wanted to explore so I can share my thoughts with you.
We’re not failing, we’re learning! 🙂 I’ll start with my favorite…
Glass Lamp Base Painting
I had a lot of confidence in this project because of how well I learned the Dollar Tree glass vases take paint. (You can check out that super fun DIY in my Instagram Story Highlights!) New lamp bases, especially big ones like this, are often pretty expensive to replace. Using this $16 Goodwill find, I used some leftover paint to give this guy a new life!
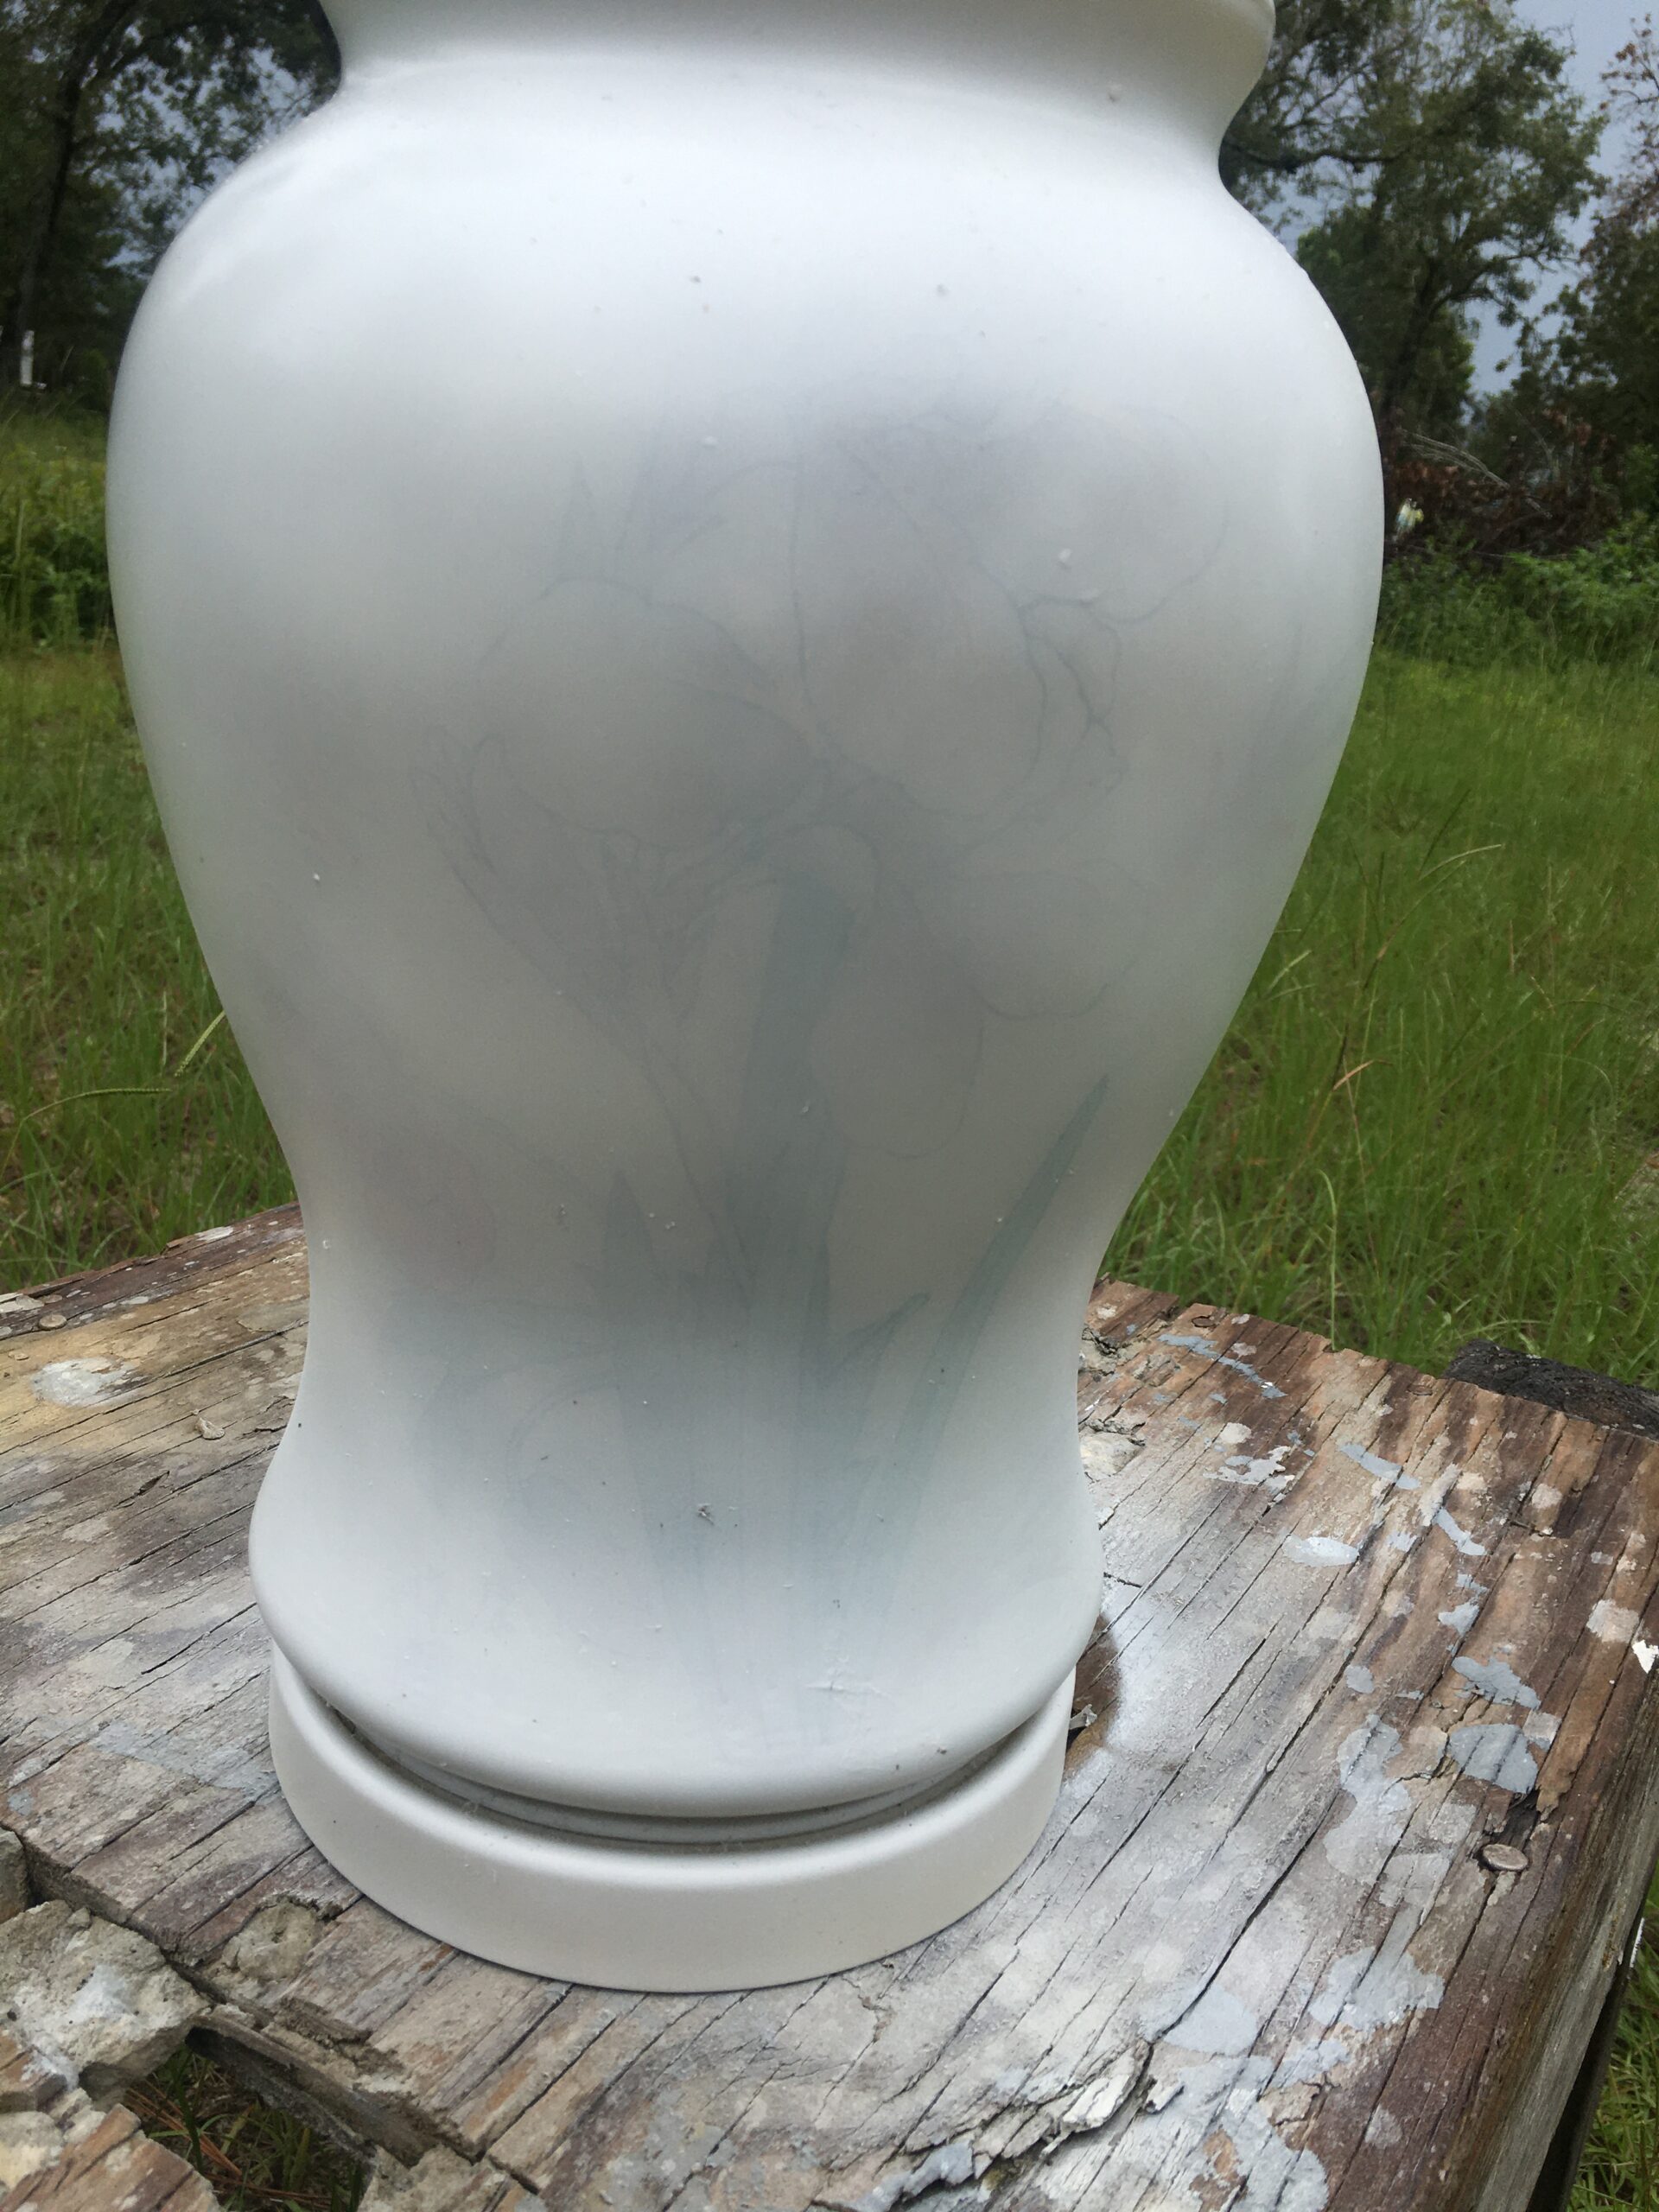
First I went in with one layer of white spray paint. But as you can see in the photo above, it definitely needed about 2-3 total coats to cover.
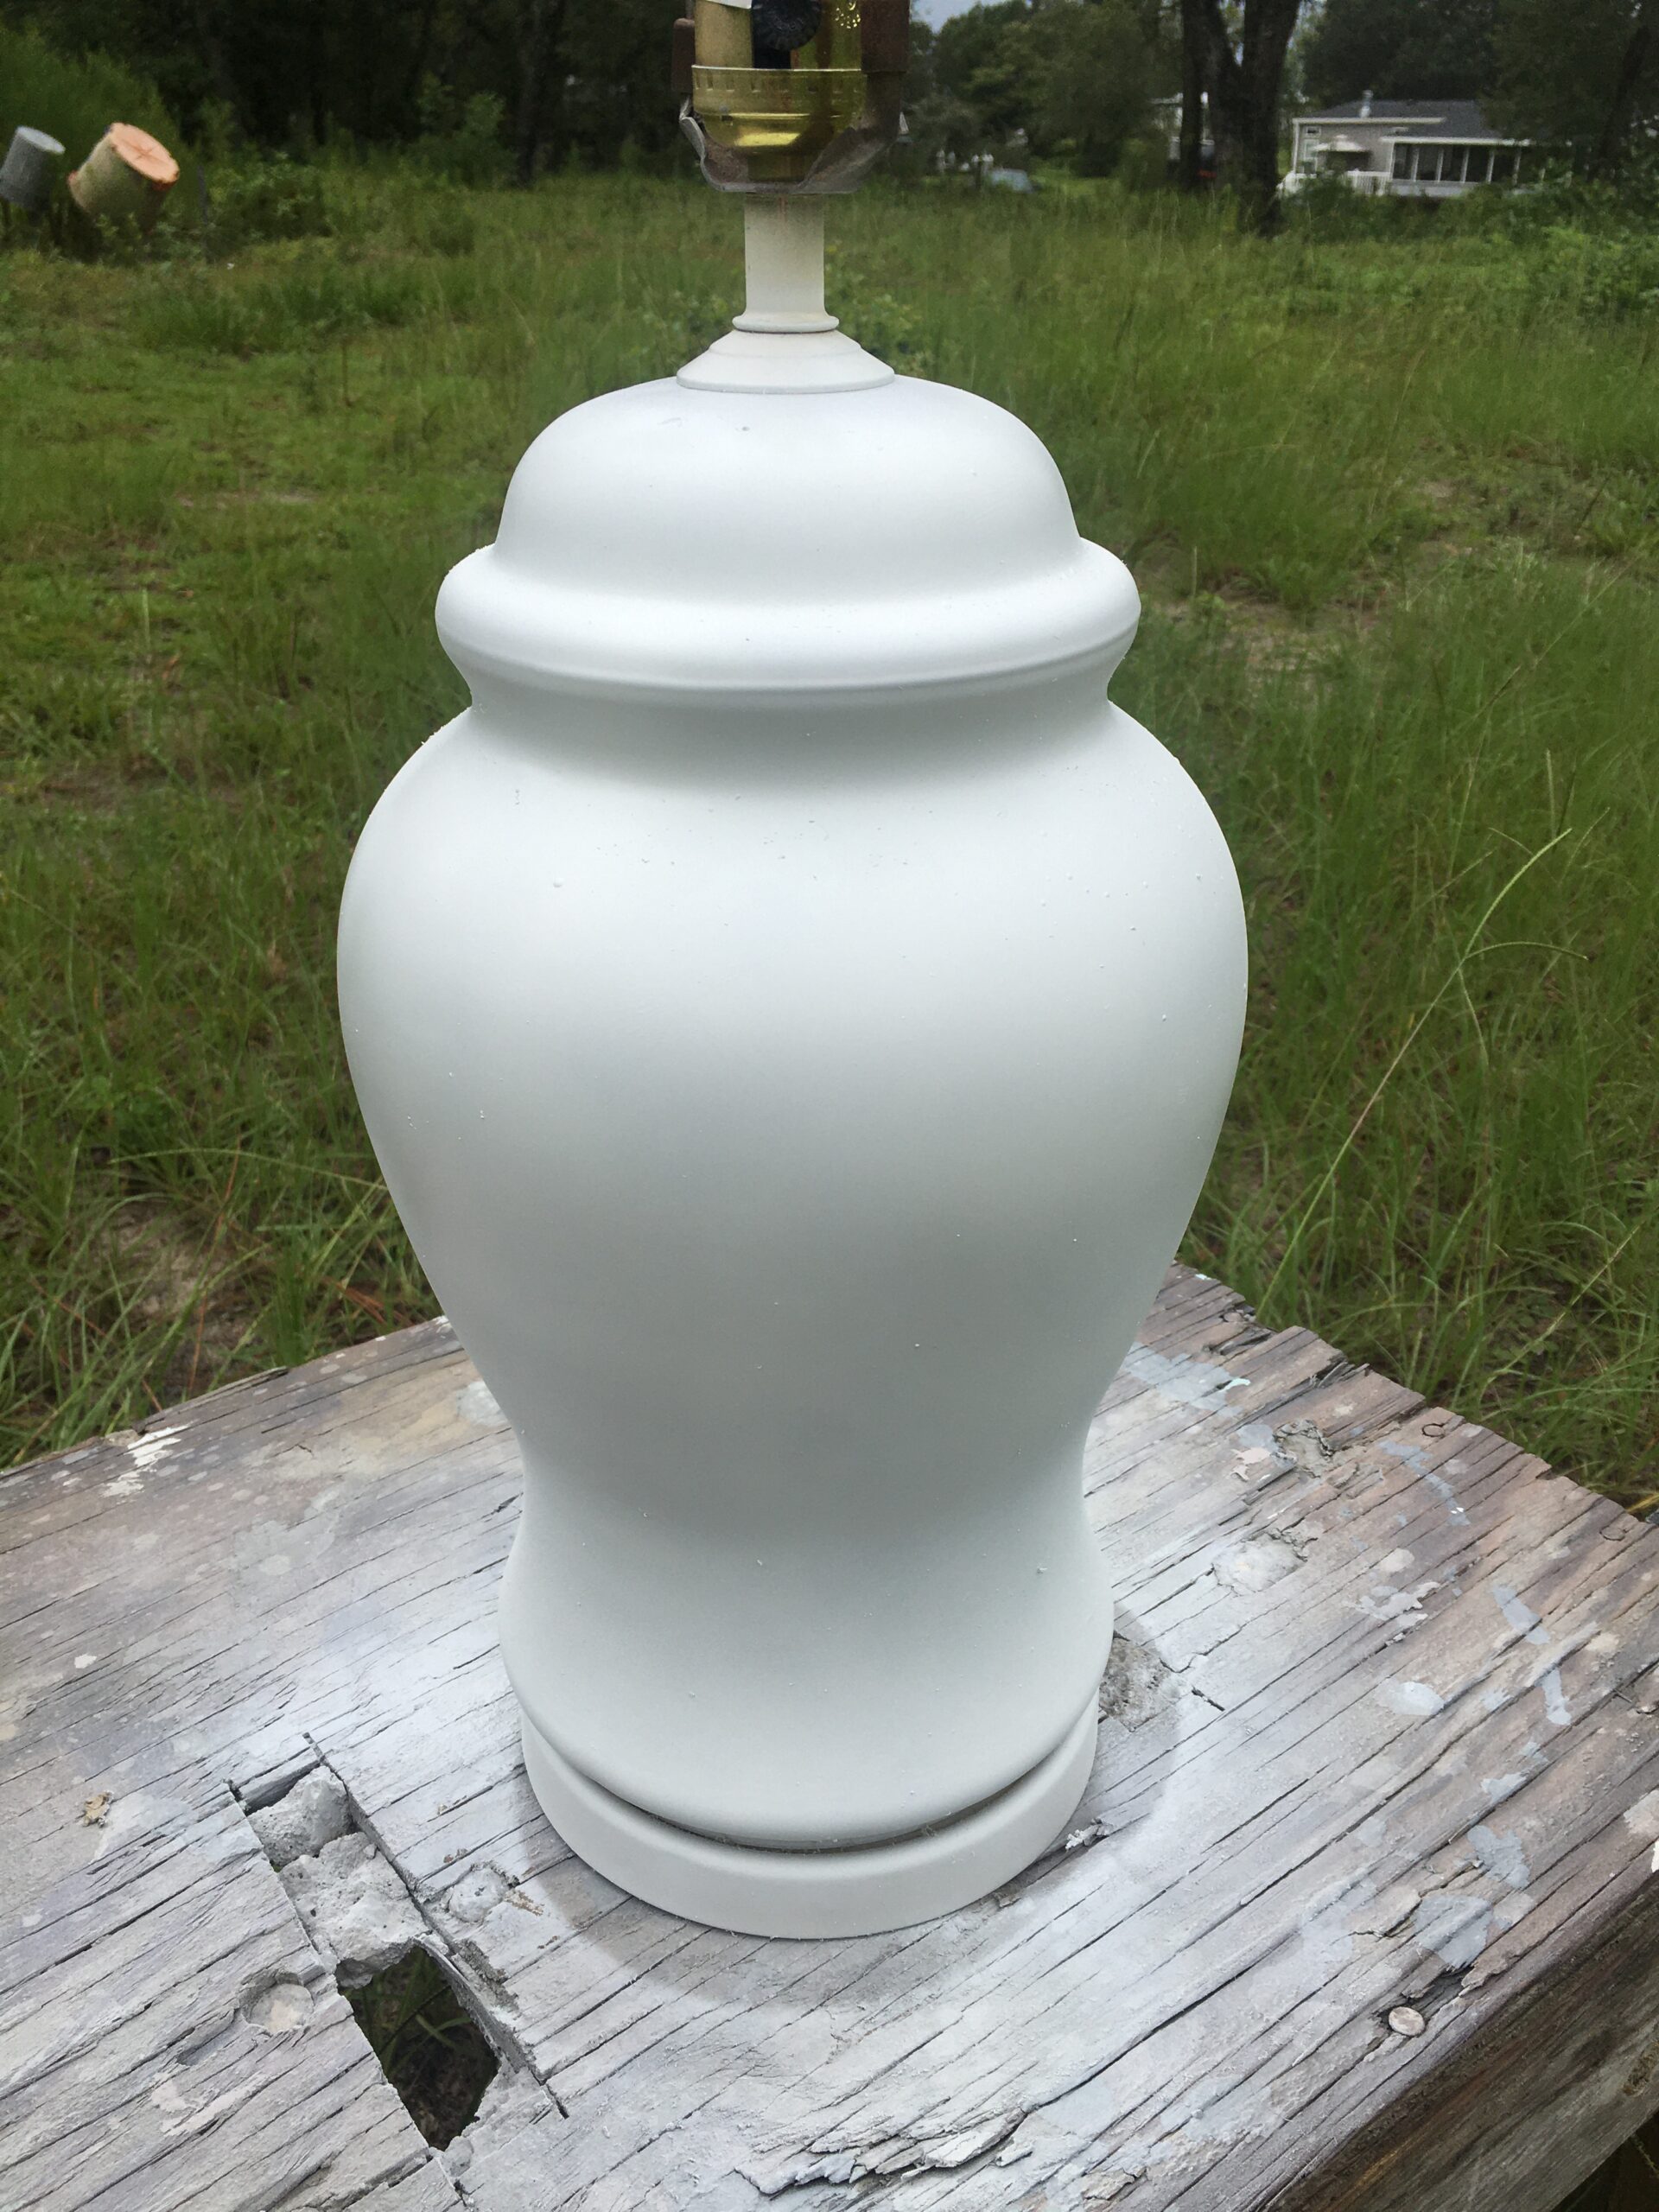
Photo after the second or third coat of spray paint was applied. With spray paint, you always have to move the piece around to ensure you’ve touched all angles.
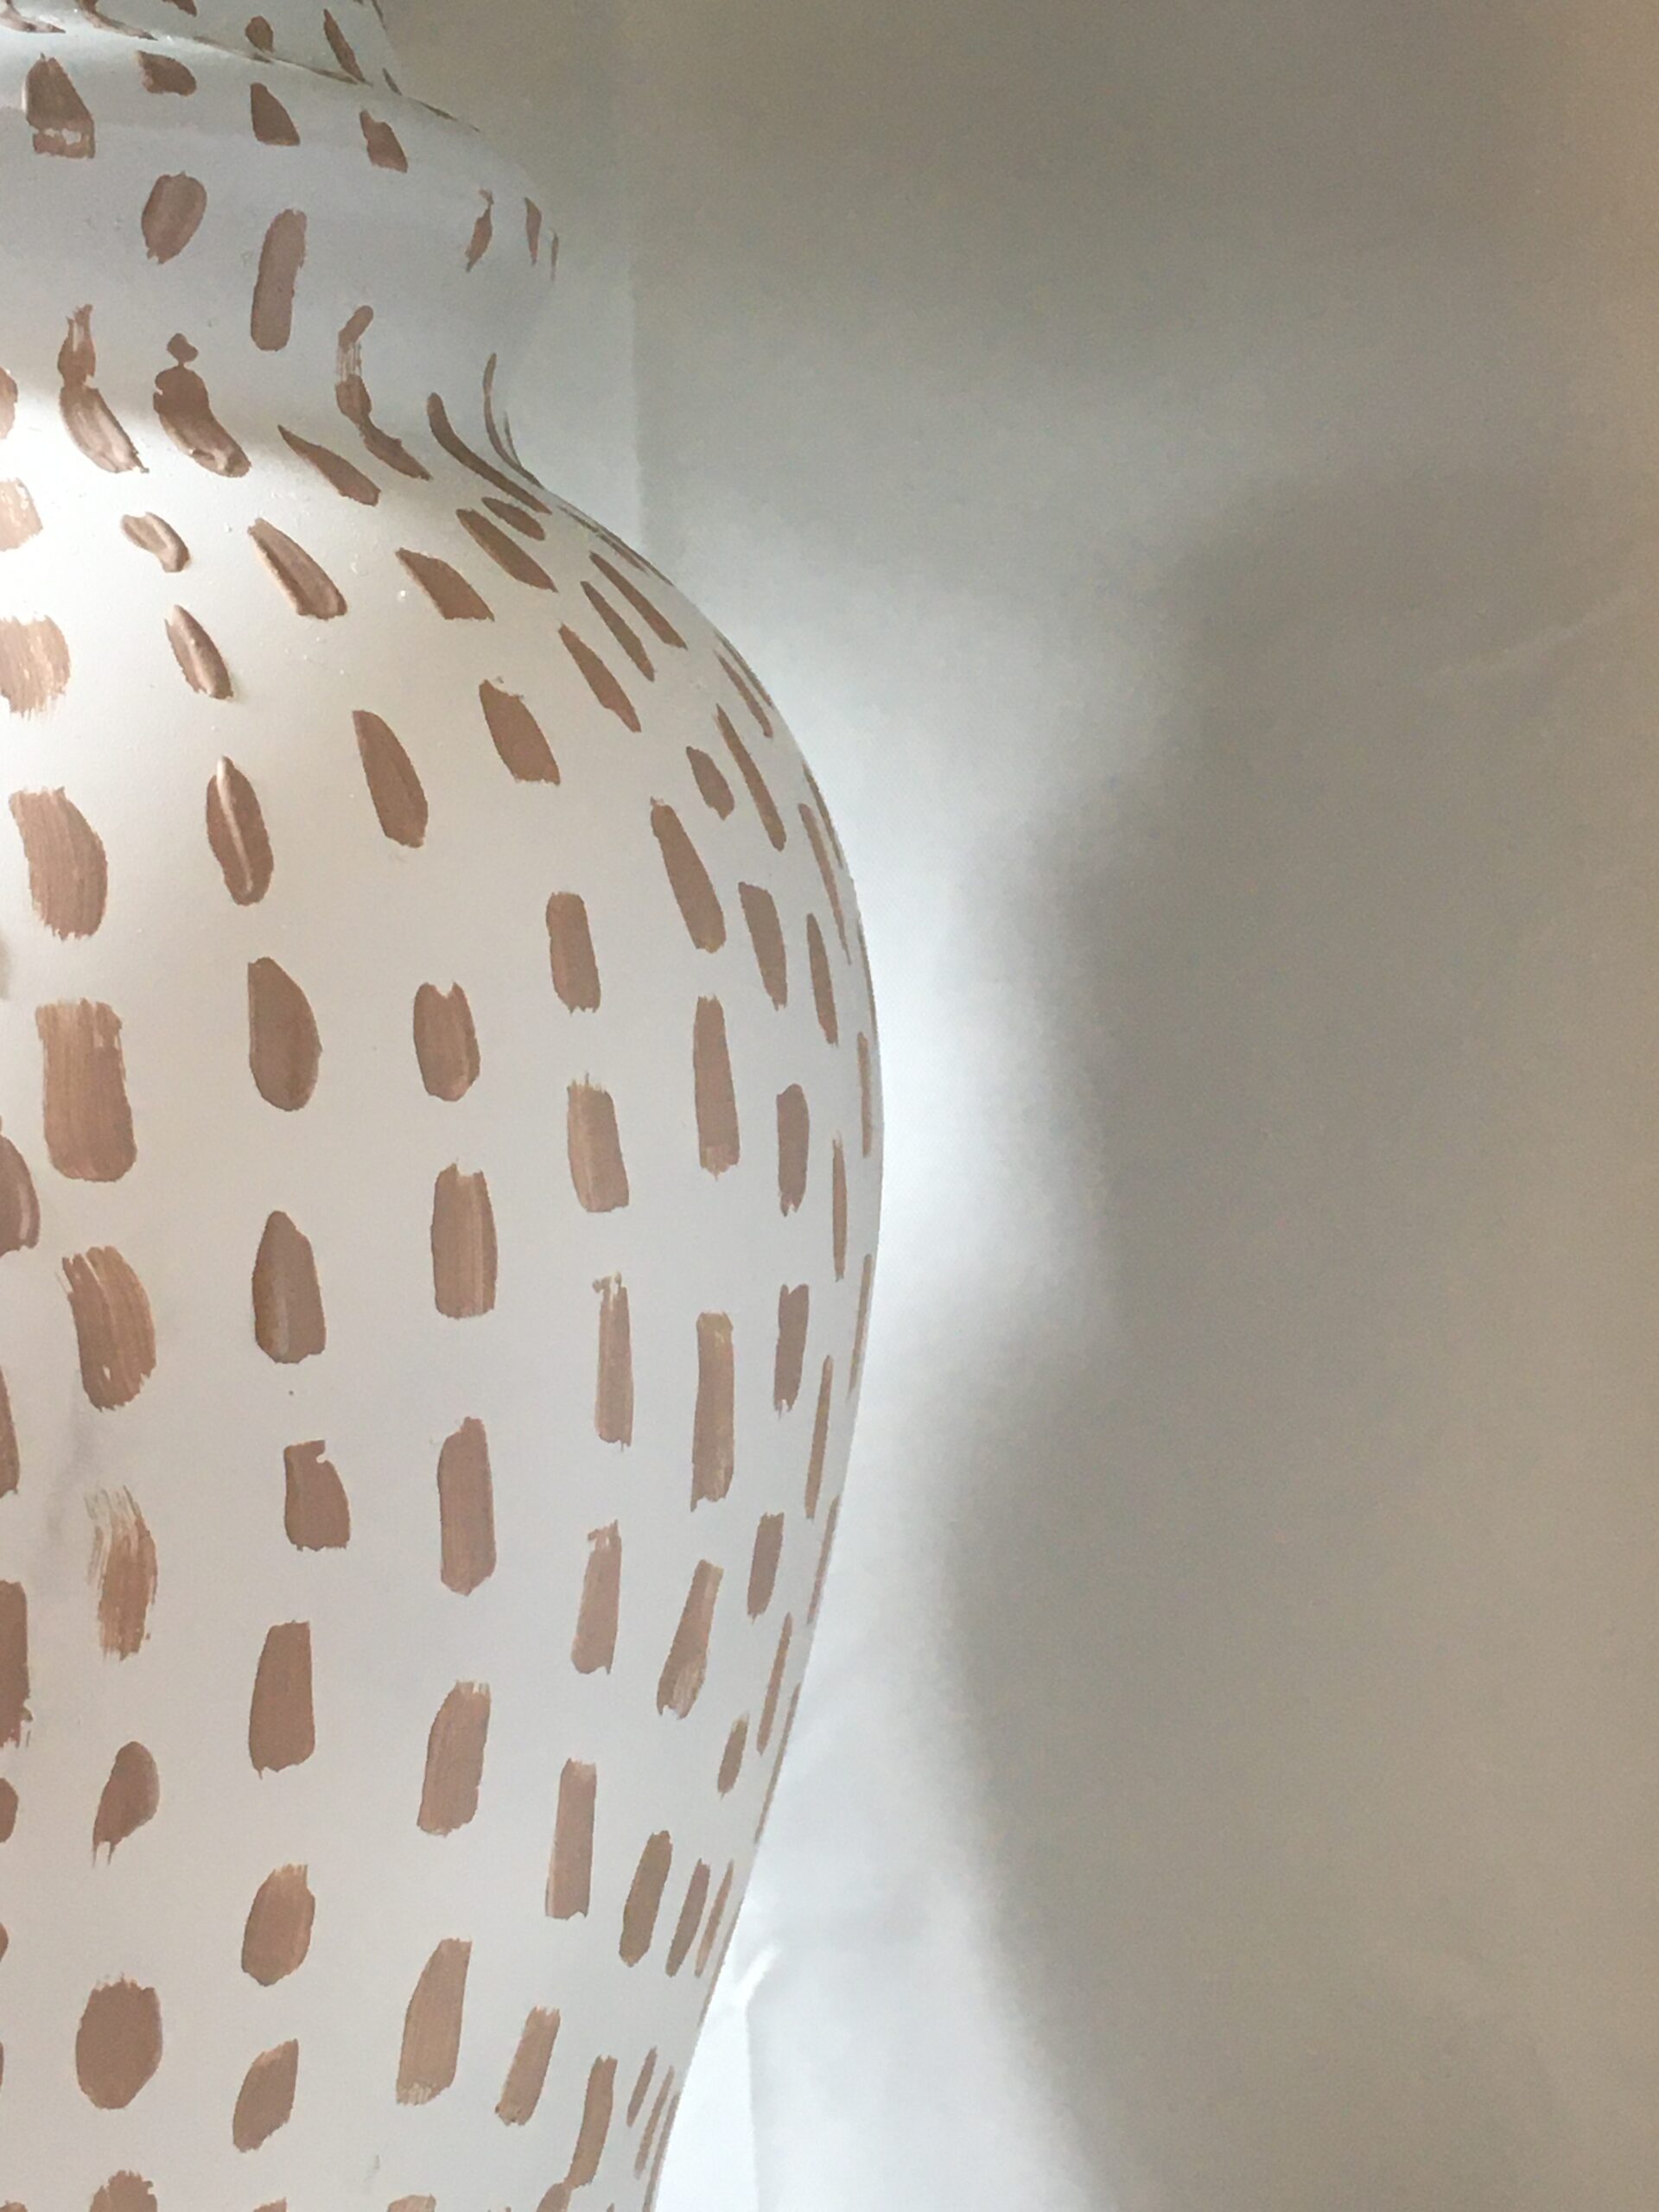
Another trick I recommend when you’re covering a pattern with a white or similar light color, is to add a little pattern on top. This is an insurance policy to make sure the old pattern is nearly undetectable. I really liked how easy this small brush stroke pattern was, and that it didn’t have to look totally perfect.
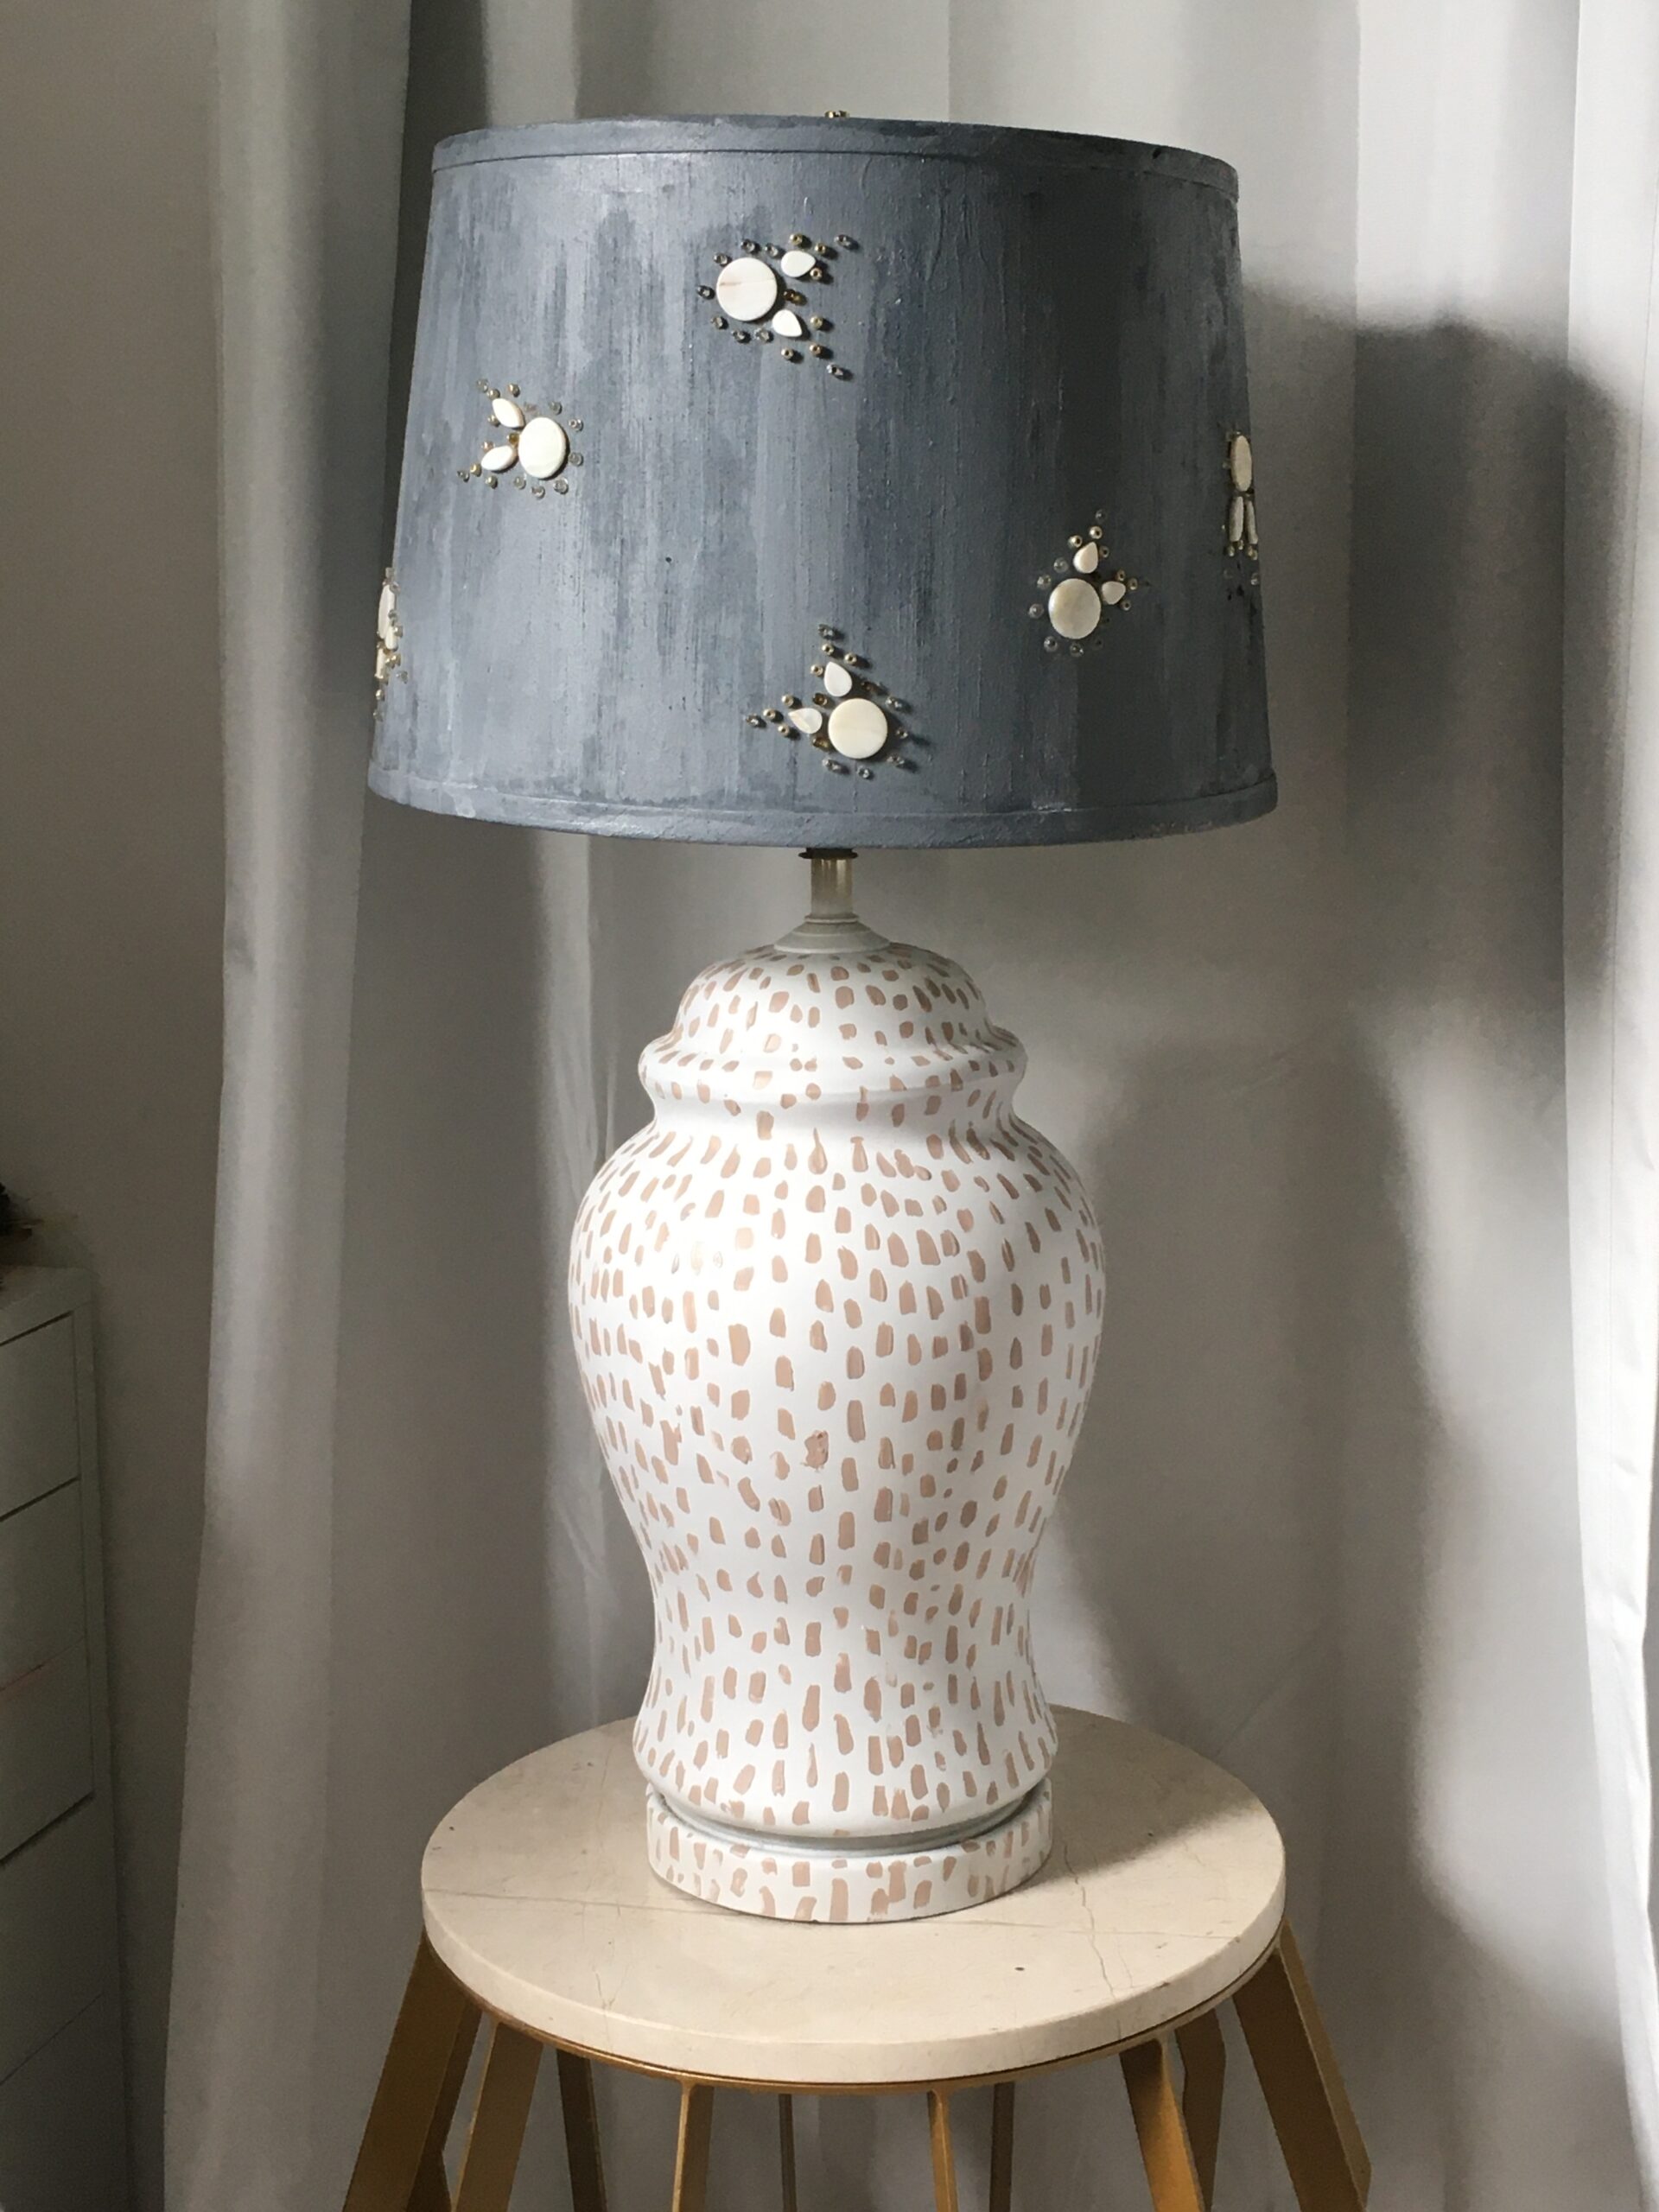
If you caught my Lamps DIY or the 2020 DIY recap, you heard the news that this lamp shade was needing a new base from its tragic fall. I totally love how these two look together in terms of color and overall proportion.
Marbled Terra Cotta Pot
So this is where I nearly had an “I give up” moment. I found this blank canvas terra cotta pot when I went to Michael’s to purchase the supplies. We needed to transition an orchid into bigger pot, so I thought this would be a fun opportunity to paint.
Basically, I originally wanted to do a “dipped” look with some Mod Podge glazing but it all went to heck really fast. In hindsight, I should’ve worked with a deeper, bigger bowl of paint to have more control of the “dip” effect.
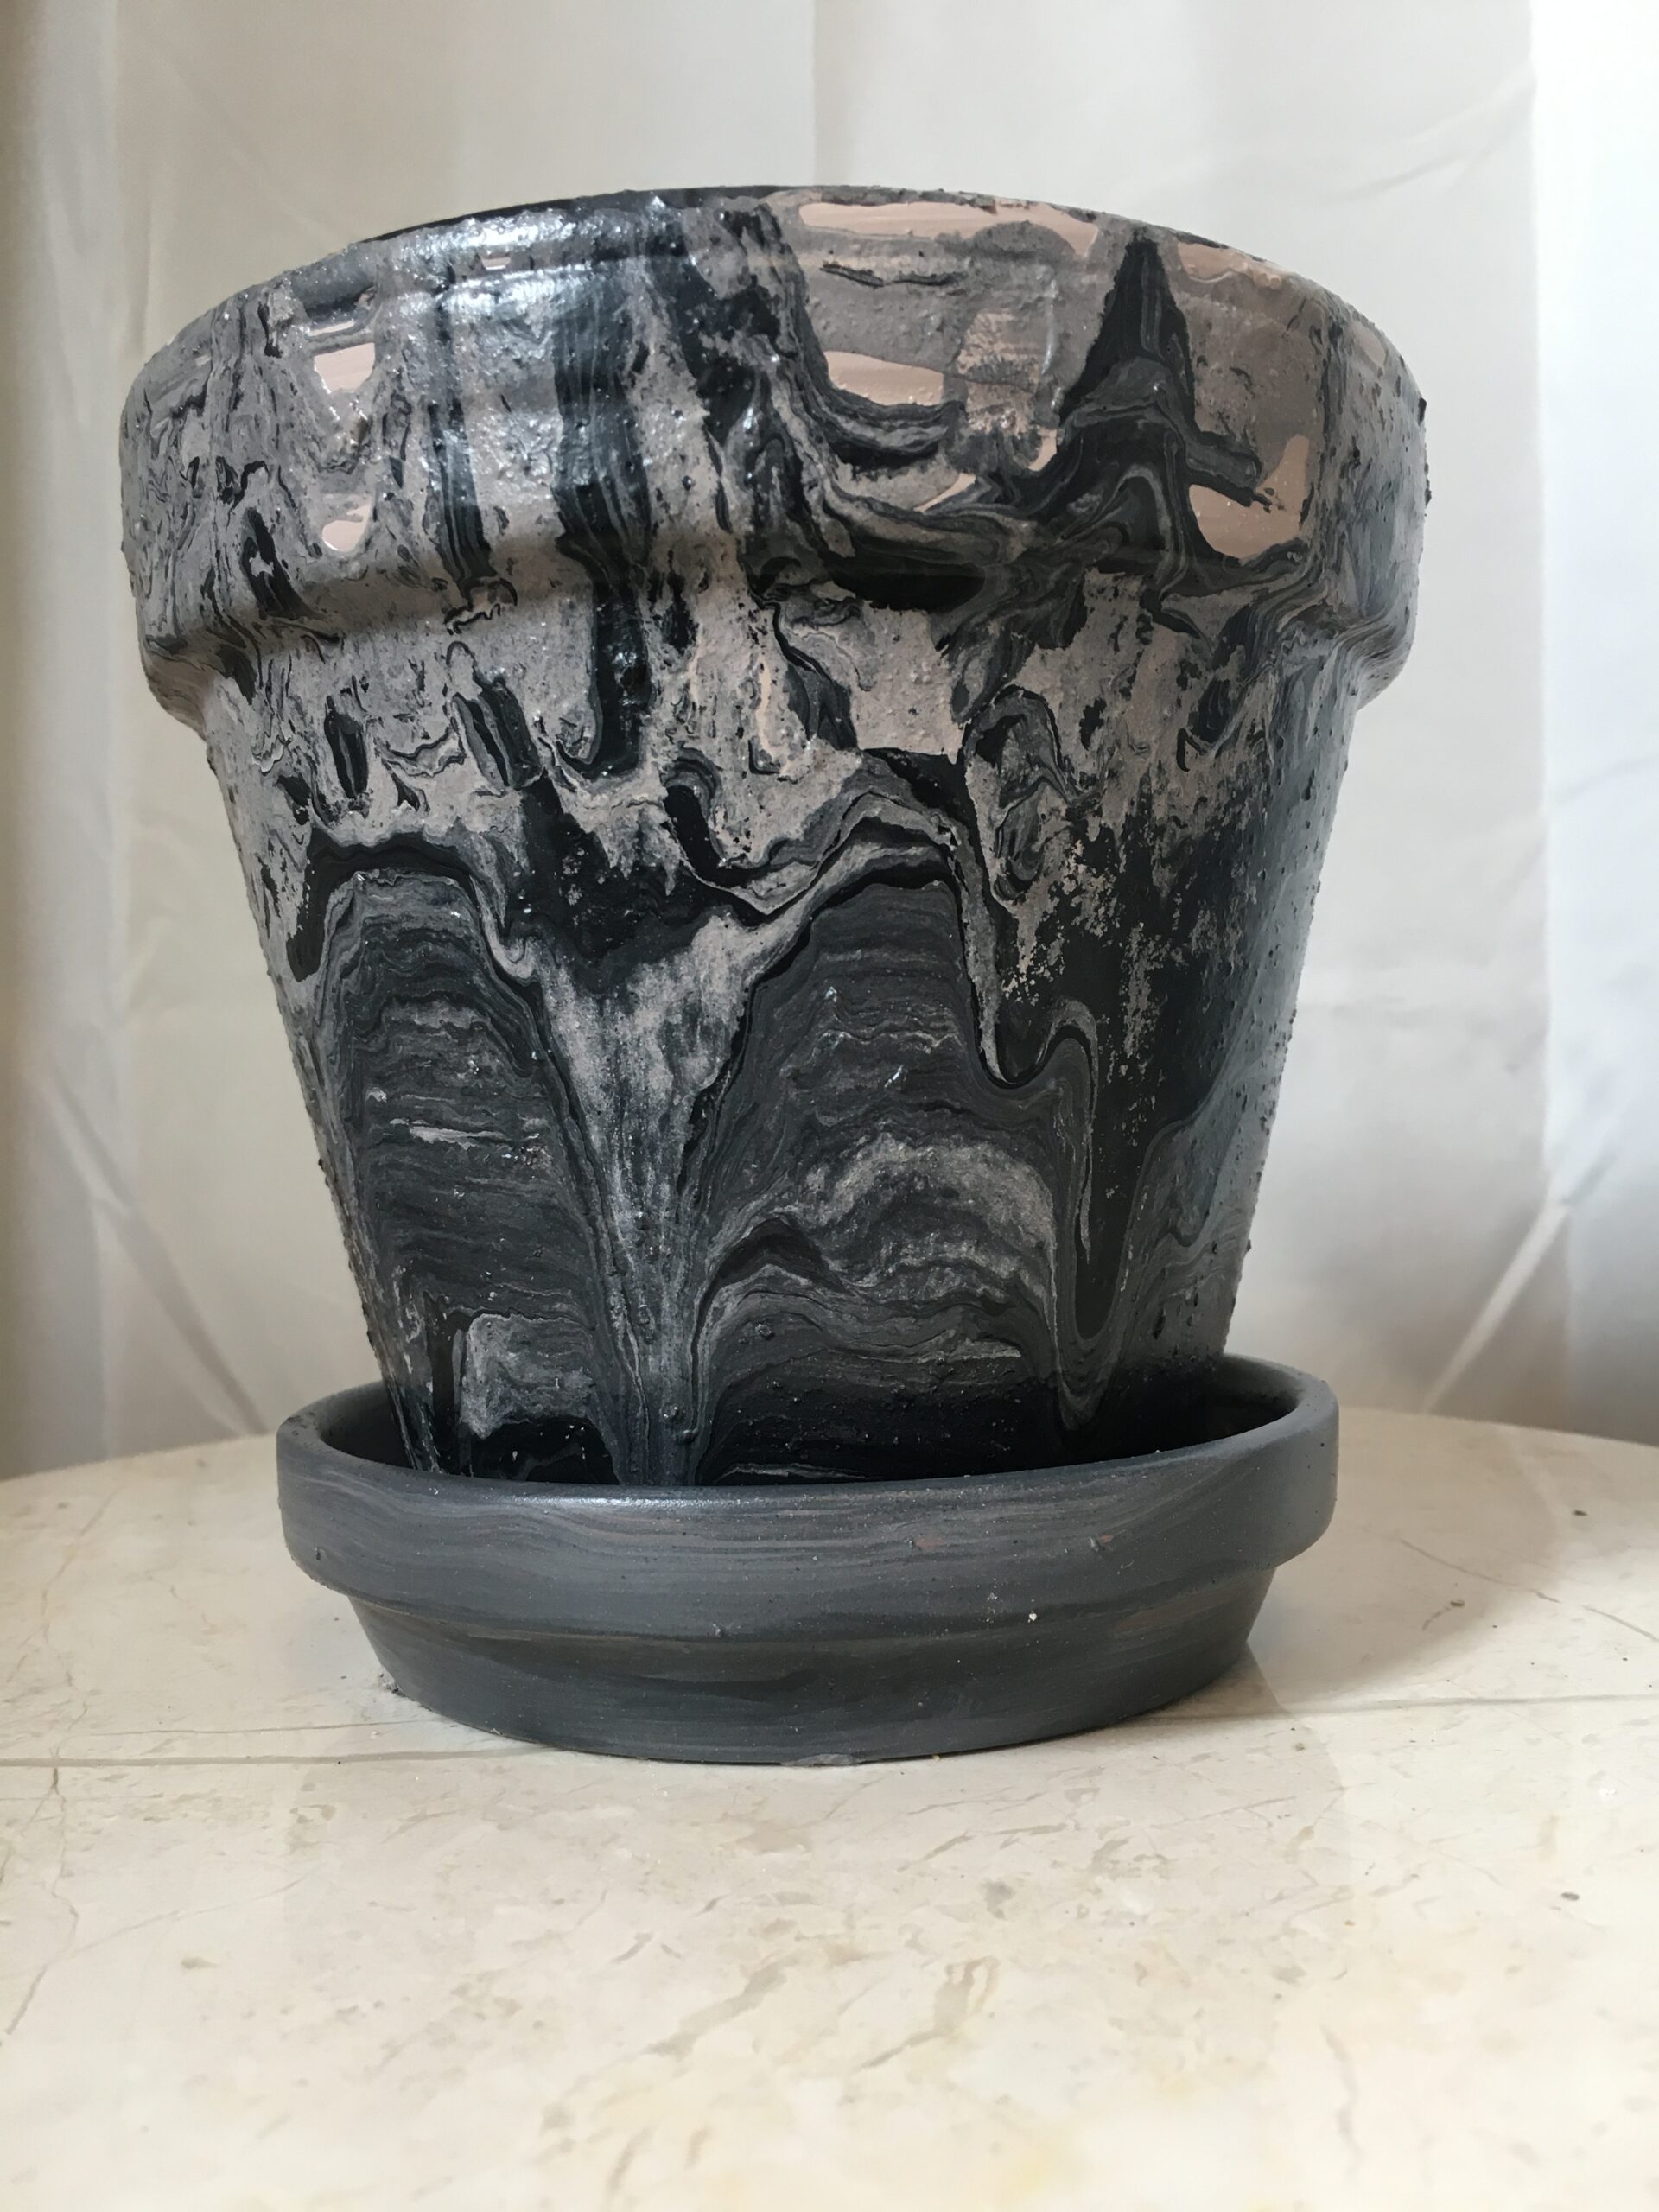
So after nearly all of the beautiful terra cotta color was covered, I decided to get really bold and try a marbling technique.
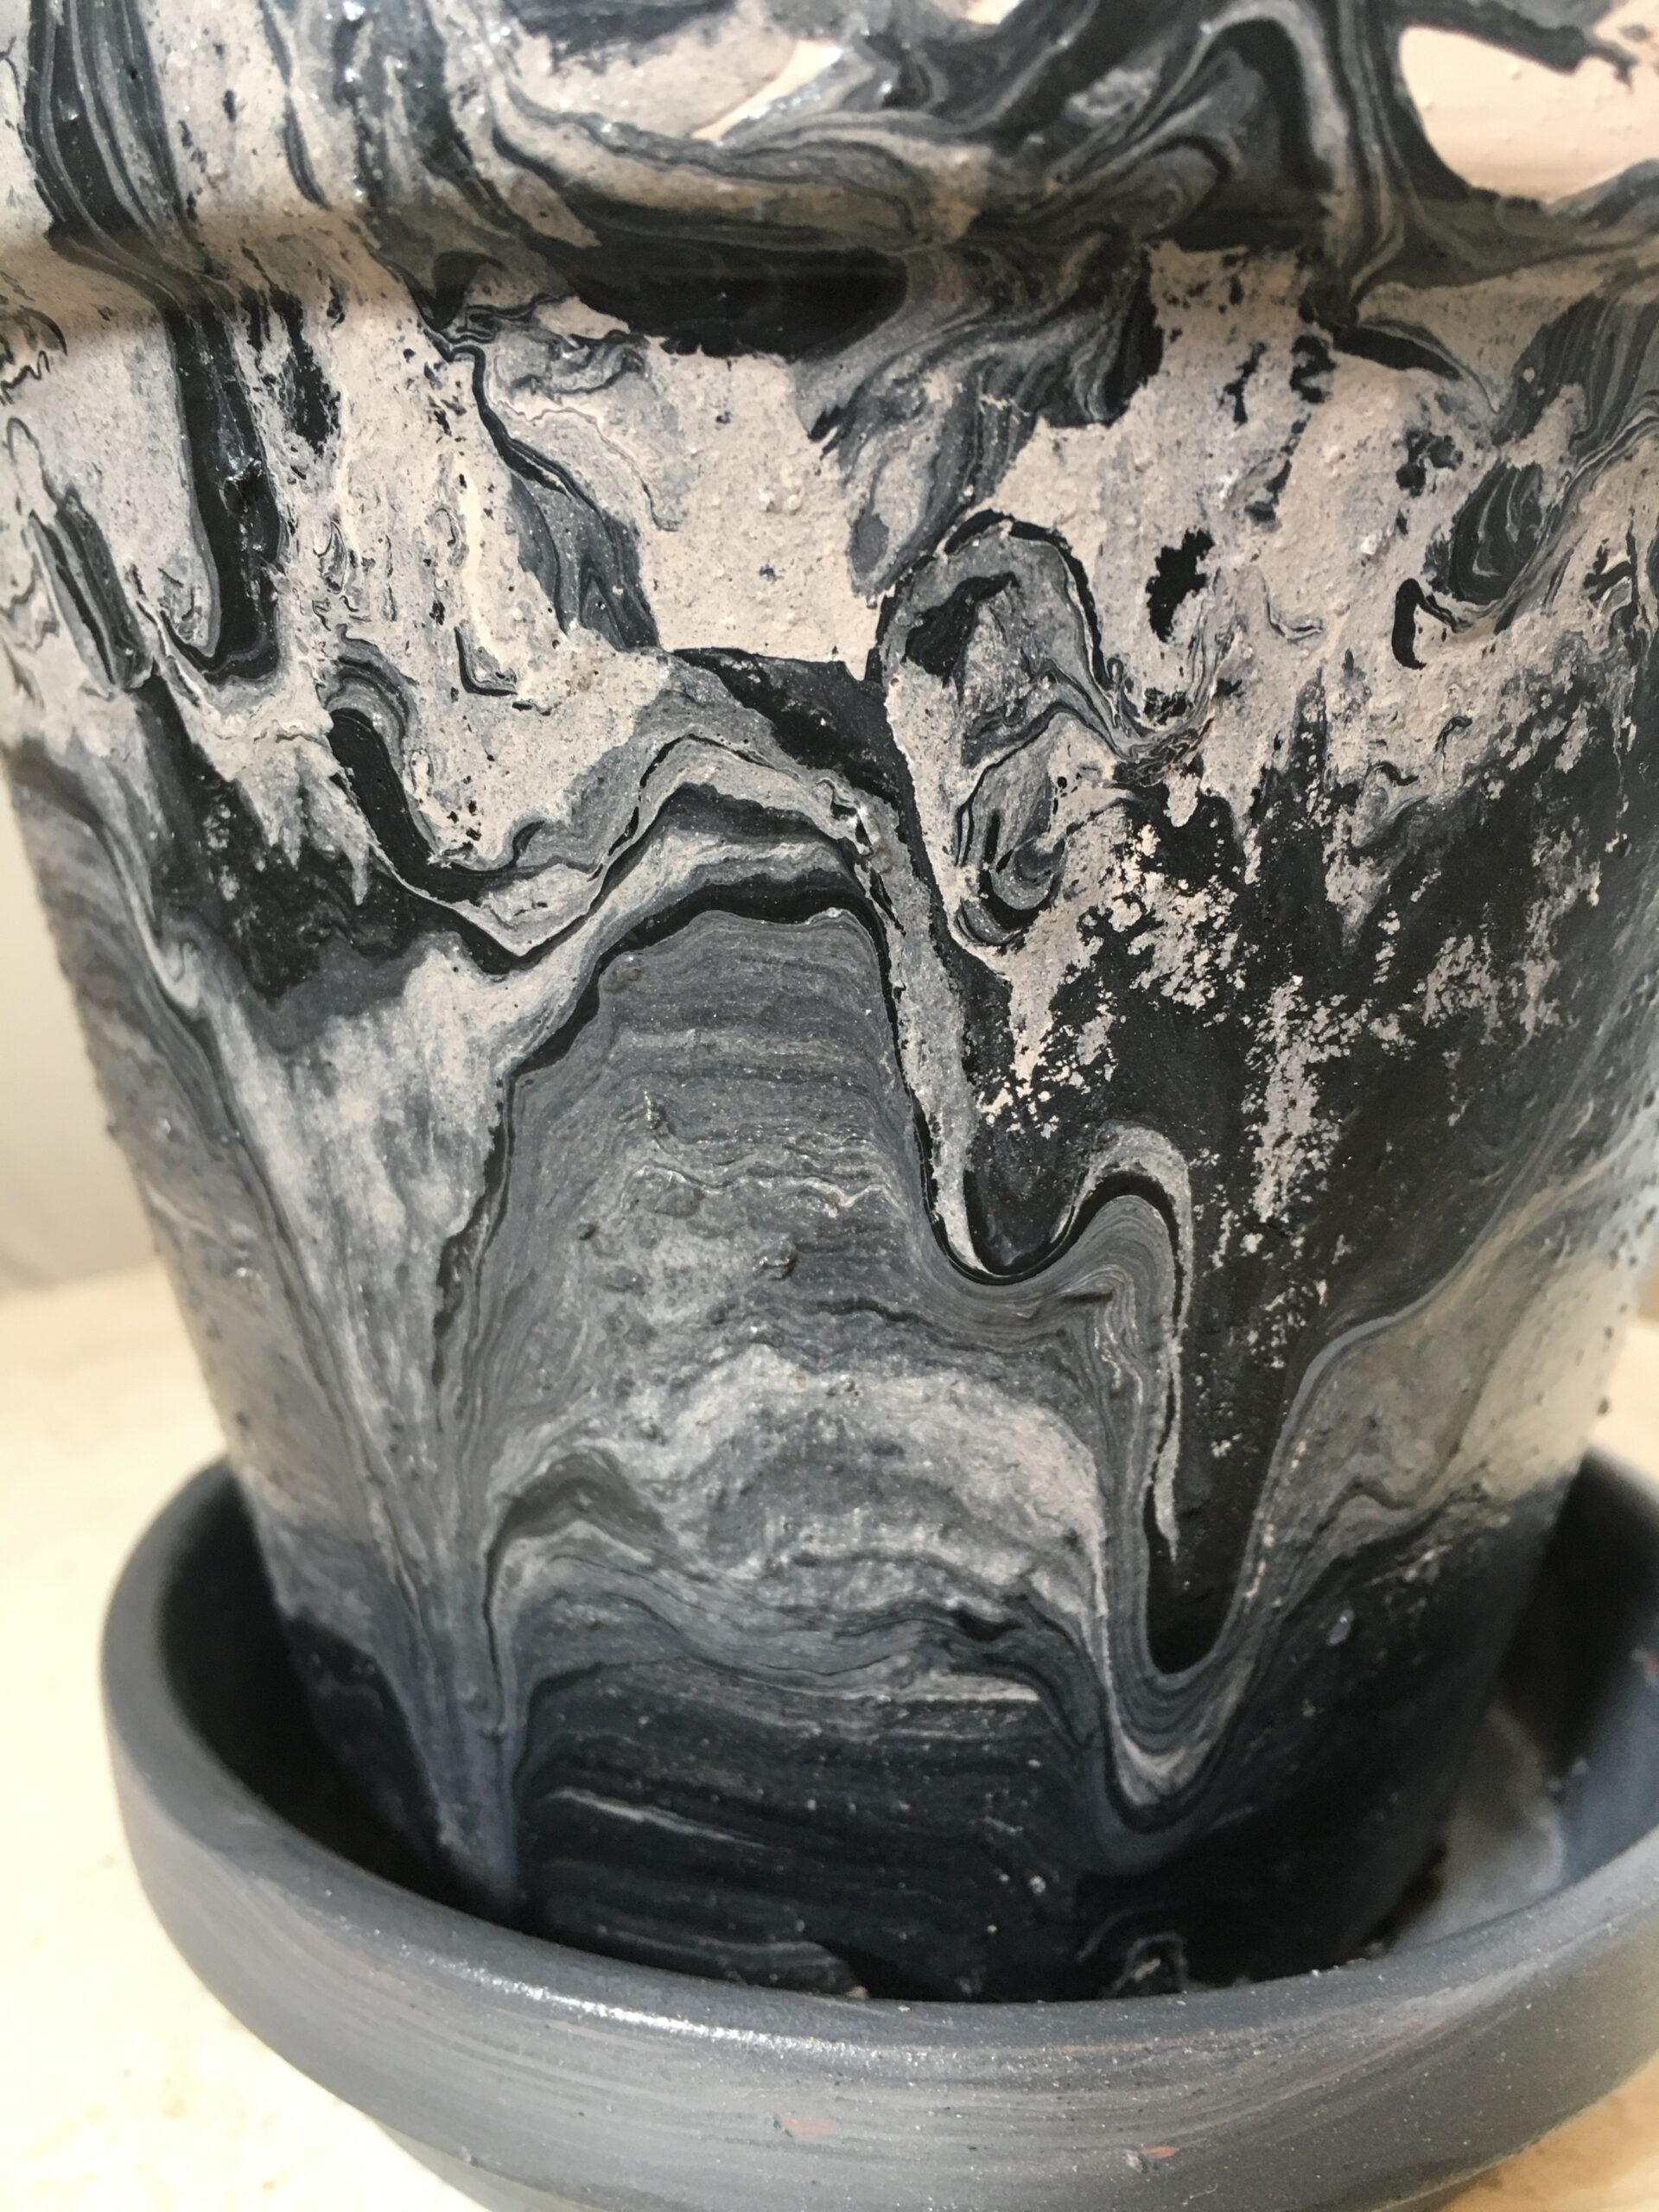
Warning: this was 10 out of 10 on the messy scale! The marbled effect was created by lightly mixing colors with Mod-Podge in a small bowl and basically dripping it on. After all the paint is applied strategically, leave it somewhere safe to dry overnight.
Not sure if I love it, but let me know what YOU think of this finish!
Chalk Painted Coffee Bar Shelf
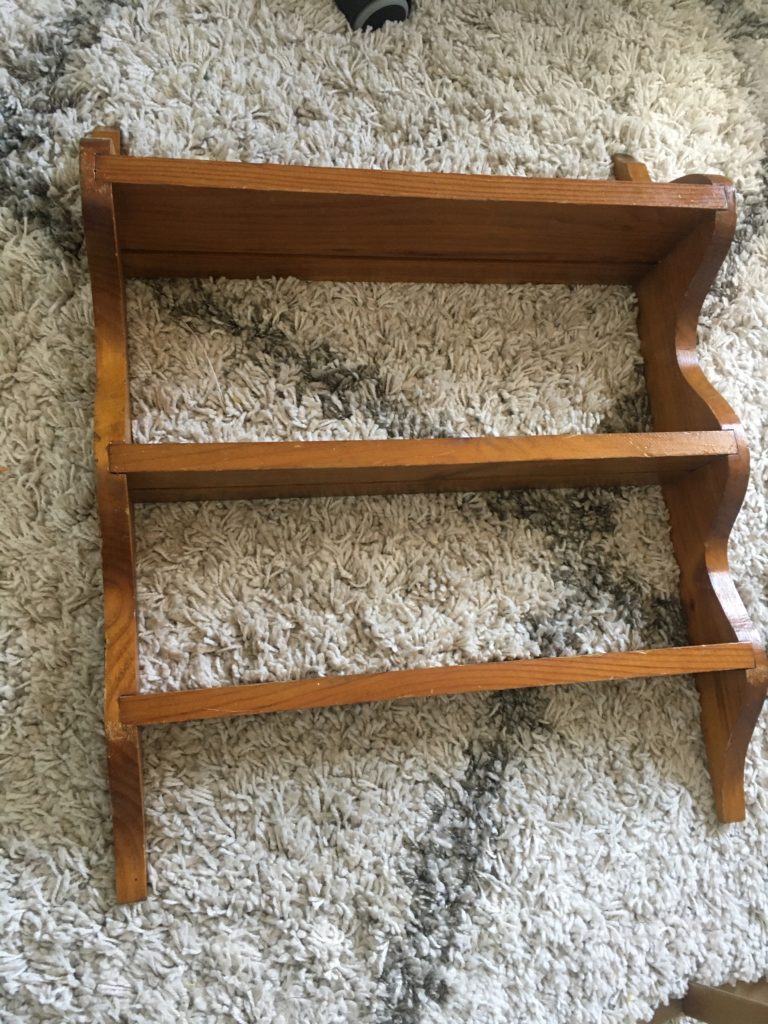
Another one from my recent Thrift Store finds! I bought this shelf for just $3 and envisioned hanging it above our coffee machine to clear some counter. You would think a girl living at a literal mini-farm would have tried chalk paint out sooner, but there’s no time like the present!
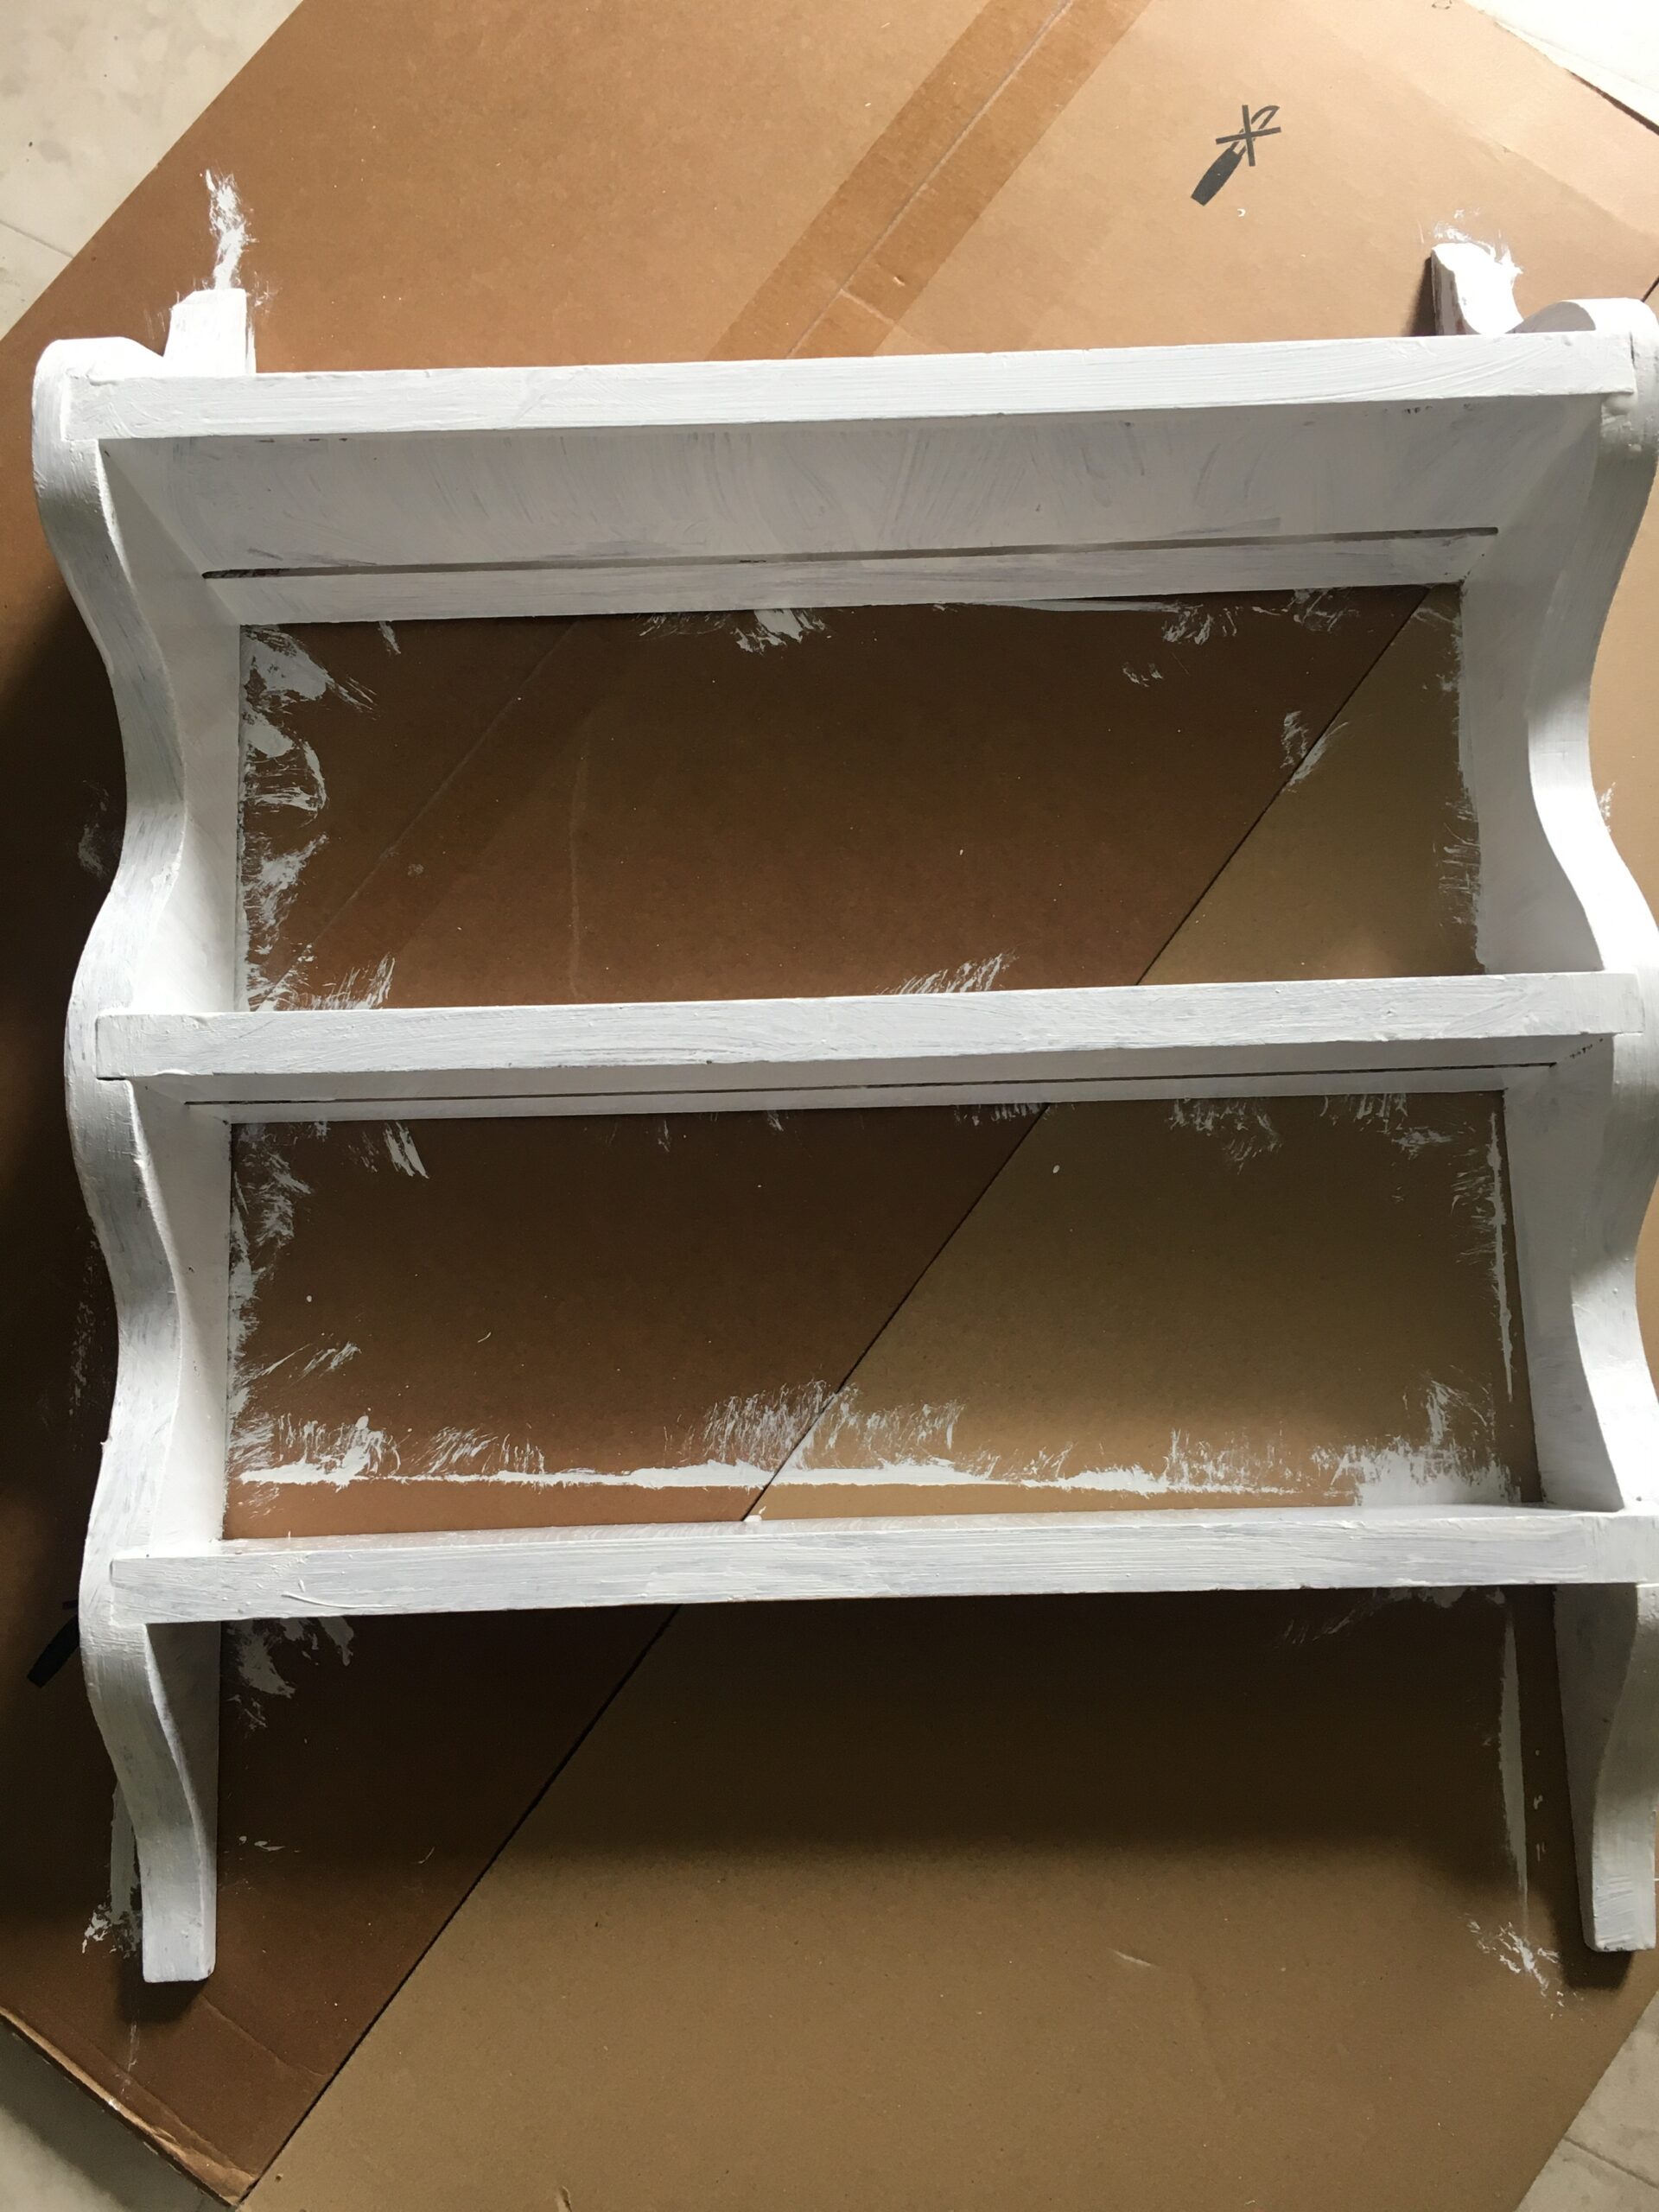
I picked a white chalk paint to update the look of the shelf and pop against our slate blue walls. First I will say, I was super impressed by how far a little chalk paint will go. I did two coats and some touch-ups and I don’t think I used even 4oz.

I watched a Youtube video on chalk paint before this experiment and was excited that it didn’t require prep to get started. However, to give it any sort of style, you basically have to do the work on the back end. To create this finish, I had to vigorously sand down for 10-15 minutes. I may try to use a wax glaze technique on another upcoming chalk paint project. So stay tuned for that if you’re interested!
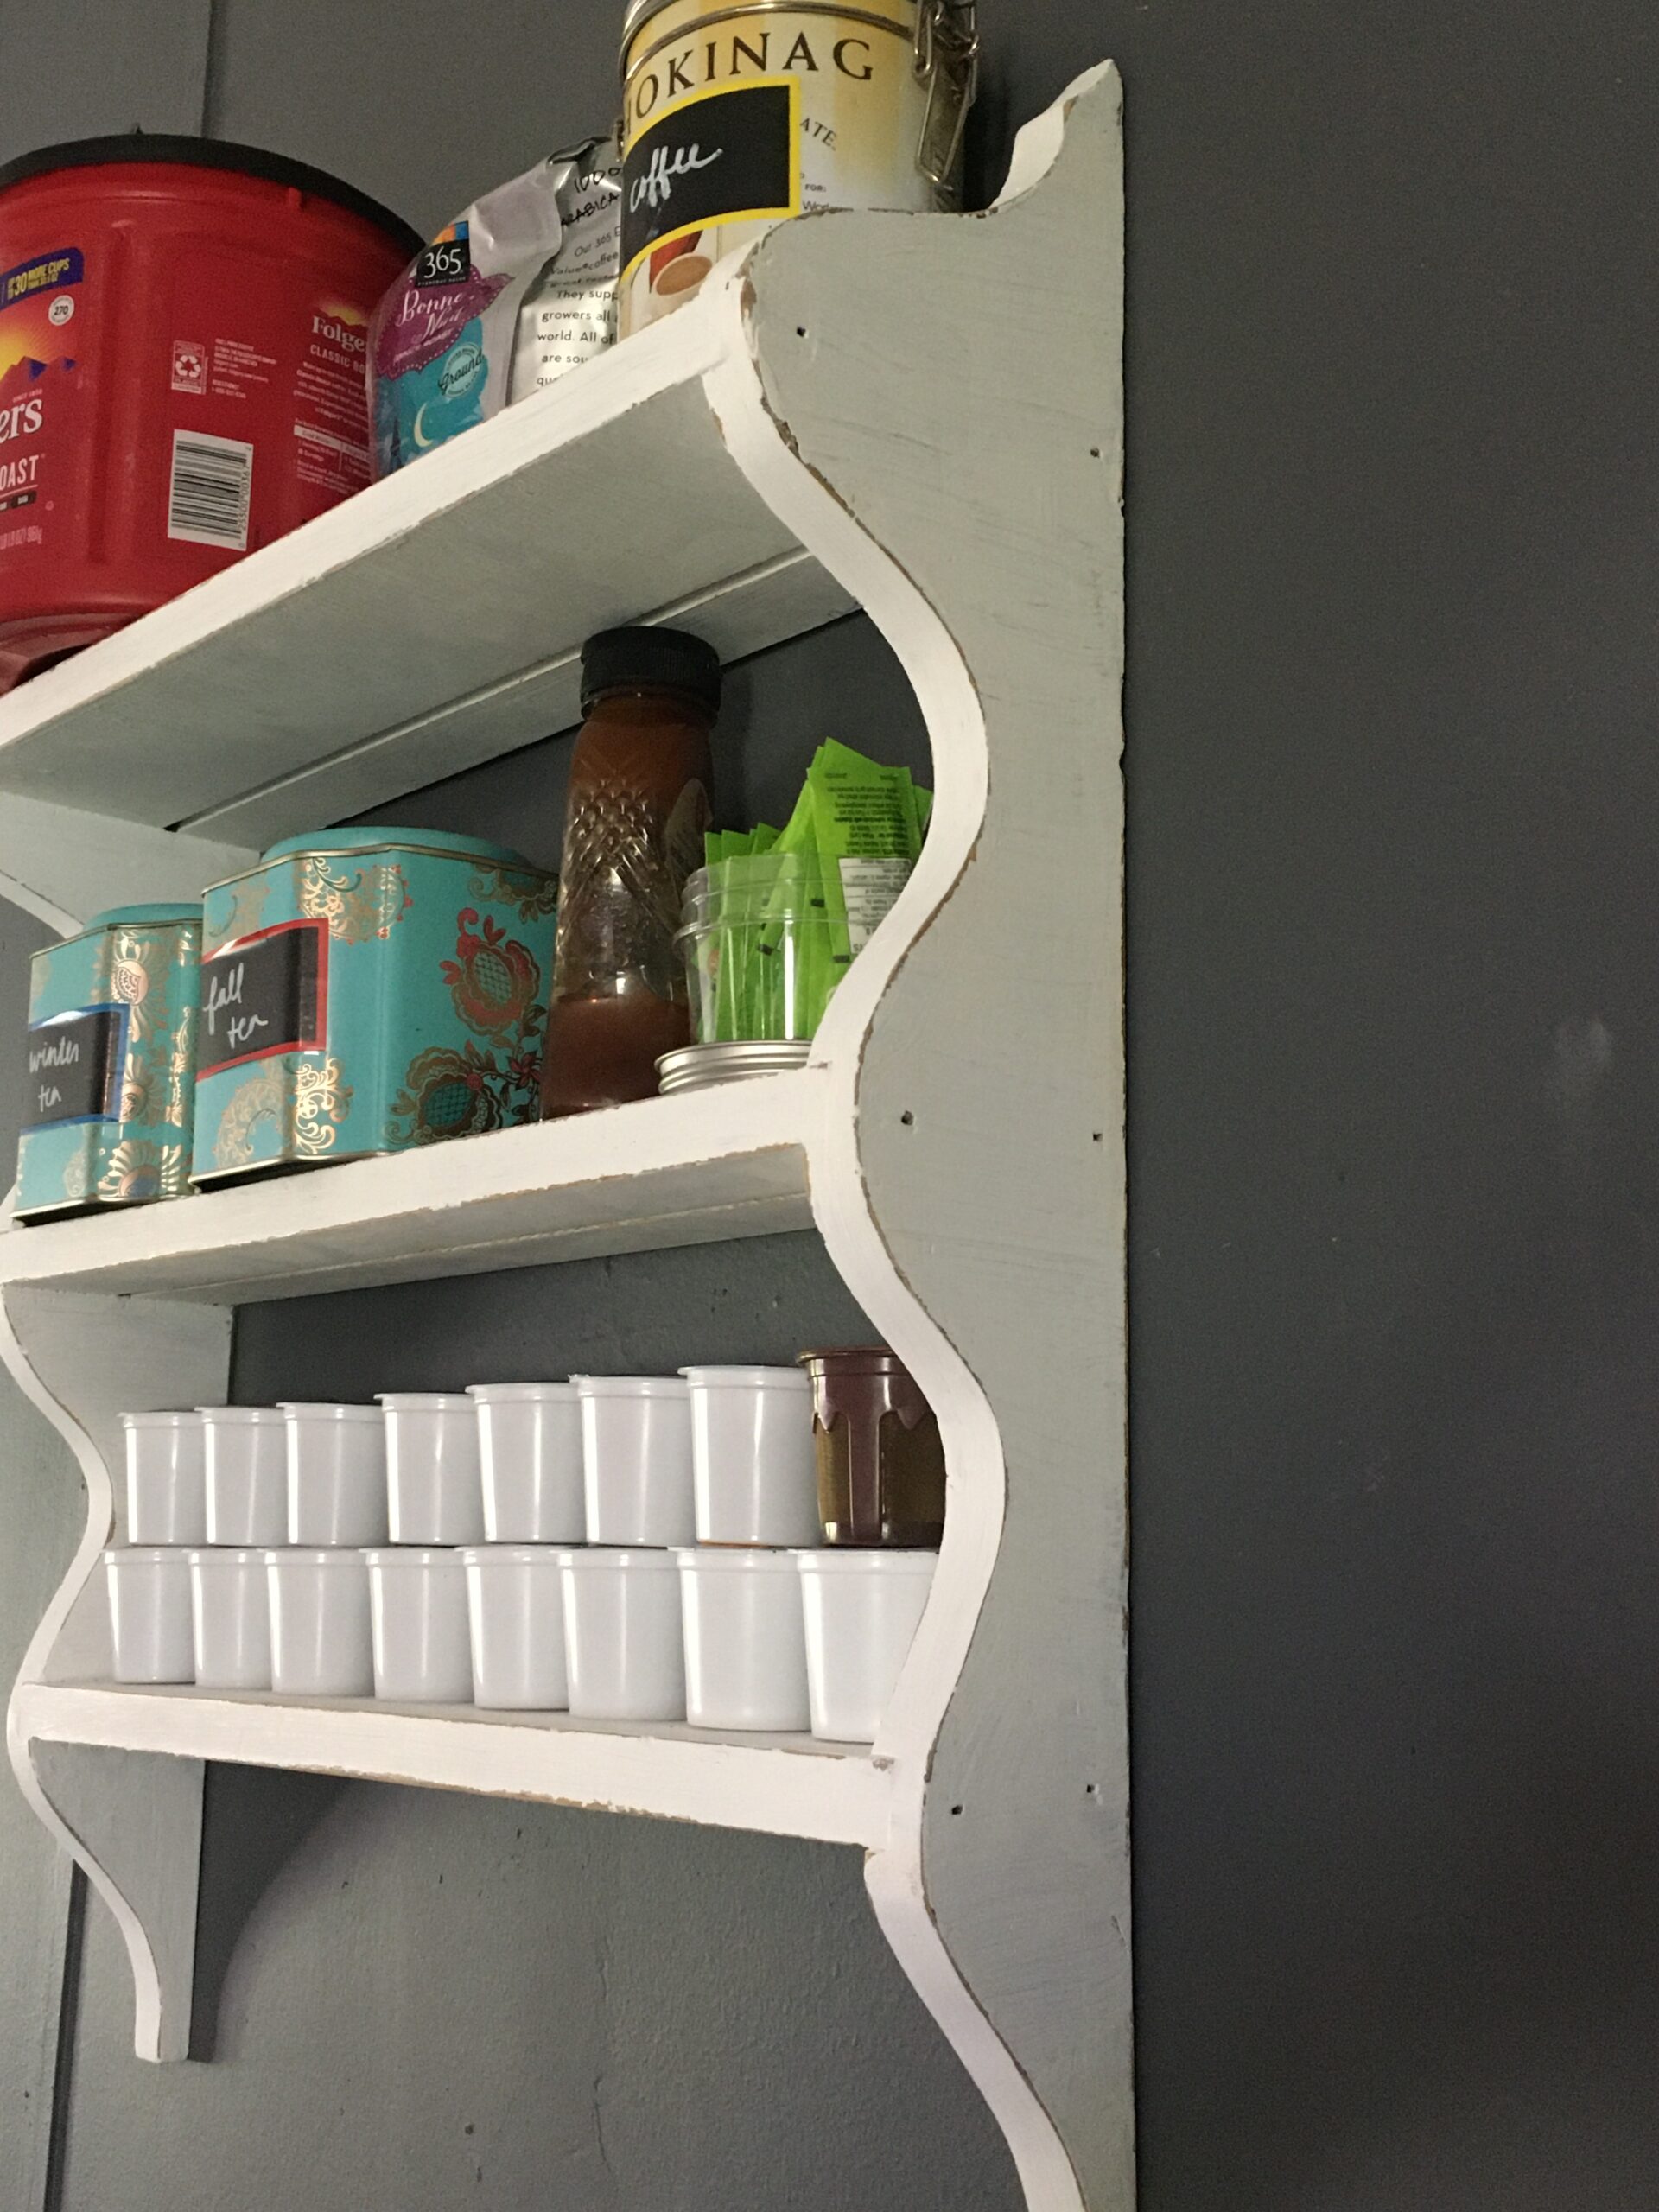
With chalk paint, I now recommend trying to use a fine, soft, dense brush. (The kind that’s made for chalk paint!) That way it might not leave as many strokes on the finished piece. That definitely added to the sanding time! Overall I like the finish, and that again it doesn’t need to be perfect. Would Joanna Gaines approve my farmhouse style shelf?
So there you have it! Which of these 3 experimental paint techniques have you tried? Let me know what you liked best in the comments below.
About Kaitlyn Loos

Kaitlyn Loos [loh-s] is one of the newest designers for interiors and events in the west-central Florida area. (Tampa, Ocala, Gainesville, and everywhere in between.) She brings over seven years of graphic design, project management, and event planning experience to create amazing spaces and experiences for her clients. She is one of the only interior design companies in her area who offers modern, fresh, pattern and color-savvy designs. From styling an event to designing an entire home, Kaitlyn Loos Design is a full service company that delivers style for nearly any investment level. She also enjoys sharing her ideas and projects through her new blog which reaches over 325 people monthly.
For more information about Kaitlyn, check out: About Kaitlyn: Interior Design, and About Kaitlyn: Event Planning.
You can also subscribe to the blog and contact Kaitlyn directly here.
Disclaimers: a small percentage of purchases from select links will benefit me via an affiliate program. I appreciate anyone who wants to support my blog by shopping the products, but there is no obligation to buy.
All of my DIY blog content is for informational and entertainment purposes only. I share what works for me in my home, but you should consult with professionals/landlords before taking on any construction projects. My blog does not constitute interior design advice for readers. I am not liable or responsible for any damages resulting from or related to your use of this information.
Reading time: 5 min
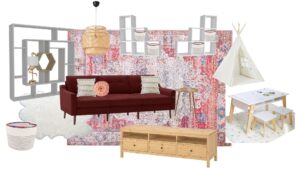
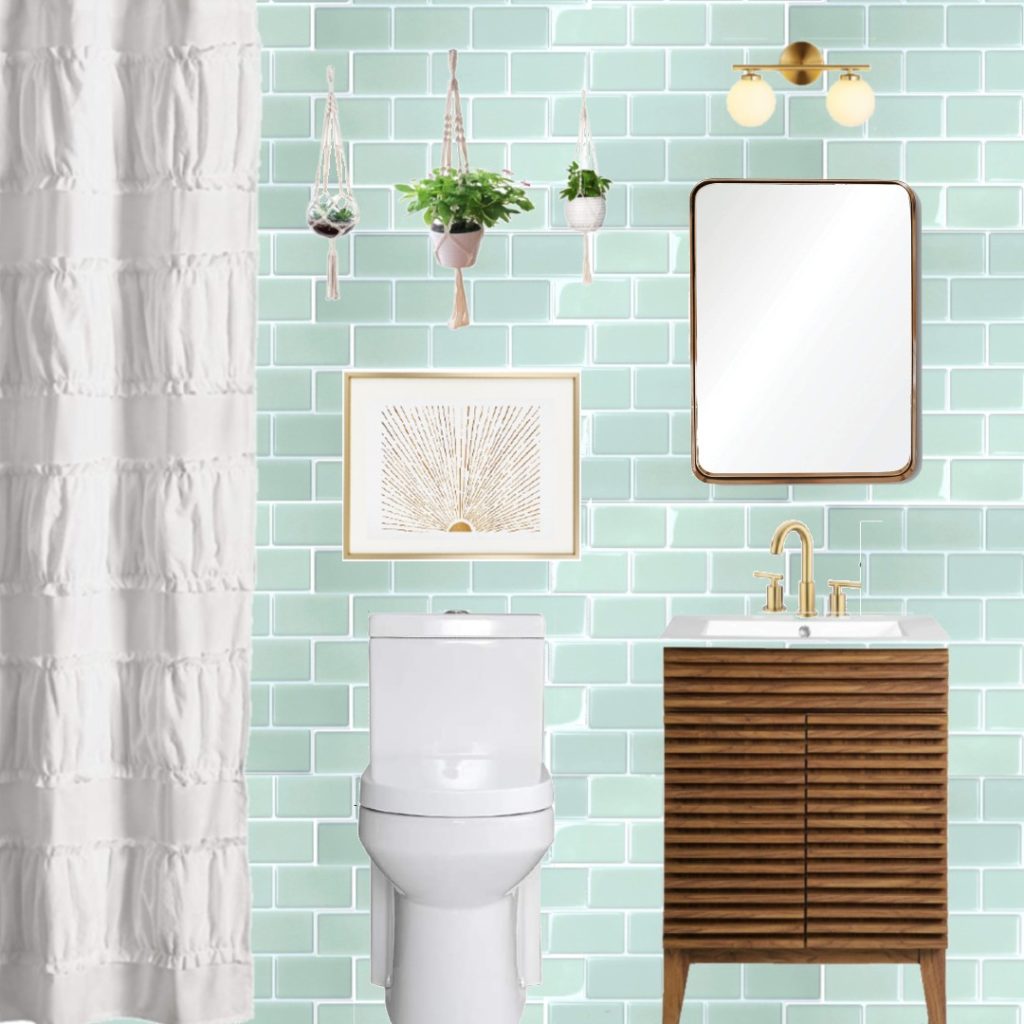
I don’t know about you, but I’ve been indulging in some style shows on Netflix and Youtube because I think I’m about over this quarantine life! So in watching these, I came up with the totally random idea to design a fantasy bathroom that translates some of the biggest trends in summer fashion. And it actually worked! If this was my idea of a self-inflicted Project Runway challenge, this is the episode where you can actually shop the look the next day, because it’s all from Amazon! So voila, a DIY bathroom update inspired by summer fashion that you can order in by the weekend. (If you wanted to!)
It was always interesting, on shows like Project Runway, when they had a challenge that connected fashion with art, architecture, or any other creative field. This design explores possible overlaps with what’s current in interior design with five of the biggest summer fashion trends. I decided to do a bathroom because my first idea that jumped out was mint colored tile. And small bathrooms are a space I notice a lot of people are willing to take some design risks on to create a pop of color or pattern in their home.
The Design
The big disclaimer here is that I’m not a fashion expert, and I barely own any of these inspirational apparel pieces, but in my dream world I do. In my dream world, I also have this bathroom, though! Also, I’ve not ordered or tested out any of these products, so please be sure to do your own research before purchasing. (But they’ll arrive quickly, anyway!) Lastly, the mockup is intended to show how the pieces look together, but it is not created 100% to scale. So now, onto the breakdown of the trends and their coordinating pieces.
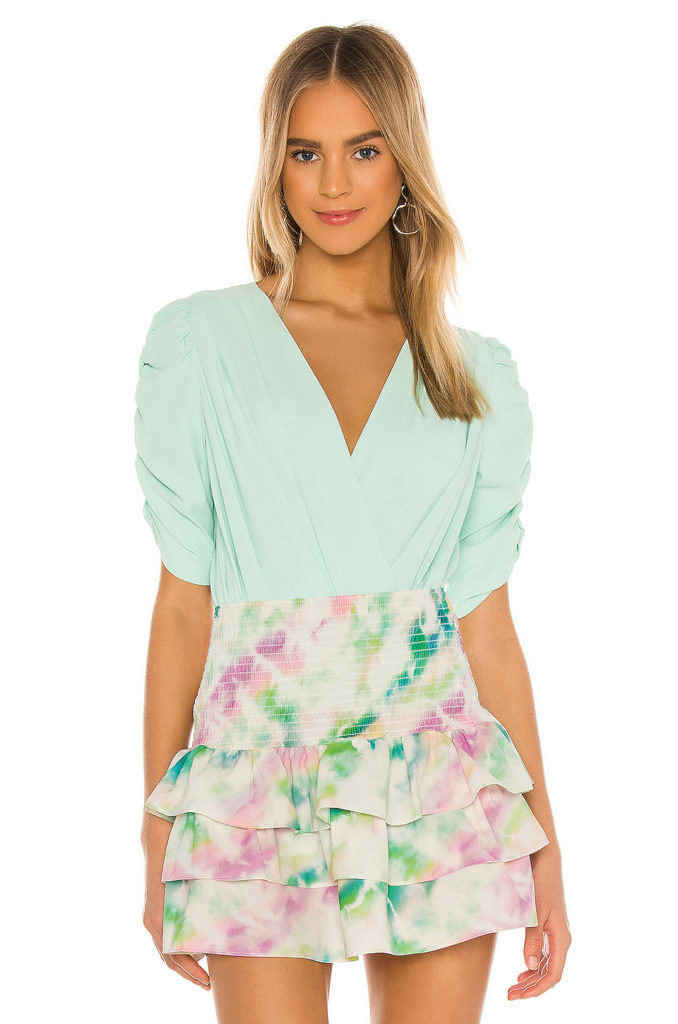
The Puff Sleeve Trend

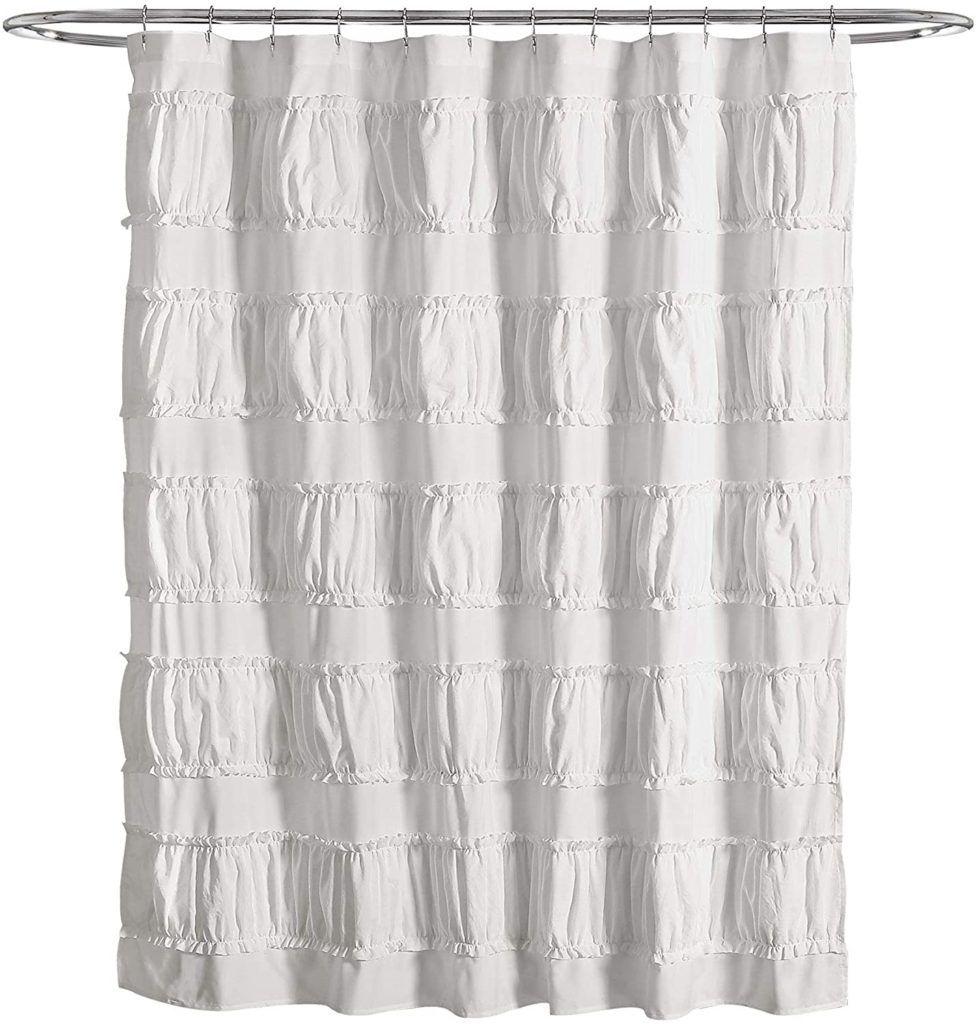
Beautiful puff sleeve dress, please meet the tufted, ruffle shower curtain. This also plays into the babydoll dress theme that was shared in Marie Claire as well, because of the tiered pattern. Much like how the volume of a puff sleeve makes shoulders look more substantial, the textured volume of this shower curtain creates visual interest in a similar way. Keep scrolling for some accessory ideas that fall under another trend!
The Mint Green Trend
So as I mentioned originally, this color trend in essence inspired this entire blog article because I connected it with the pastel ceramic tile trend. I thought for sure this would be the one thing you COULDN’T get on Amazon for a quick bathroom update. And then I found these beautiful peel and stick wall sheets in mint! I’ve had my eye on this product ever since I saw Sharrah Stevens use a white version in her rental laundry room. Check it out below.
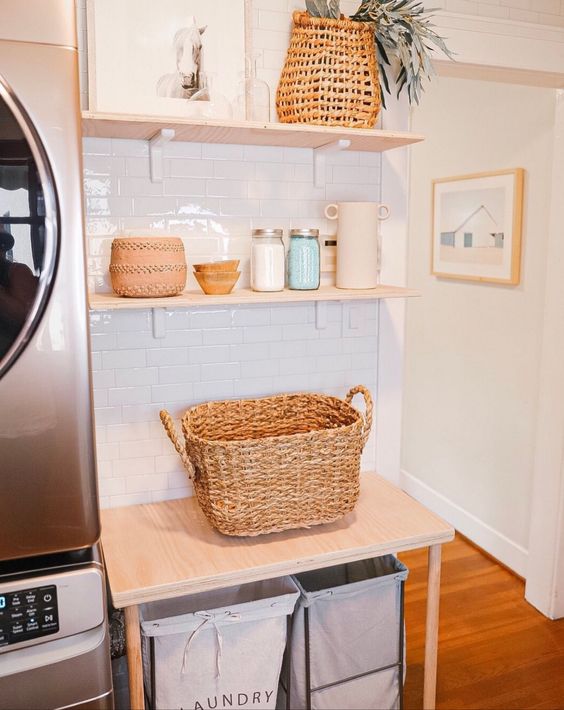
Doesn’t this look amazing and totally like real tile? I might even like the look of it better than SOME real tile because it looks handmade in texture and the grout is probably much easier to clean. It would take being a bit crafty and meticulous to make the cuts and line it up nicely, but for the price, I think this would look amazing to do wall to wall in a small bathroom.
The Hawaiian Print Trend

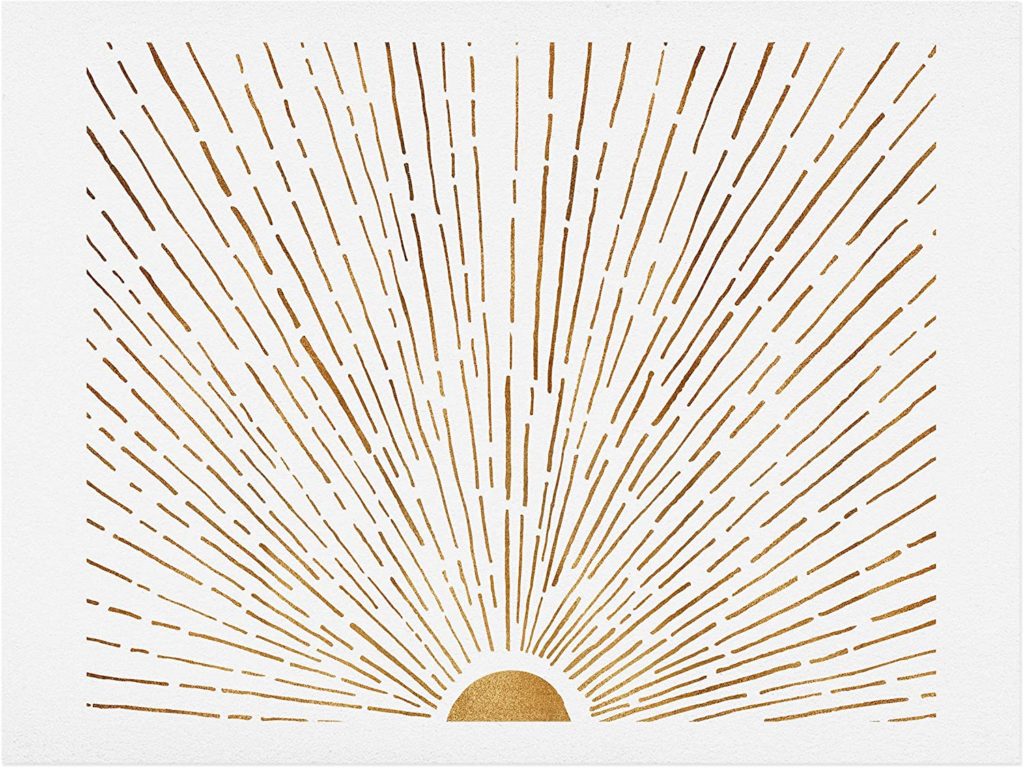
This is less of a direct translation of the trend than some of the others. With a bold, colored tile in the room, I wanted a more subtle tropical print piece for the walls, and I’m totally in love with this find! This doesn’t mean you couldn’t design a whole bathroom around a bold, happy Hawaiian print. I’d be into that, too! Just maybe go with the white peel and stick subway tile.
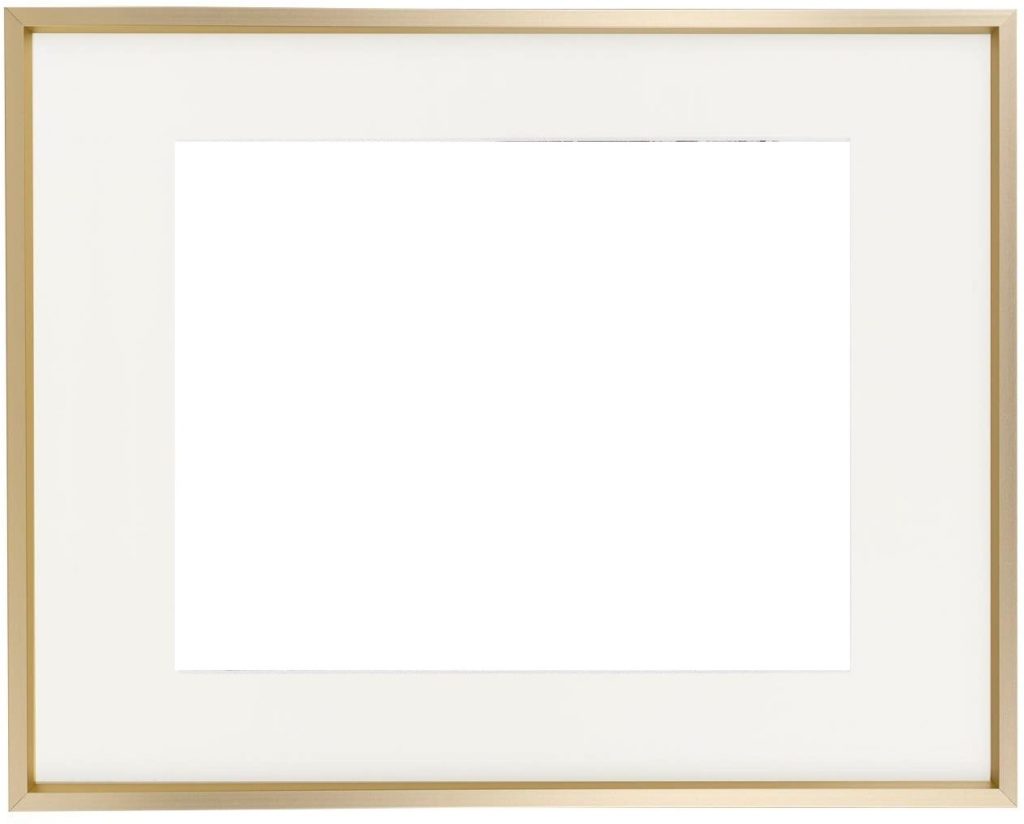
I suggest framing the print in this matted, gold frame to finish the look.
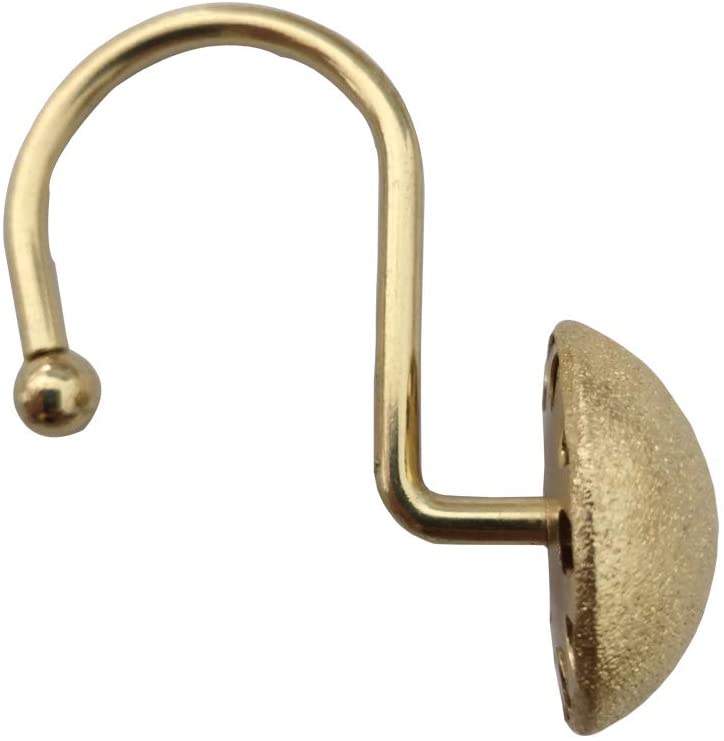
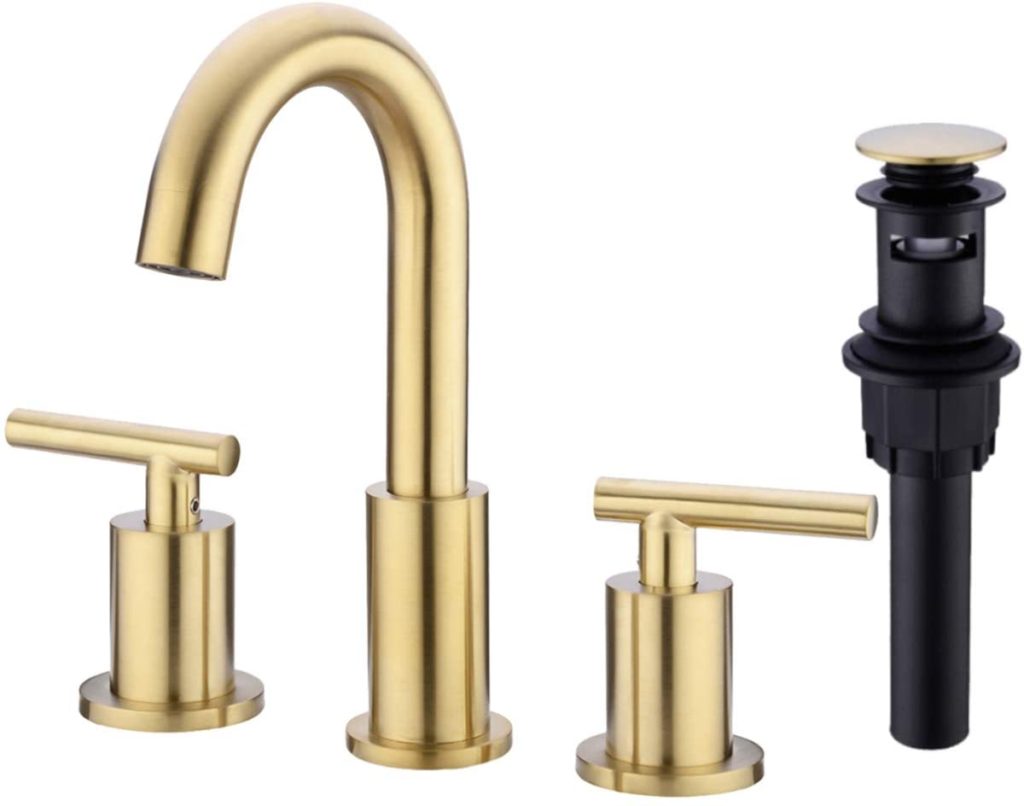
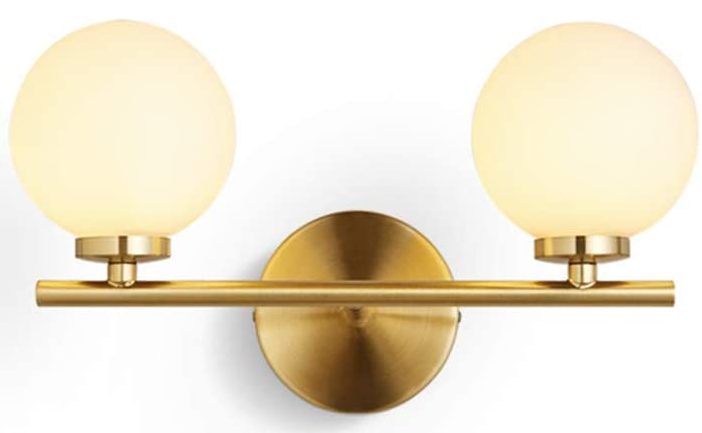
The Gold Chain Trend
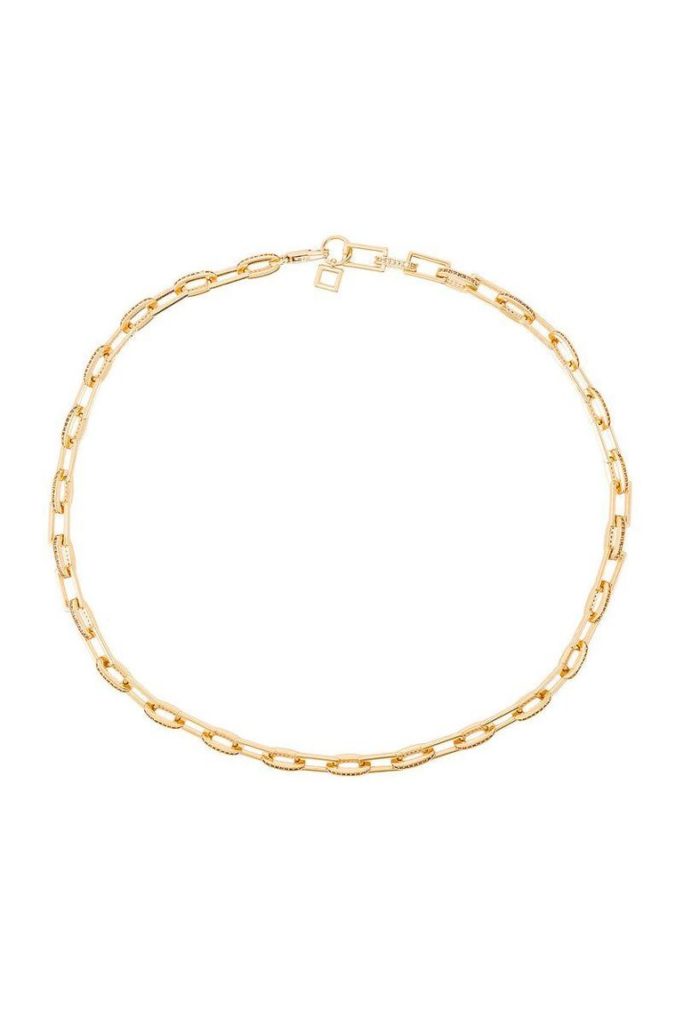
While you might not catch me posing with a gold chain Chanel necklace in my mouth (LOL!), you know I can recommend gold metal fixtures in your bathroom! Gold is my favorite shade of metallic whether it’s a necklace or a new bathroom faucet. I also love how the warm gold contrasts with the cool toned mint. In this summer bathroom, I’m recommending you “go for the gold!” with as many metal fixtures as possible.

The Crochet Trend
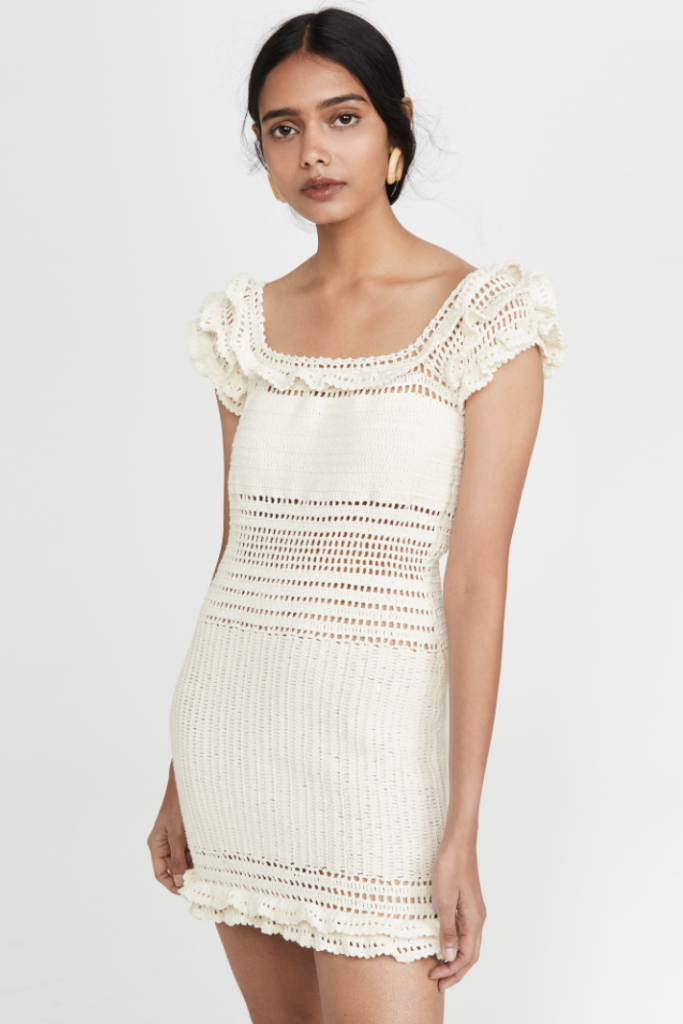
There’s definitely some fashion and interior design trend crossover happening with the crochet and macrame trends. Crochet/macrame plant hangers add some casual, bohemian flair to this bathroom. I love the idea of hanging these over the toilet area with the art print either under it or on the opposite wall.

Finishing Touches
Below are a few additional items that I think bring the rest of the room together.
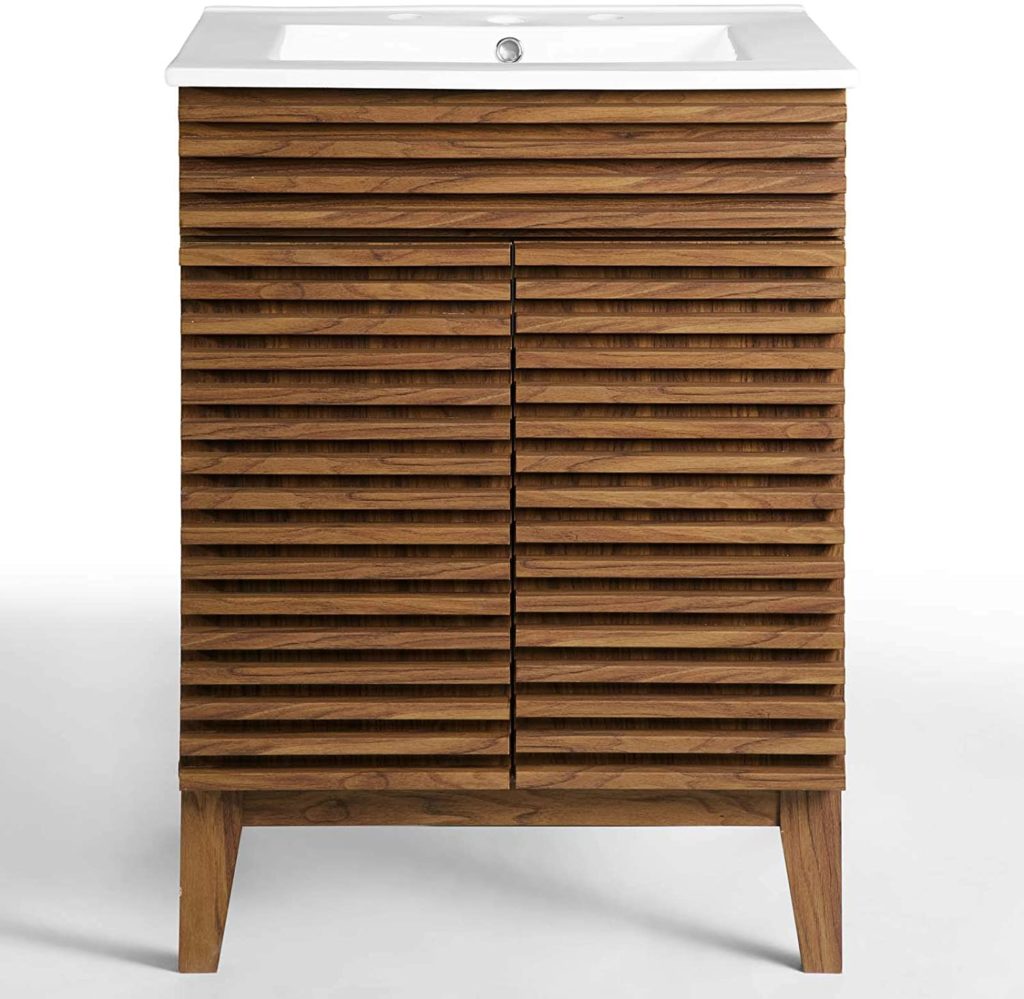
Another item I can’t believe I found on Amazon! This mid-century walnut vanity brings some contrast and warmth to the room and ties in well with the other selections.
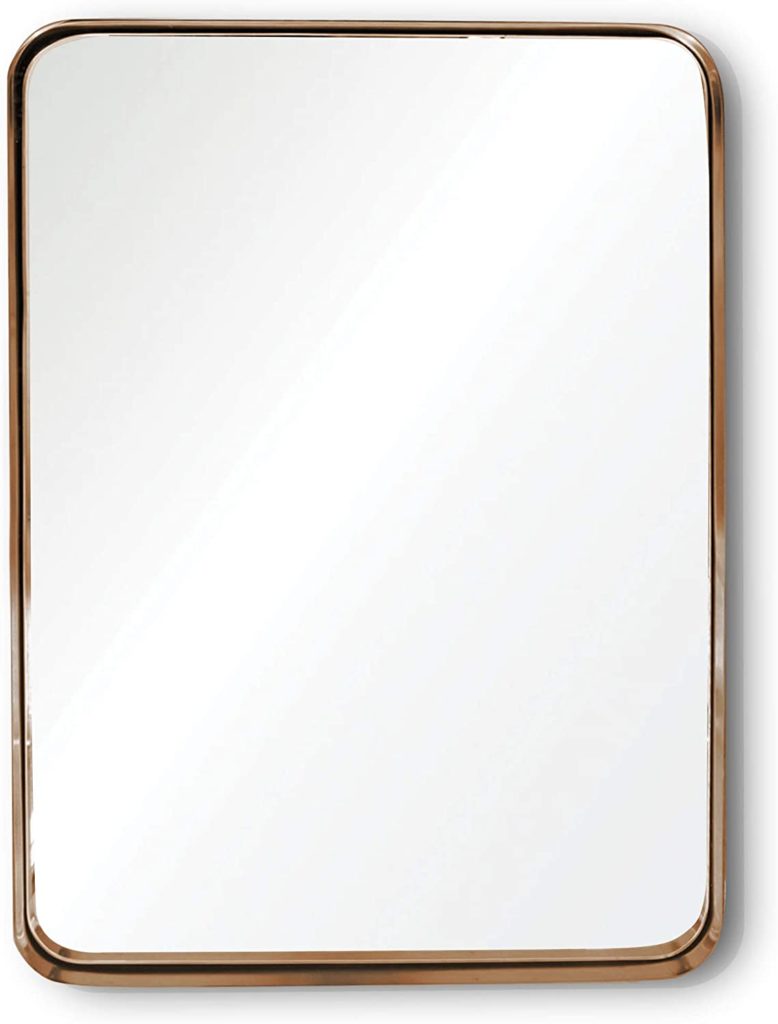
Rounded rectangle mirrors have a vintage-inspired look that’s definitely a new trend in the interior design world. The gold frame ties in well with the rest of the space and is in great proportion with the vanity.

In any bathroom renovation, it’s important NOT to forget your toilet! If you have a toilet in the dreaded “almond” shade or off-white, it will NOT look good with the mint tiles, white shower curtain, and white sink. I found this modern white toilet on Amazon, but really it just needs to match the white tones of the space. Be sure to hire a plumber for a drama-free install.
So that’s your bathroom update inspired by five of the biggest summer fashion trends! Let me know in the comments if you liked this “Project Runway” inspired idea and be sure to tag me on Instagram if you try any of this out in your own home!
Be sure to subscribe here because more DIY projects and ideas are on the way!
About Kaitlyn Loos
Kaitlyn Loos [loh-s] is one of the newest designers for interiors and events in the west-central Florida area. (Tampa, Ocala, Gainesville, and everywhere in between.) She brings over seven years of graphic design, project management, and event planning experience to create amazing spaces and experiences for her clients. She is one of the only interior design companies in her area who offers modern, fresh, pattern and color-savvy designs. From styling an event to designing an entire home, Kaitlyn Loos Design is a full service company that delivers style for nearly any investment level. She also enjoys sharing her ideas and projects through her new blog which reaches over 325 people monthly.
For more information about Kaitlyn, check out: About Kaitlyn: Interior Design, and About Kaitlyn: Event Planning.
You can also subscribe to the blog and contact Kaitlyn directly here.
Disclaimers: a small percentage of purchases from select links will benefit me via an affiliate program. I appreciate anyone who wants to support my blog by shopping the products, but there is no obligation to buy.
All of my DIY blog content is for informational and entertainment purposes only. I share what works for me in my home, but you should consult with professionals/landlords before taking on any construction projects. My blog does not constitute interior design advice for readers. I am not liable or responsible for any damages resulting from or related to your use of this information.
Reading time: 6 min
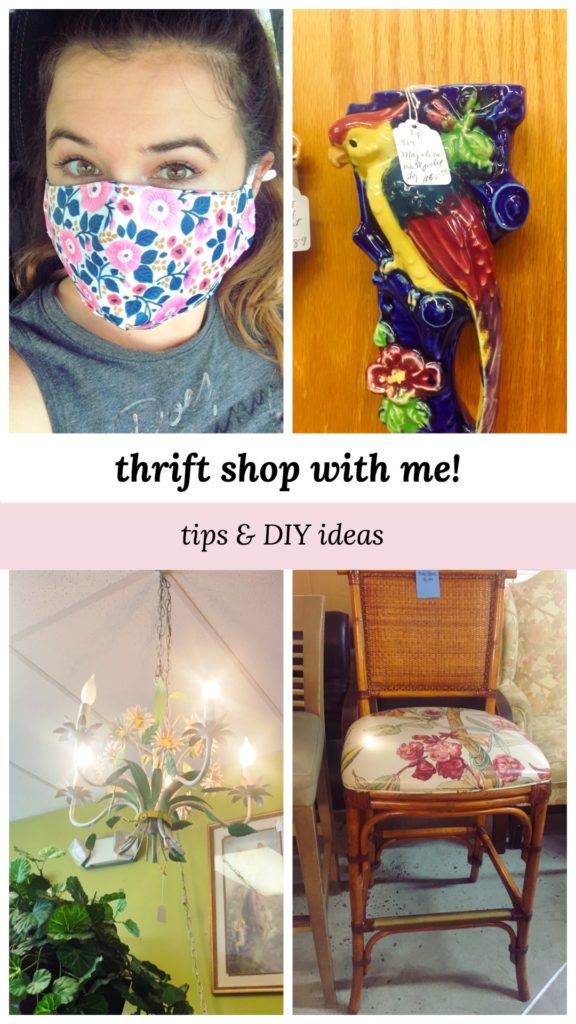
So I hit the thrift stores this past week to look for items for our living room, kitchen and front deck. According to my recent blog topics Instagram poll, thrift decor ideas was a close second behind DIY projects. (That blog post can be found here!) Specifically, I went out looking for some wall art pieces, a new lamp base, and outdoor furniture. In the process, I decided to check out a few different spots since I’m still new to the area. I took lots of pictures and I’m sharing tips and ideas so you feel like you’re coming to the thrift shop with me!
If you’re new to thrifting…
If you’re new to thrift shopping, let me first say, that you never really know what you’ll find! I mentioned in my first blog on Budget Home Essentials that I like to shop thrift stores for unique decor. And this is still true! So if you like to shop around, it can be fun! Thrift stores are an awesome option because the things you buy will benefit a charity or small local business. In addition, when you find a new life for one of these pieces, you’re making a sustainable choice.
Someone who shops luxury, quality wholesale, IKEA, and thrift stores the same week? Yes, that’s me! I like to mix things up and embark on a bit of a treasure hunt. And there’s certainly some treasures I’ve found! Keep reading to see more of my finds and ideas for how these can be implemented into a modern home.

Different types of thrift stores
There’s several types of stores can fall under the “thrift” category and I’ll share my perceived differences for those. The most common are Goodwill and Salvation Army, where people donate unwanted items and the sales go to the charity. You’d be shocked in the best way at what people will donate to places like these. When you find something good there, it’s such a win for both you and the organization! This is where you’ll typically get the best deals IF you can find what you want. In this week’s adventure, I shopped two different days at the Goodwill by the Paddock Mall.
Next, there’s small businesses who purchase large quantities from estate-type sales, to sell at a discount. Or they may sell consignment. These stores are typically privately owned by a family and they can be very motivated to sell. I shopped at the Bargain Barn Thrift Store Extravaganza and I was impressed by how much selection they had!
Lastly, you have the traditional vintage stores which typically have a more curated collection of vintage goods. I shopped at the brand new Ocala Antique Mall and Estates. The prices may be higher than the other stores, but the average value of the items is likely much higher.
I found so much at all three stores, so I’ll briefly share my thoughts and ideas for each.
Ocala Antique Mall and Estates Finds
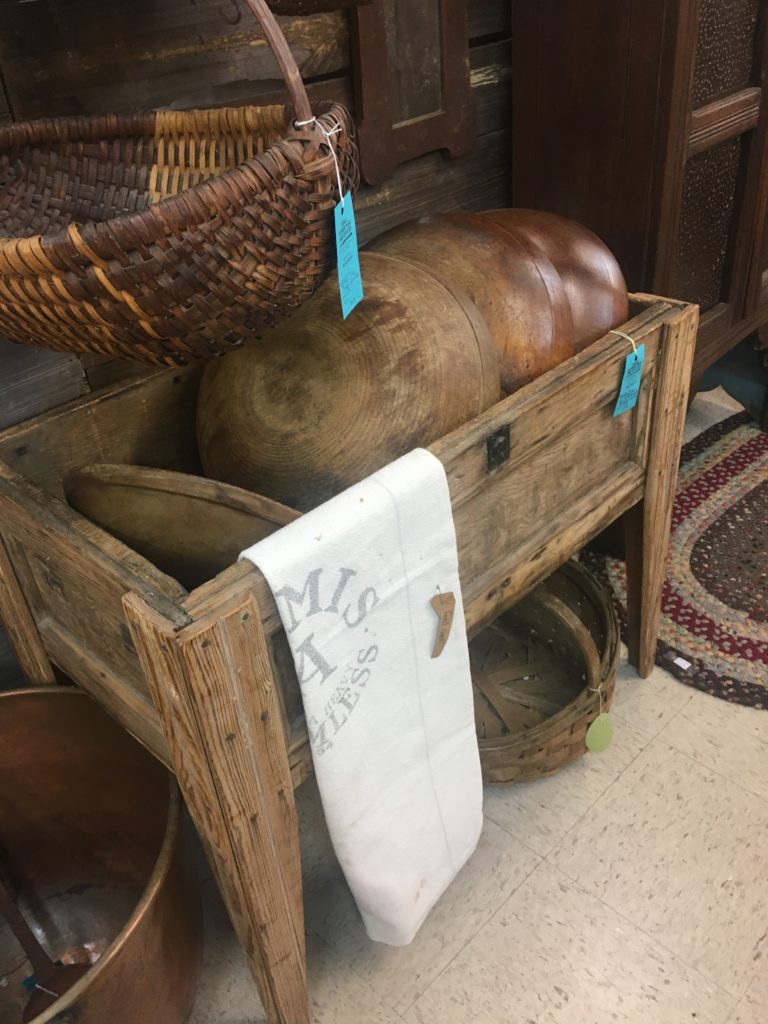
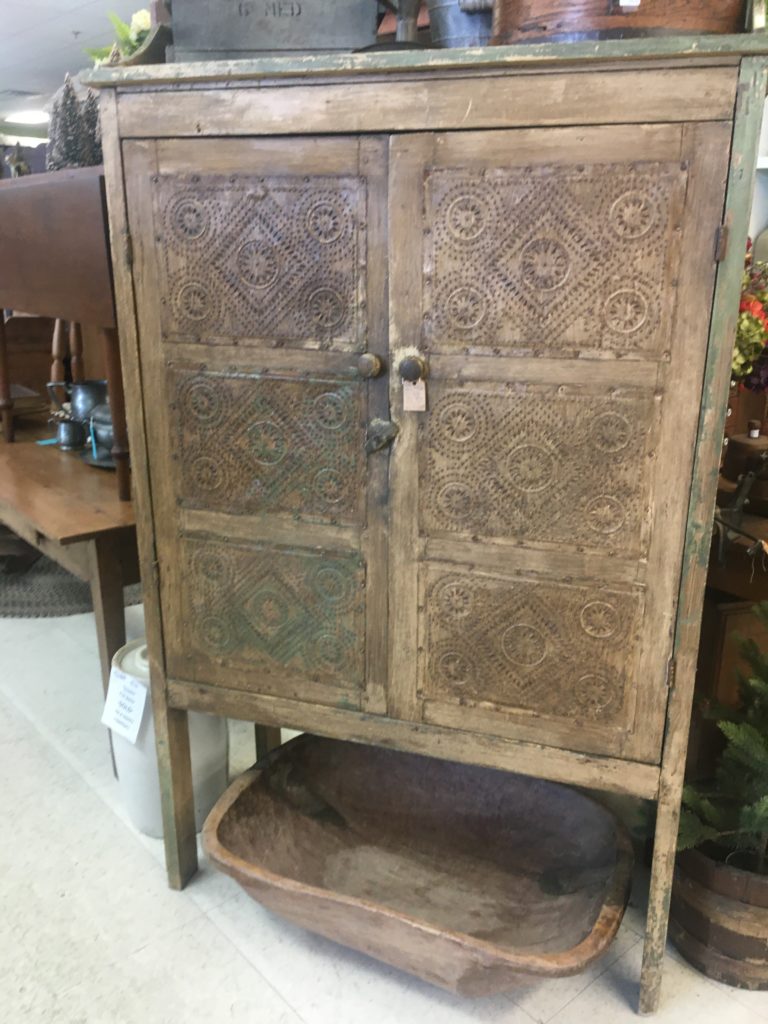
Vintage stores are great about pairing like items. I love this old wash bin and selection of wooden bowls. Why buy the antique decor look from a high end store when you can get the real thing?

I love vintage silk scarves! They’ve come back in style since more people are using them in their hair or to dress up a bag. If you find one with a design or colors you totally love, you could even have it framed as an art piece. How pretty would this colorful yellow and black one be in a simple white frame?
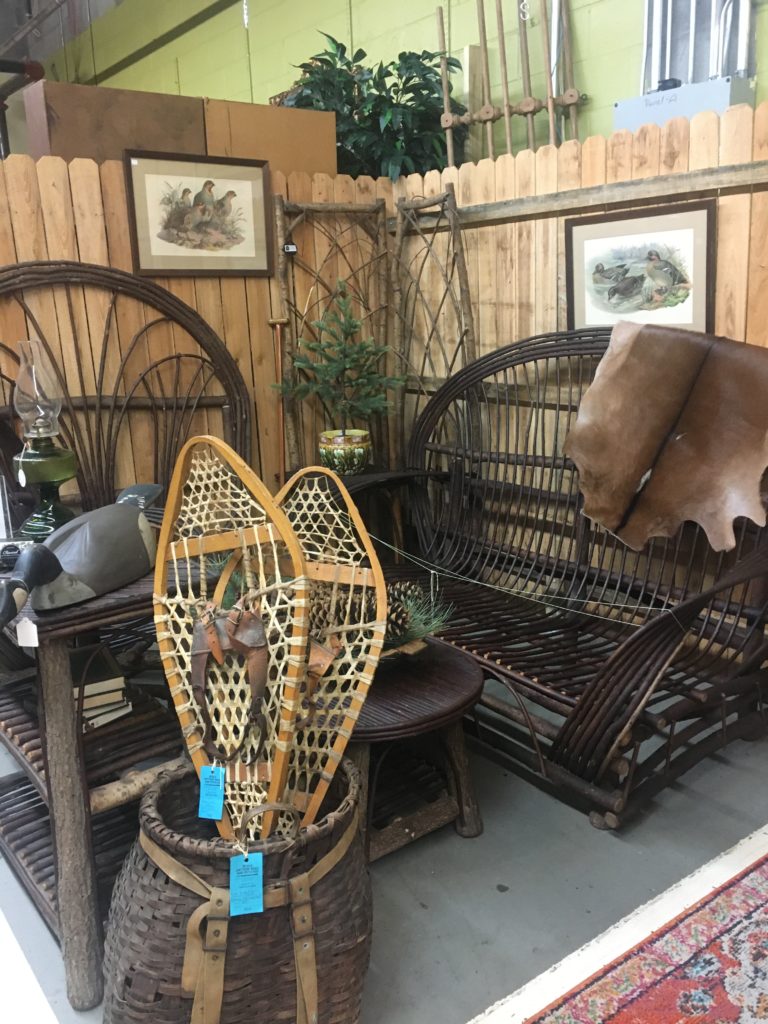
I’m living for the idea of someone refinishing these high-back rattan chairs and adding plush cushions for a chic patio moment. (More outdoor living trends and ideas in this recent post.)
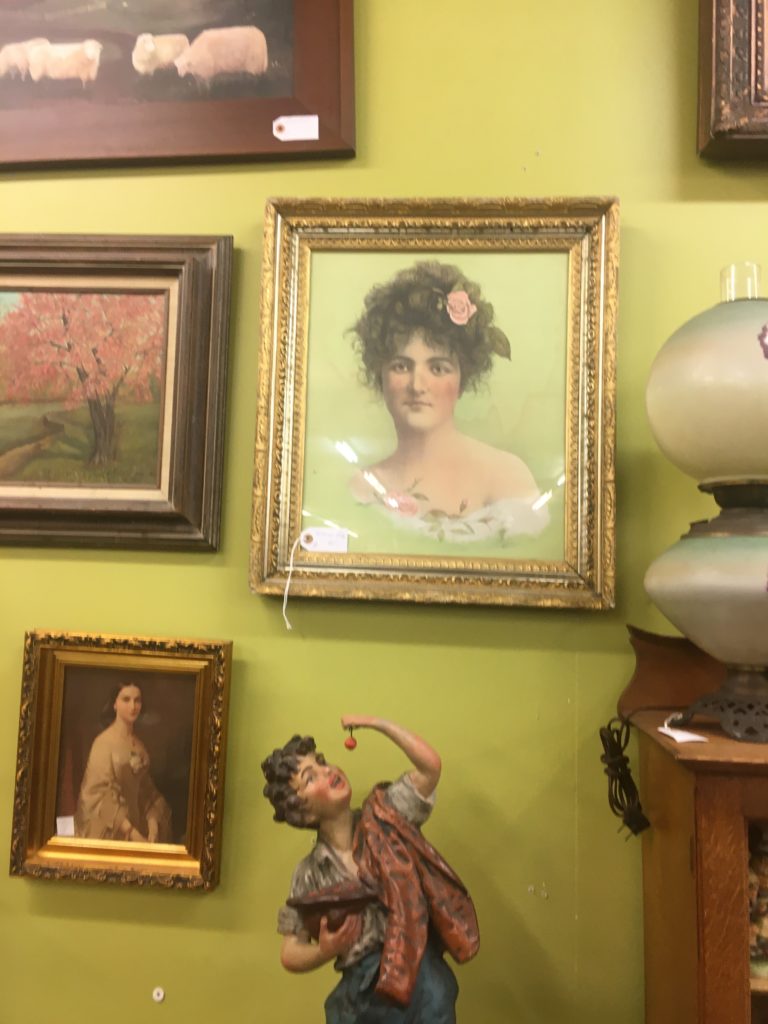
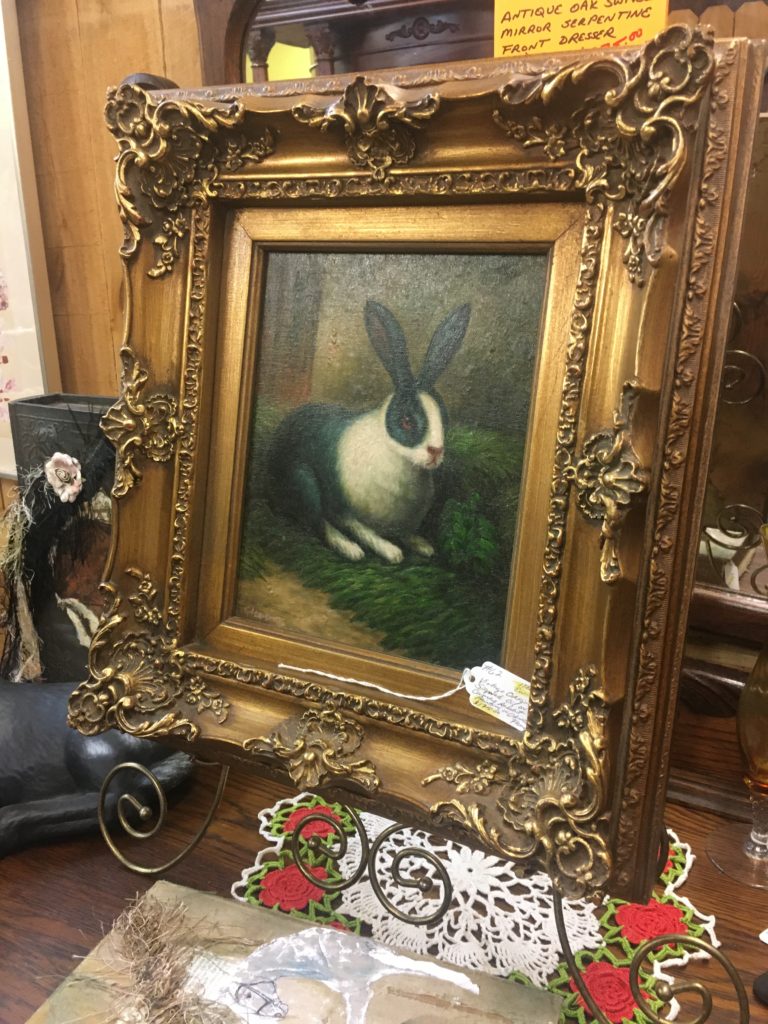
I saw these vintage art pieces in gold frames and thought they’re MEANT for a moody dark library gallery wall. Or they can go totally extra on a patterned wallpaper accent wall.
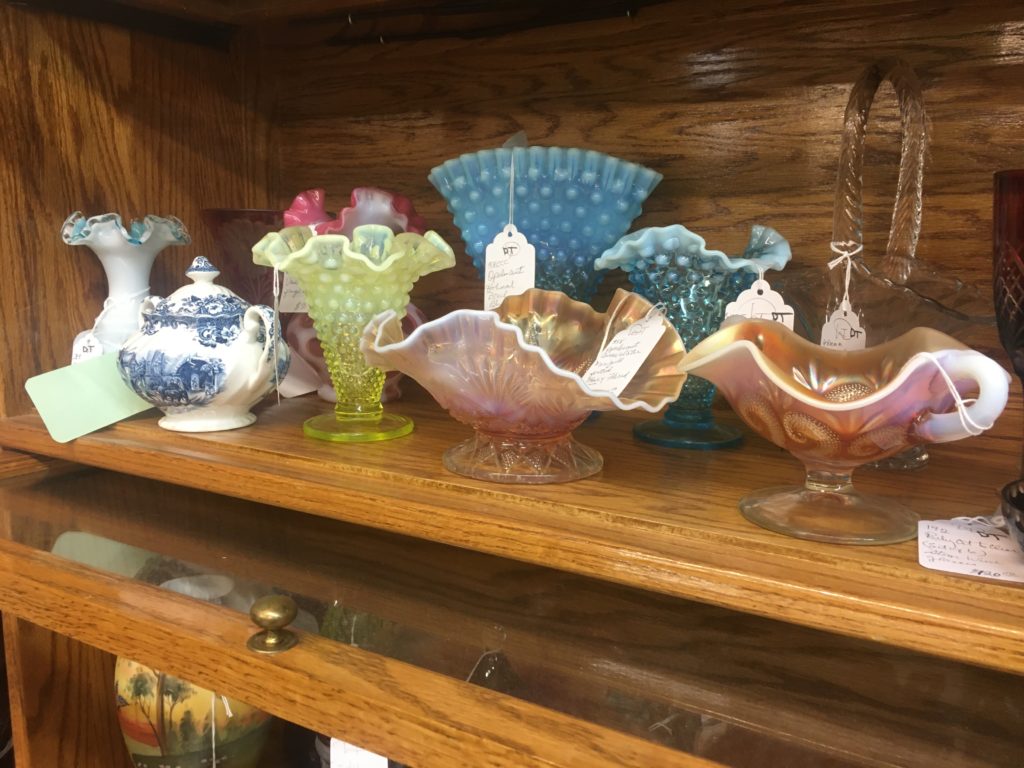
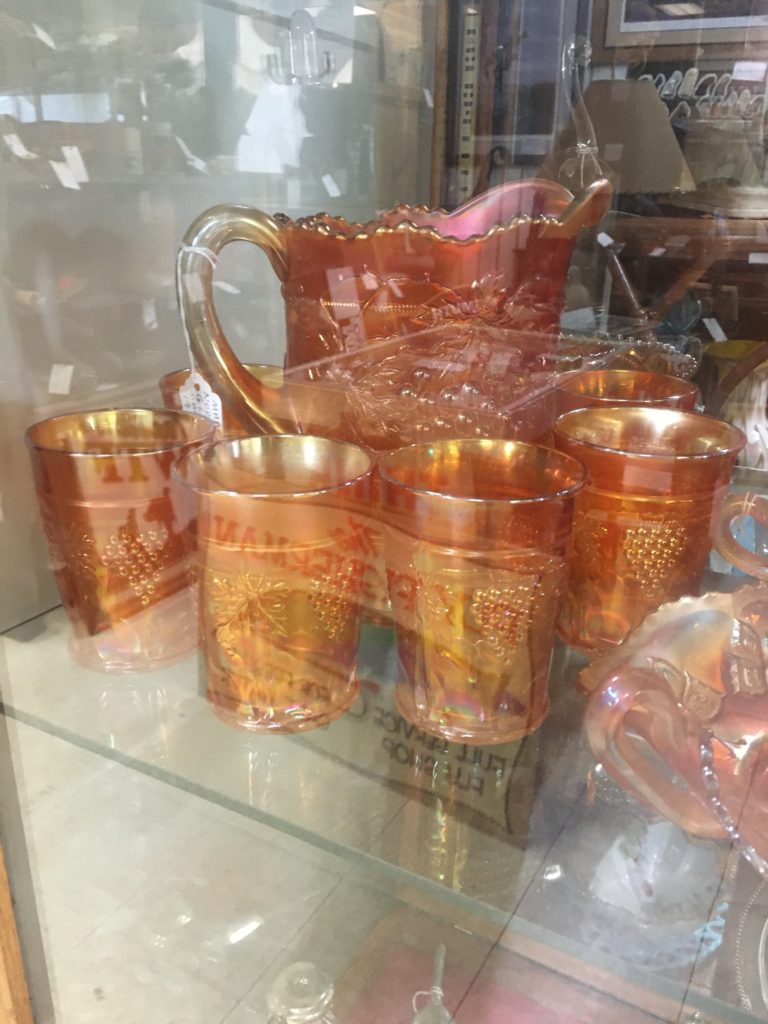
These mid-century glass pieces look like a school of colorful jellyfish, and I’m into it! With so many people opting for glass-front cabinets, colored glassware decor is an on-trend, vintage pick.

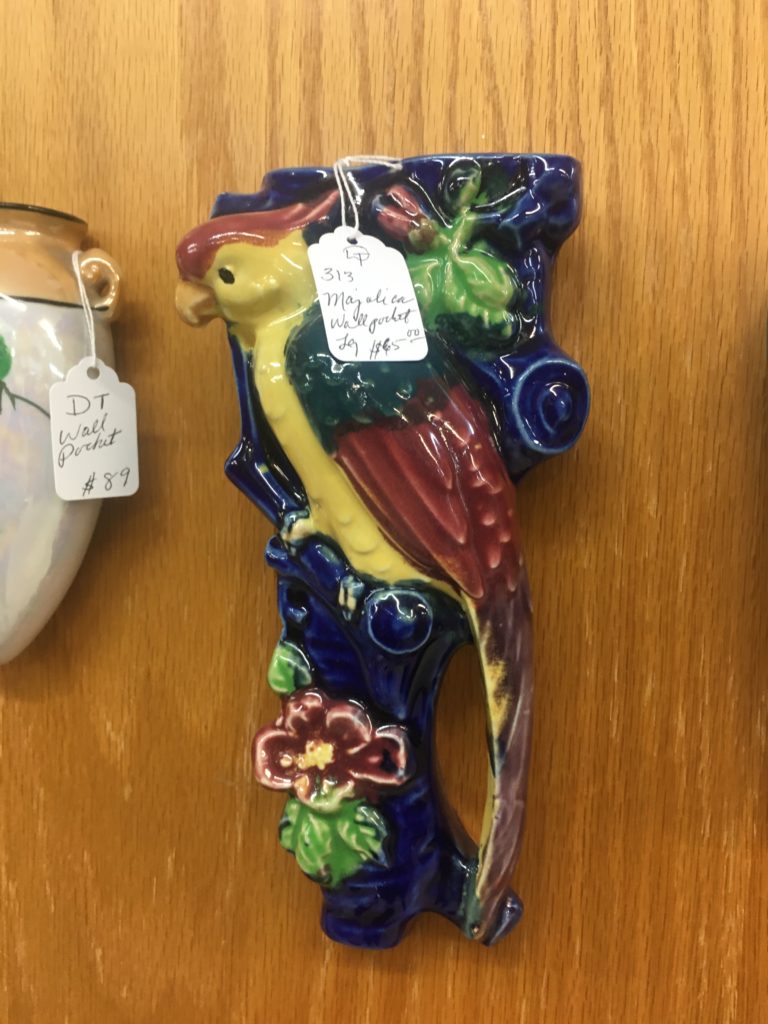
These ceramic birds are the stuff of Opalhouse at Target’s dreams. They could add a fun sculptural flair to a gallery wall over a couch or part of a vertical gallery on a narrow wall.
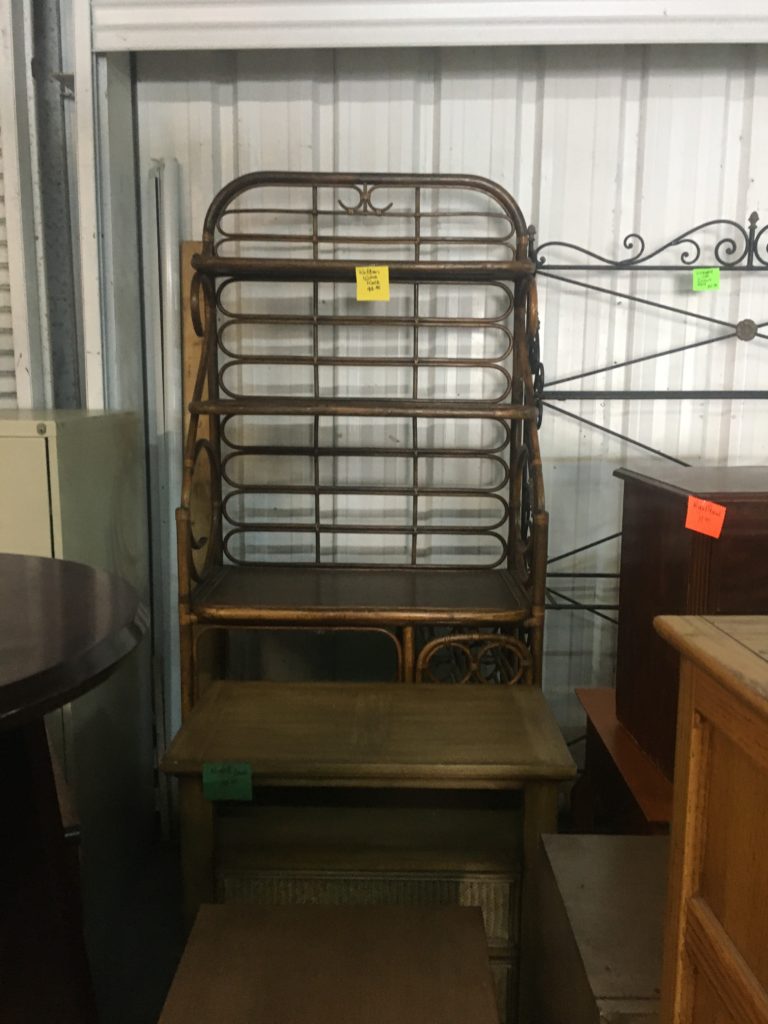
Is this etagere Pier 1, World Market, or Anthropologie? Nope, it’s totally the real vintage thing. This would be beautiful in an eclectic style living room.
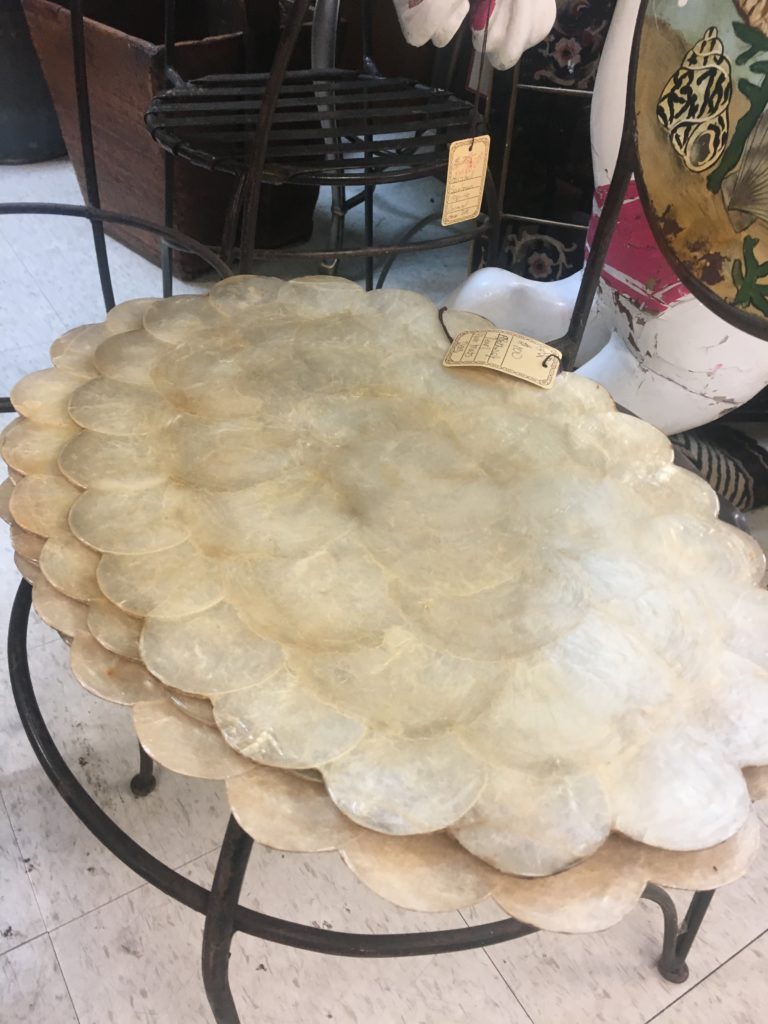
These capiz shell chargers would help create a stunning table setting on a contrasting, dark wood table. One of a kind, investment pieces like this can dress up your table even when paired with inexpensive plates and flatware.
Ocala Goodwill Finds
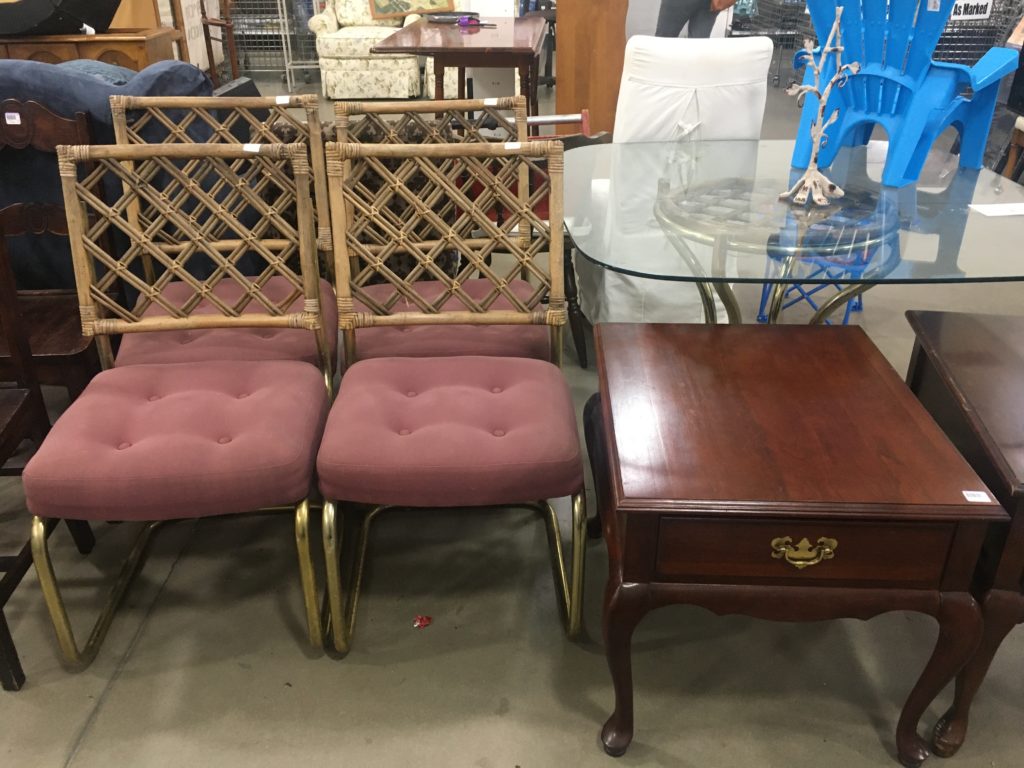
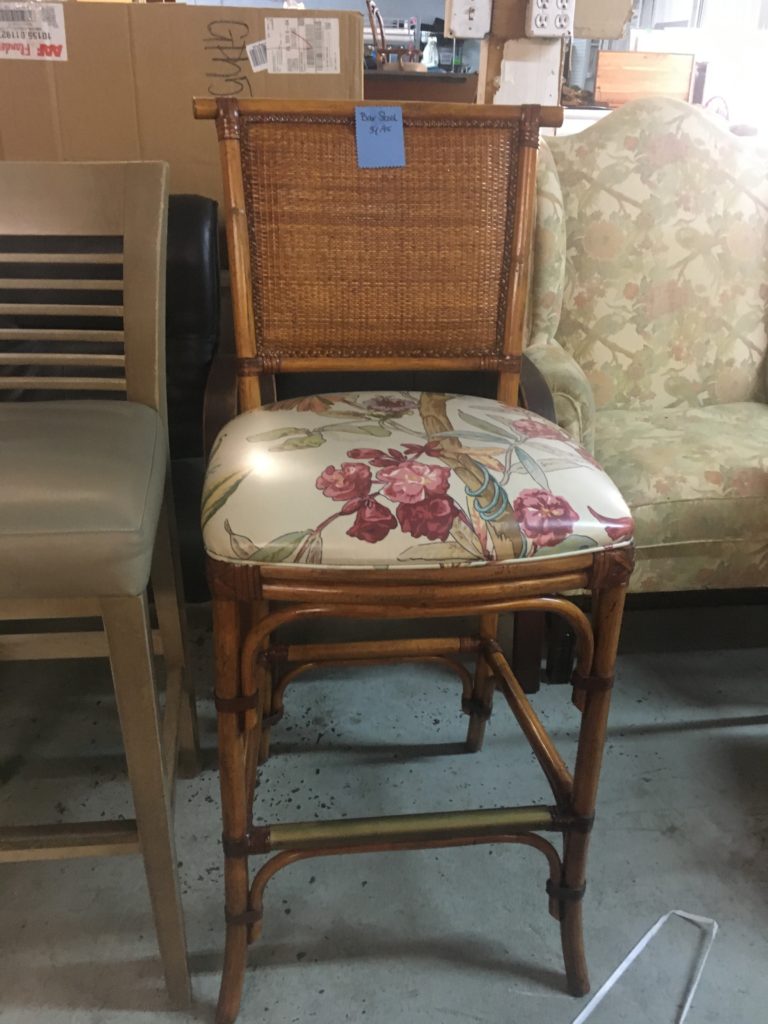
I can tell we’ve arrived at Goodwill when an 80s brass/glass table is styled with a plastic blue kid’s chair! But how cool are these vintage chairs? I feel like this 80s glam, beach-style stuff is back in style in a big way.
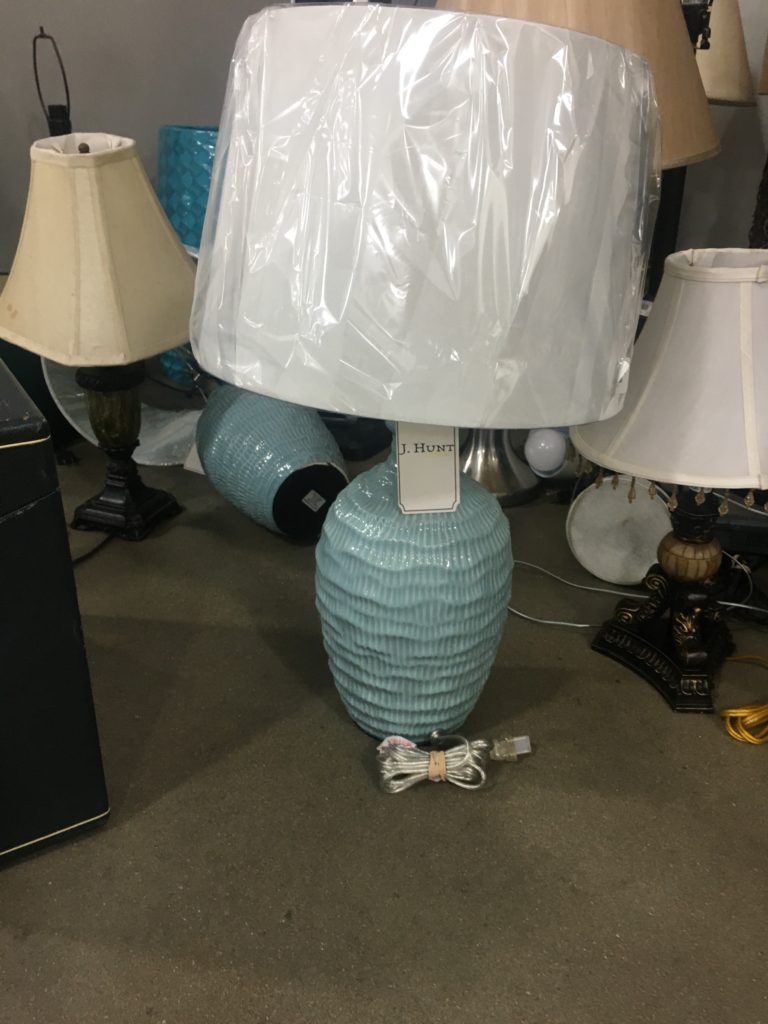
You might see these two matching light blue lamps and think – hey, those look nice! I thought so, too. But then I checked the price and saw they were marked for $35 each. While this isn’t bad, you could get totally great lamps from Target or similar for the same price. Goodwill also gets retail items that may not be marked down as low as other items, and I think this is the case here. Keep scrolling though, because I did find a lamp for a better price!
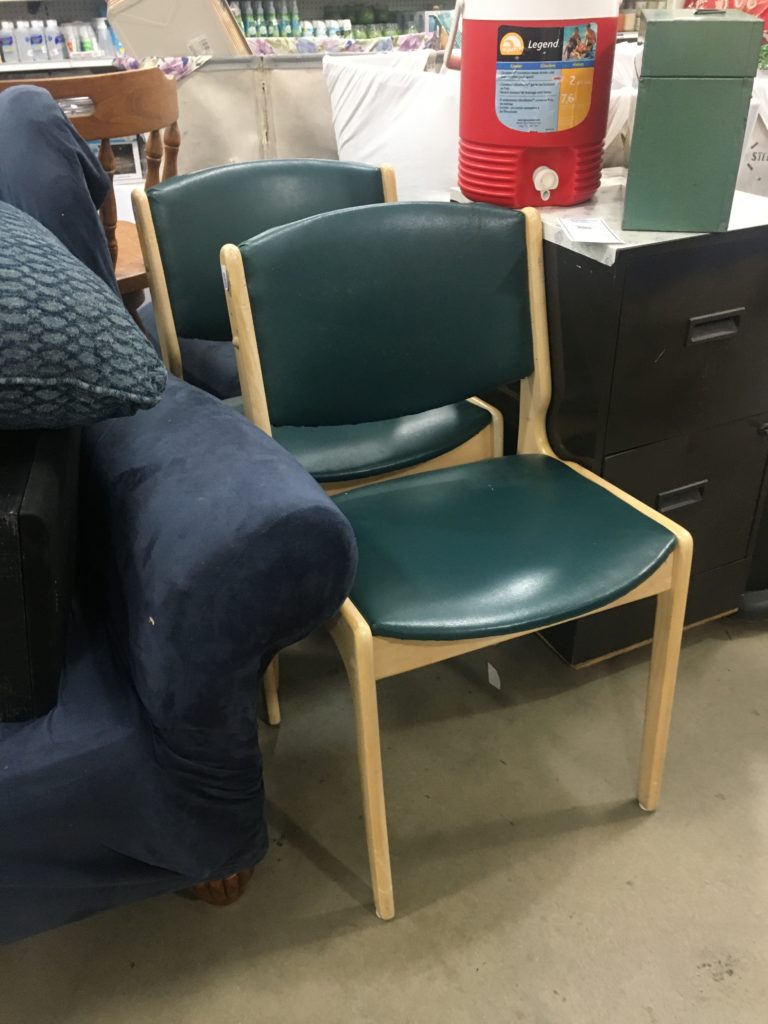
I thought these green chairs could look really cool with dark wood stain and new upholstery. What you may have to invest to improve these chairs is a fraction of what they could cost new from a Crate & Barrel or West Elm.
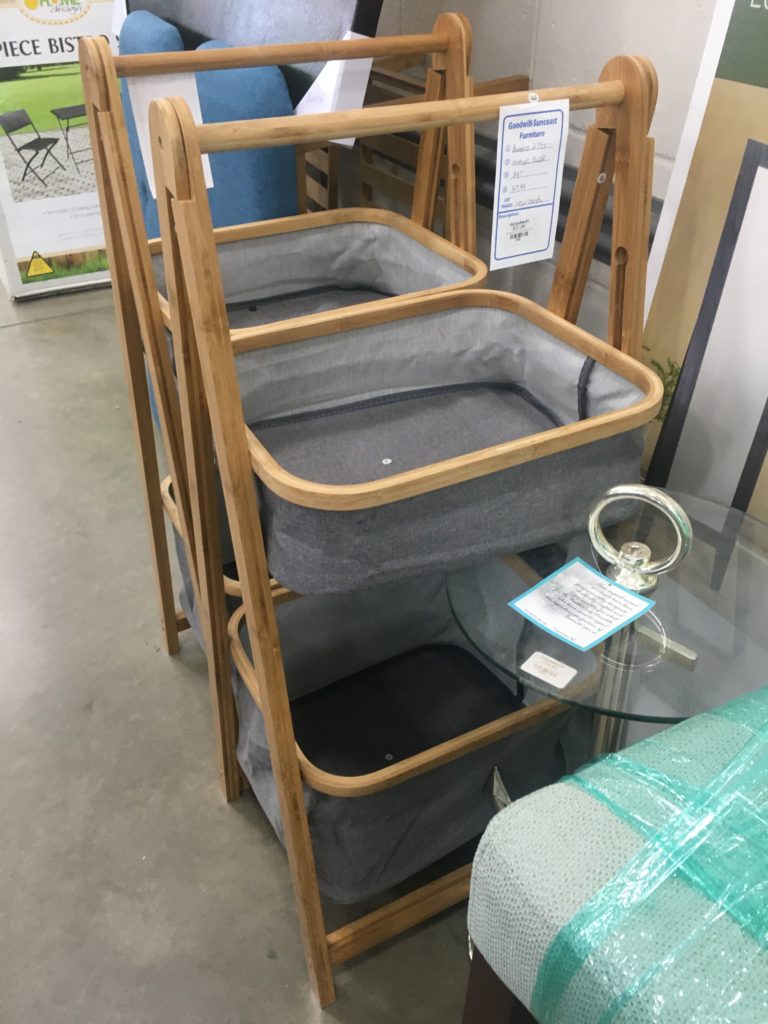
These storage units I thought would make cool, tiered planters for a covered patio area. Tiered planters are very hot on sites like Urban Outfitters this season.
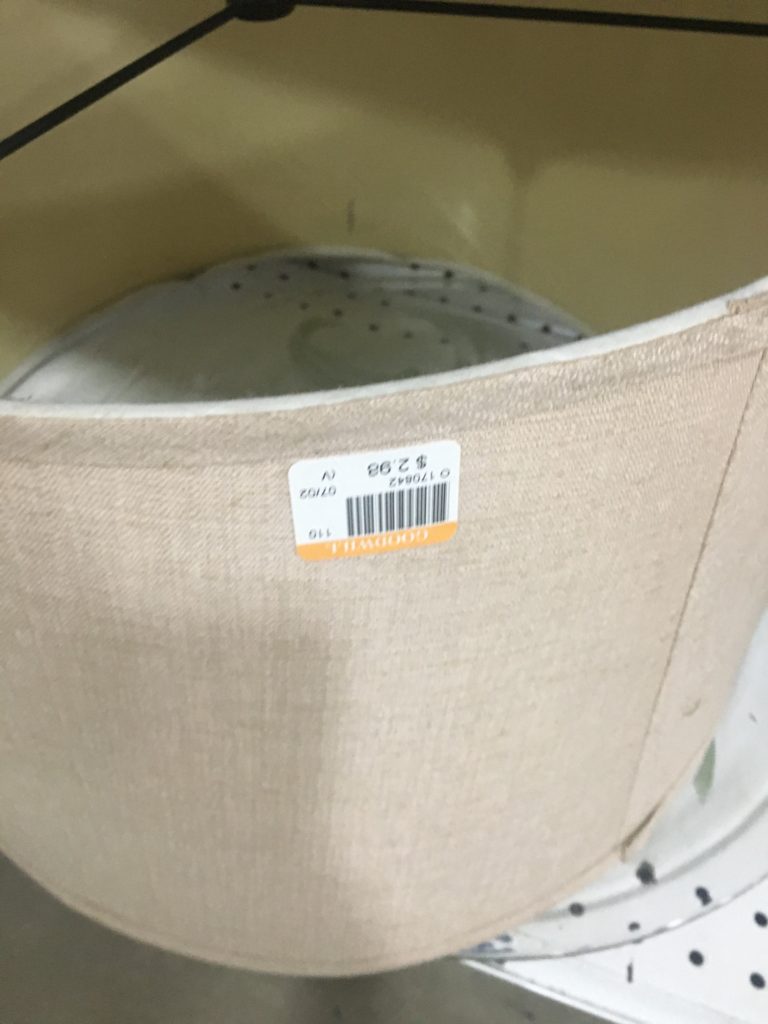
If you need a new lamp shade, check out your local Goodwill! I feel like this $3 lamp shade would be 4x more at Target.
Bargain Barn Thrift Finds
Bargain Barn definitely had a lot more furniture than the Goodwill. They actually buy storage units to resell in their store, nearly unseen. I recommend this spot if you’re in the Ocala area!
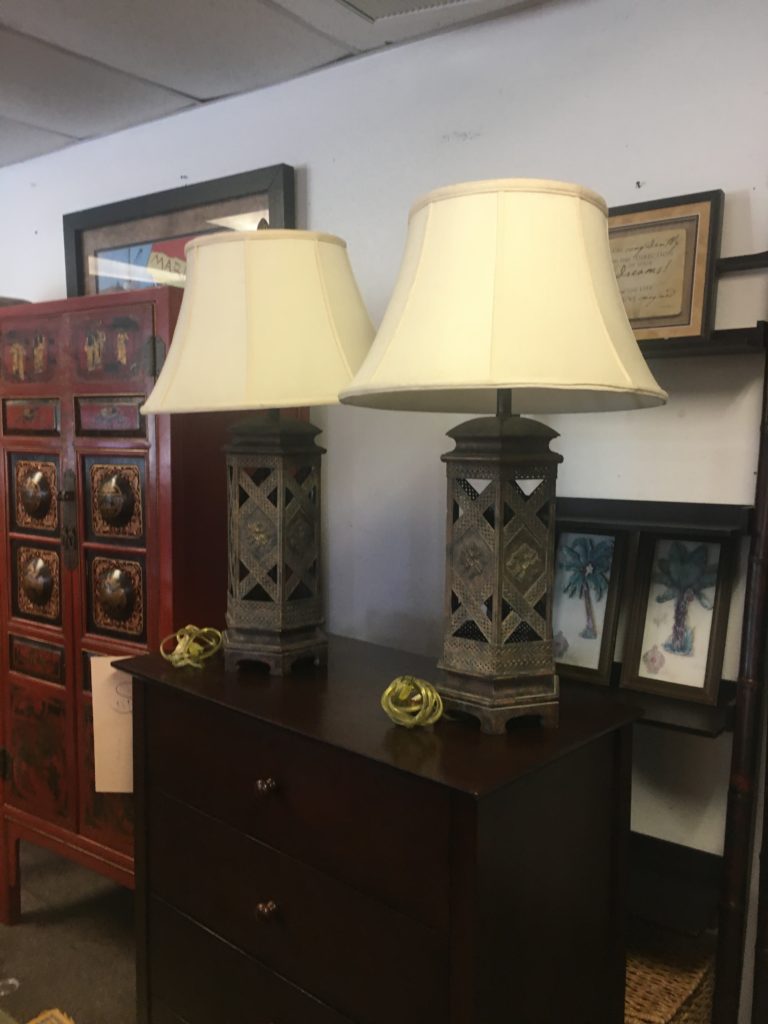
I’m very big on buying lamps in pairs, and these quickly caught my eye at the Bargain Barn. I could see these working as-is, or I could see someone switching out the shades for modern black ones. Another idea, if you have the DIY bug, is to paint the base detail blue and white and add sleek white shades.
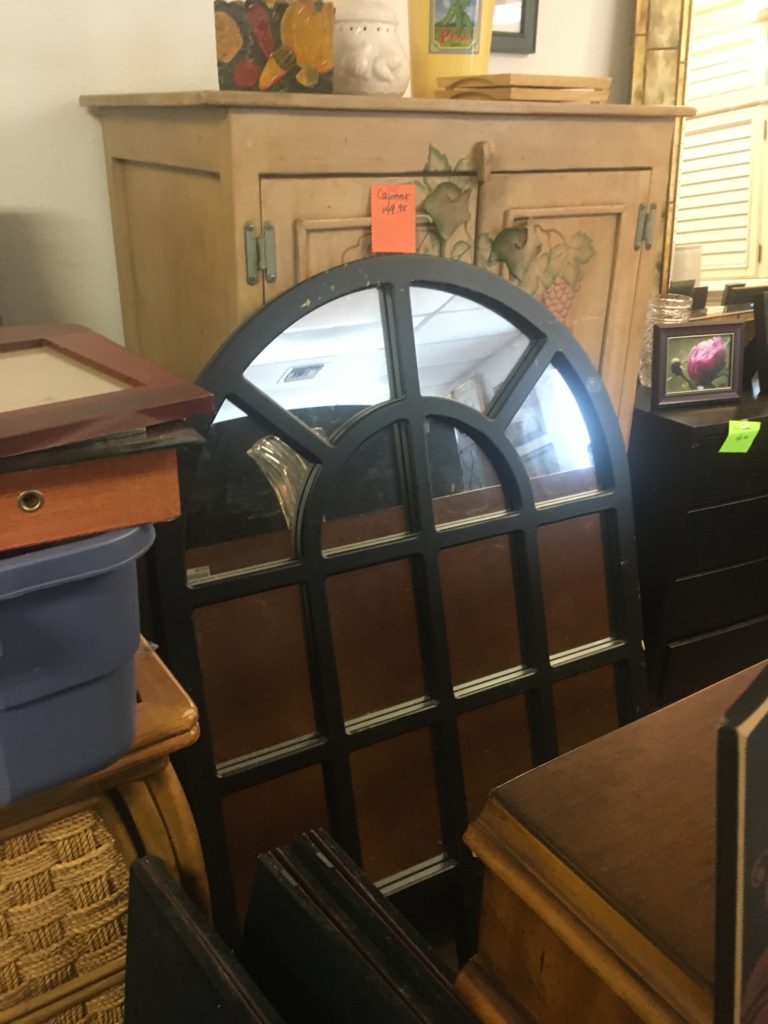
The Bargain Barn had two of these matching archway window mirrors –which can create such a beautiful symmetrical moment in a space. You could rough them up for a farmhouse feel or touch up with black paint for a traditional look.
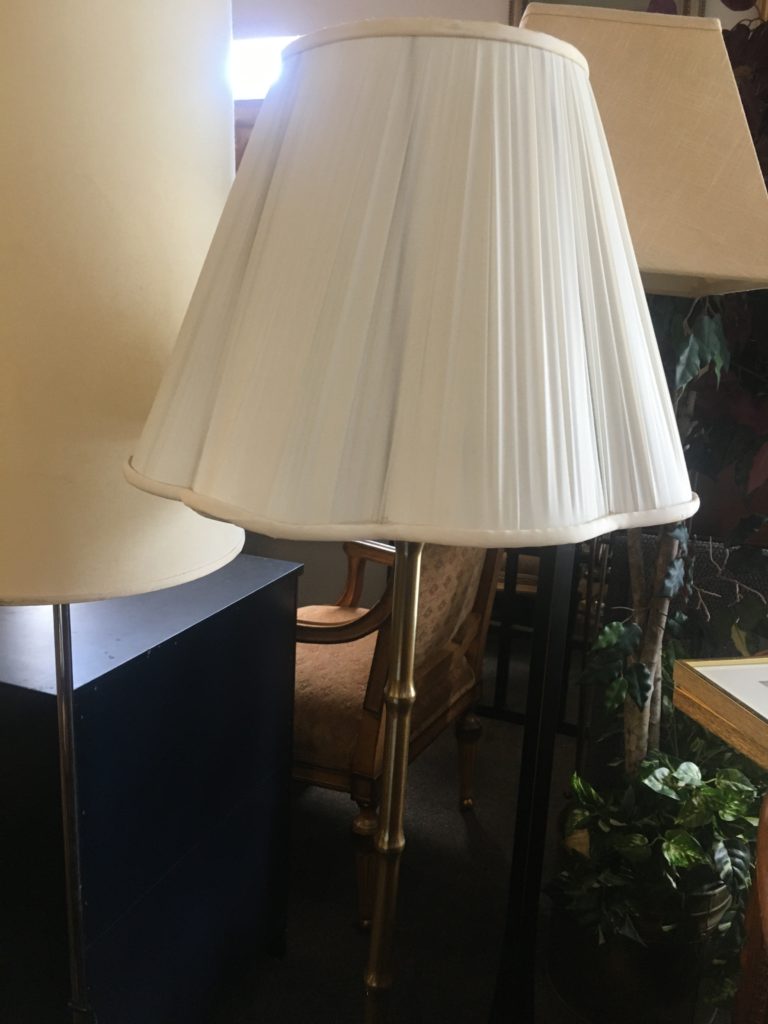
I love how this floor lamp has a tiki style that could add vintage character to a coastal-inspired home. Whether that’s in a neutral toned room with palms or against a jewel-toned, teal wall, this one had me dreaming!
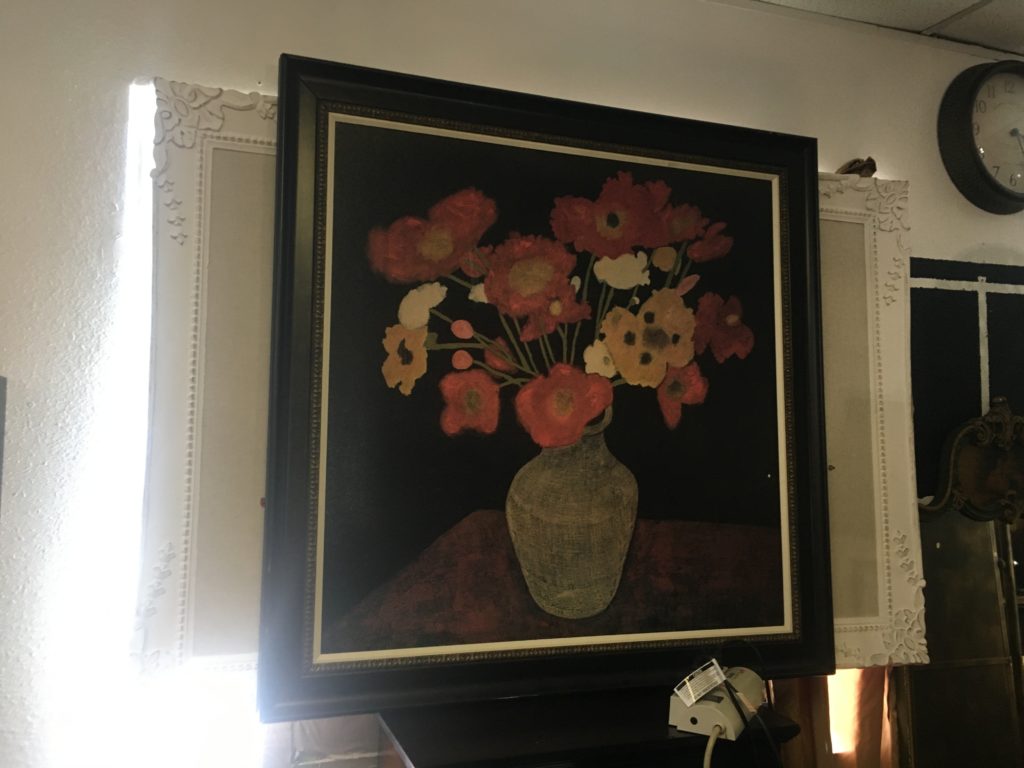
Had to snap a picture of this larger-than-life pin board BEHIND the floral painting. With linen fabric and white, chalk-painted looking frame, this would be perfect for an open wall of a home office.
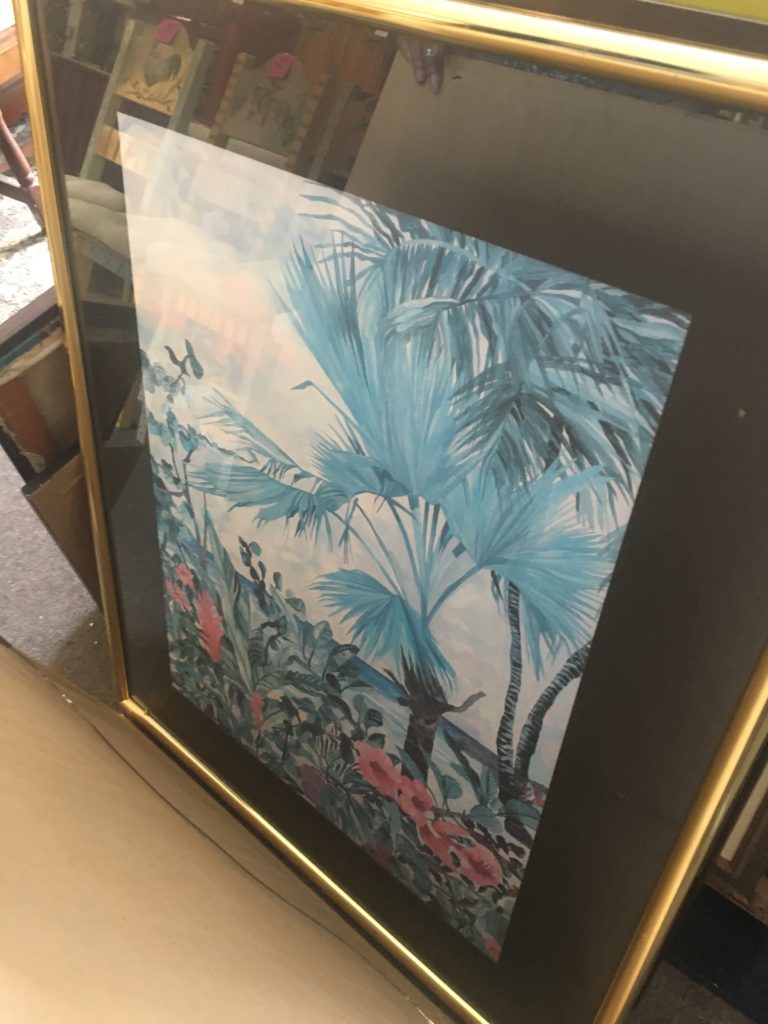
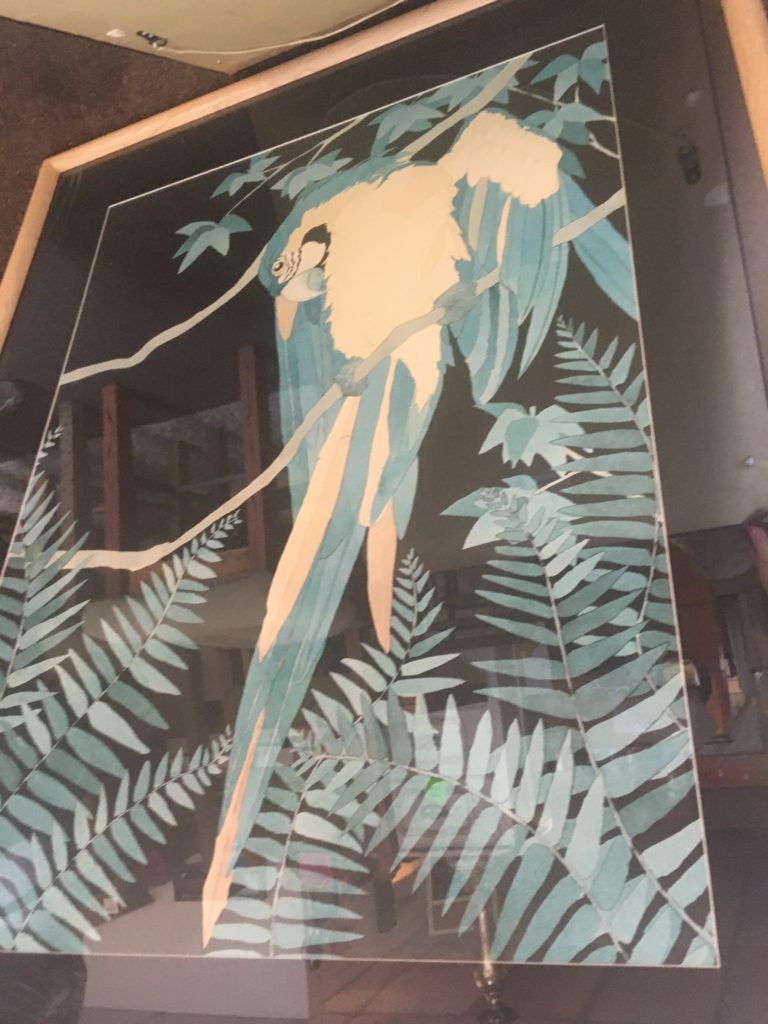
When trying to decide on something that’s a little out-there in style, consider if it’ll have friends in the room. Do you have something with similar colors? The two pieces above with the very similar color palette and matting style were recommended to be sold together by the owner, and I agree!
Even More in the Bargain Barn Back Room!
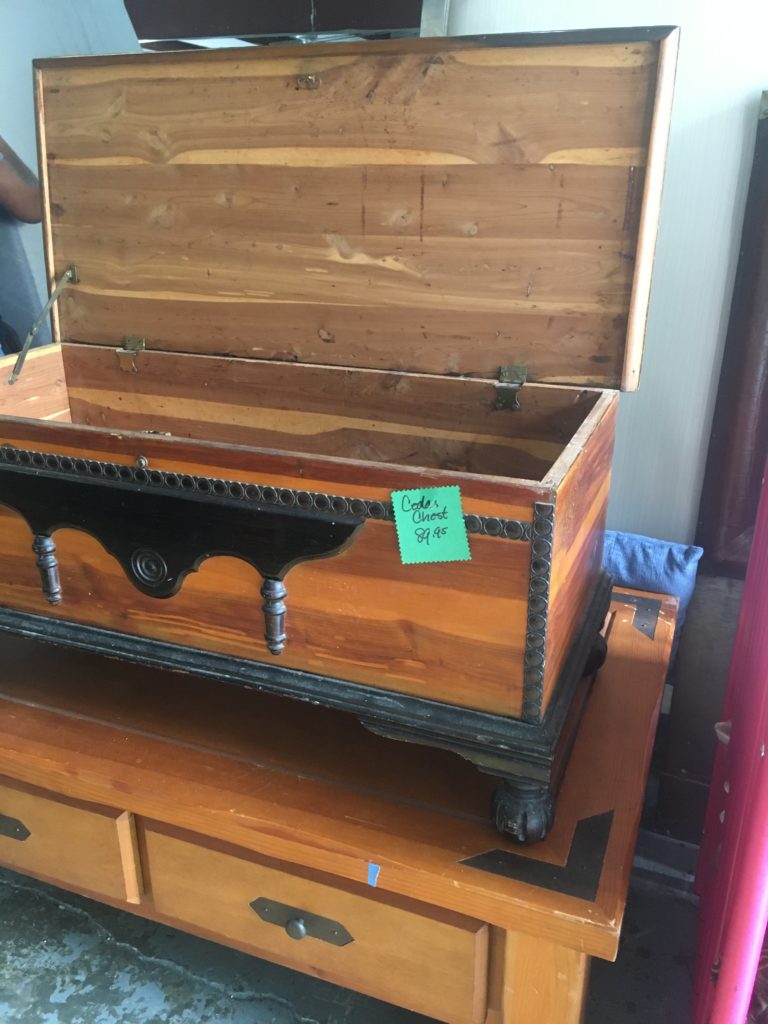
Cedar chests are timeless and popular because the natural material keeps bugs away. By mixing a piece like this chest with modern decor, you can create a customized, lived-in feel in your home.
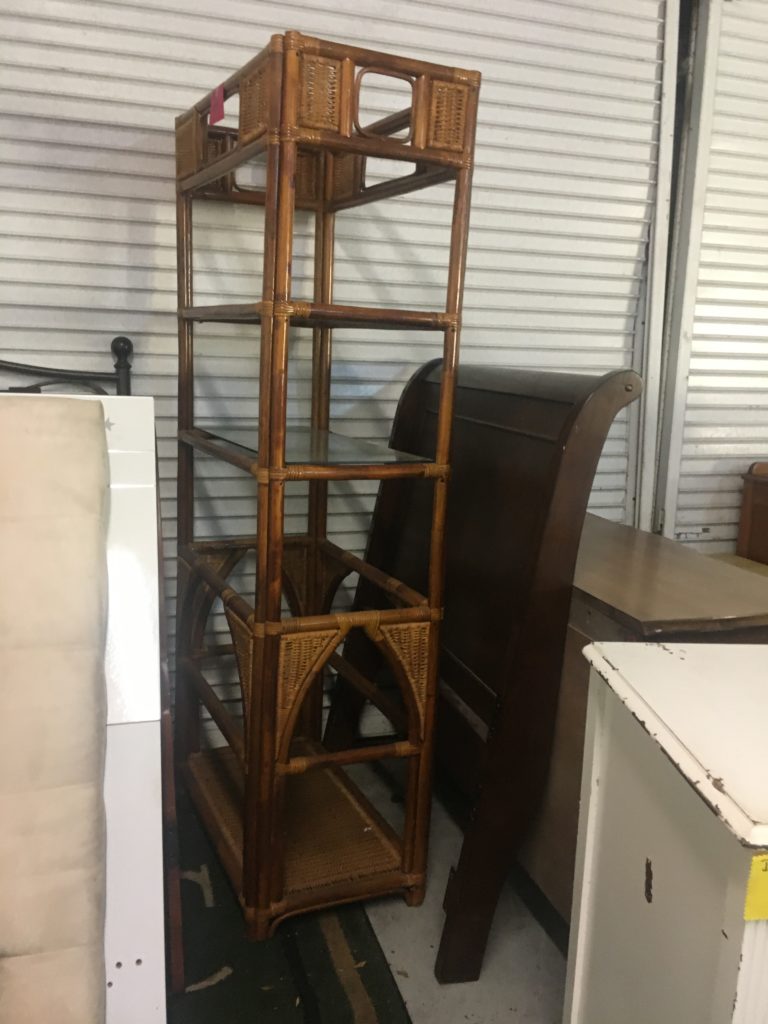
Is this a thrift store or a 2020 Urban Outfitters? I couldn’t help but day dream about styling a whole room around the big rattan etagere on the right.

Again, more and more rattan furniture! A little reupholstery could make these look totally 2020. Rattan, along with other casual, natural furniture materials, are back and on trend.
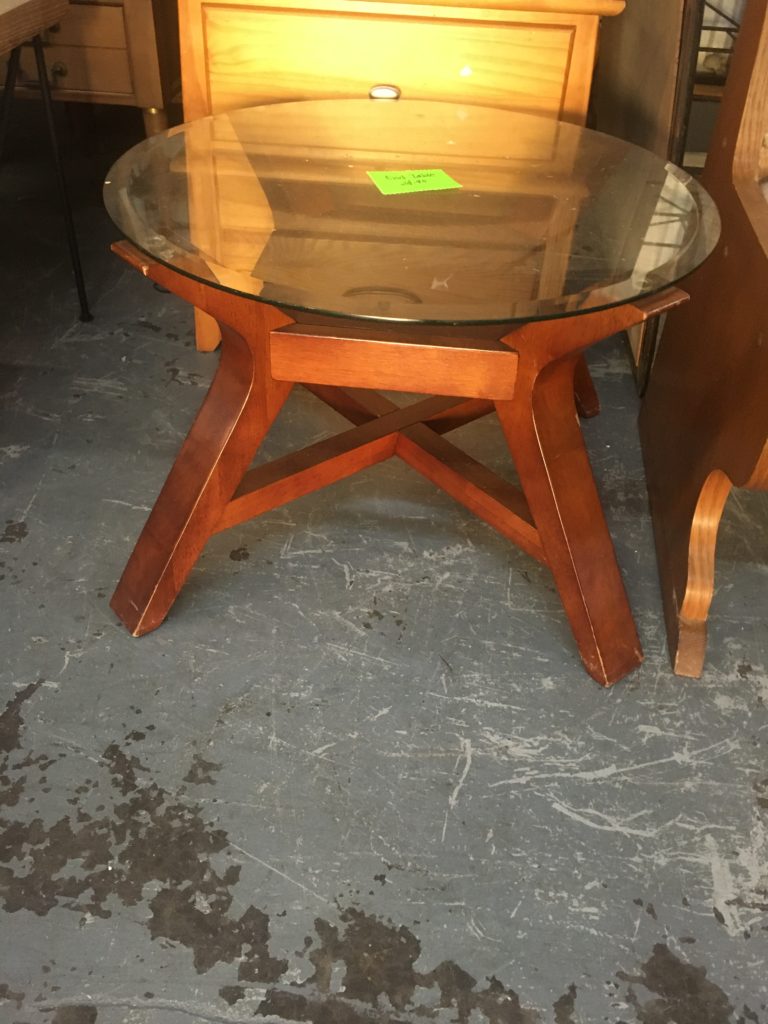
I like the lines of this mid-century side table. With a dark walnut stain it could look like it’s from West Elm in 2020, but with a bright paint color it could look like 1960s Palm Springs.
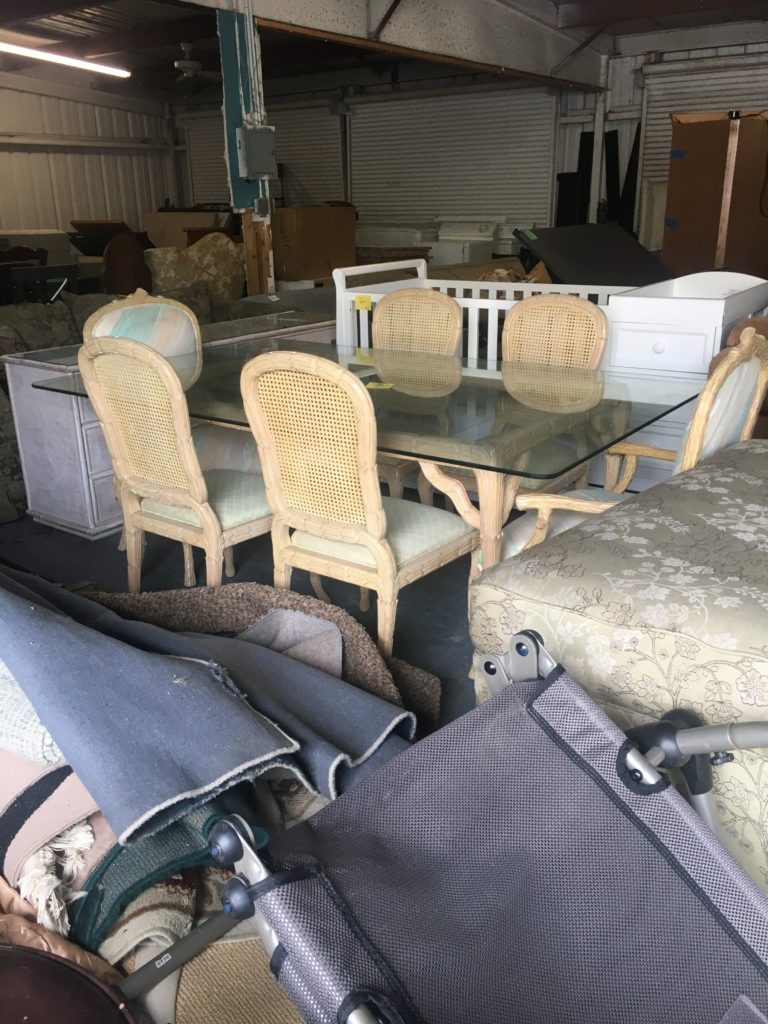
This table and chairs set appears to be vintage and high quality. My idea was to paint the chairs and table base black and add new upholstery. It could be chic, black and white 80s moment.
What I Bought!
So onto the next part – what I actually bought on these adventures! As mentioned previously, I was thrift shopping for new wall art, a lamp base, and outdoor furniture. And luckily, I was able to find a few of these items!
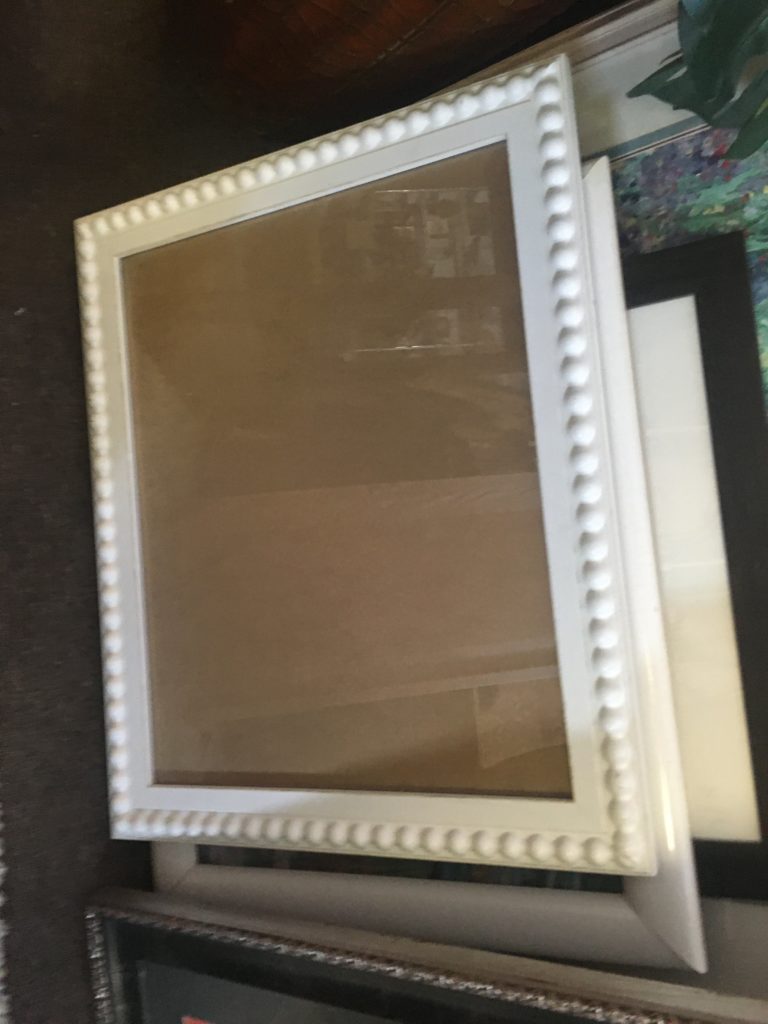
I found this frame for $10 that I can use to frame a large art piece for our living room. The white color should be a nice contrast against our slate blue walls and has a subtle, farmhouse feel. (Because even though I straight up live on a farm, I still like it with my modern and colorful spin.) This was found at the Bargain Barn.
I’d envisioned a narrow shelf piece that we can hang above our Keurig for a little coffee station. But I totally forgot about it when I went thrift shopping. Then at Goodwill, I spotted this shelf in one of the bins for $3! It even has the fixtures on it to mount on the wall! More DIY on this particular piece will be coming in the near future, so be sure to subscribe so you don’t miss it!
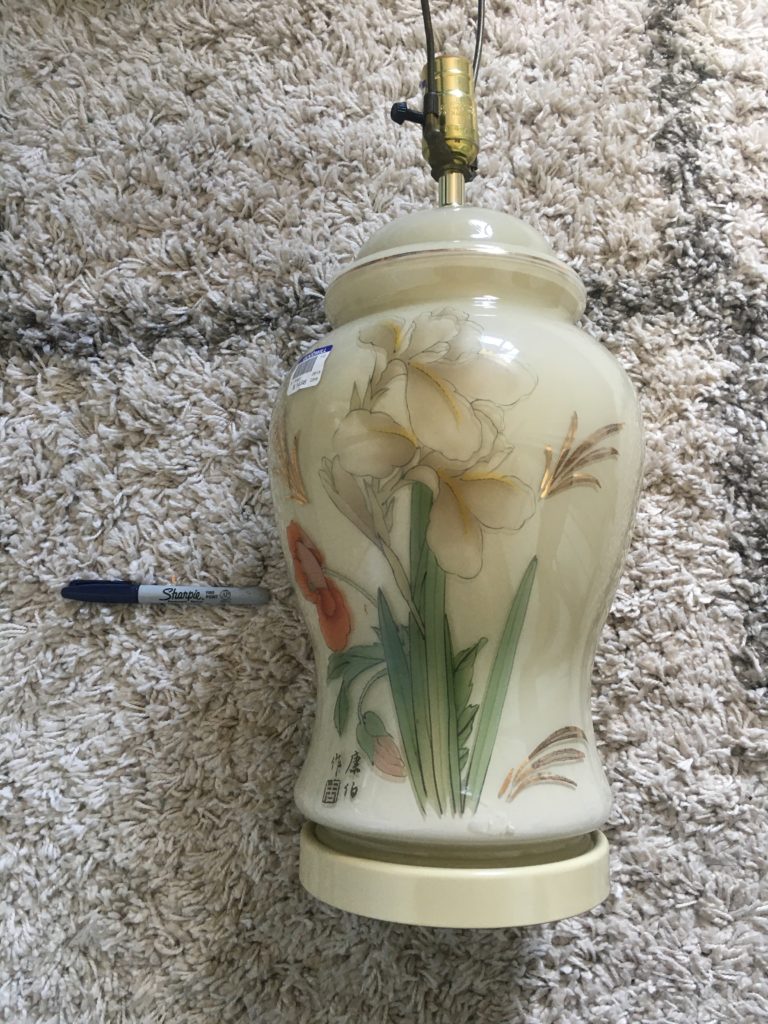
Last but not least, I found this vintage beauty at Goodwill. (Sharpie for scale reference.) What’s funny is that this was hiding behind the lamps I mentioned were overpriced. If you remember from my epic 2020 DIY Recap, we needed a new base to replace the one that broke. And you better believe this means there’s another big DIY happening here in the coming weeks!
Does that leave you with a bit of a cliff hanger? 🙂 Are you inspired to go and thrift shop for your home this weekend? I hope you enjoyed this thrift shop with me adventure. Let me know what you find at your local thrift store in the comments below.
And hey, if you’re liking any of my ideas and want to make something similar happen in your space, I’d love to help! I’m currently accepting projects for summer and can do consultations in-person or virtually. Drop me a note here, and we’ll get started. Thank you!
About Kaitlyn Loos
Kaitlyn Loos [loh-s] is one of the newest designers for interiors and events in the Tampa, Ocala, and Gainesville area. She brings over seven years of graphic design, project management, and event planning experience to create amazing spaces and experiences for her clients. She is one of the only interior design companies in her area who offers modern, fresh, pattern and color-savvy designs. From styling an event to designing an entire home, Kaitlyn Loos Design is a full service company that delivers style for nearly any investment level. She also enjoys sharing her ideas and projects through her new blog which reaches over 325 people monthly.
For more information about Kaitlyn, check out: About Kaitlyn: Interior Design, and About Kaitlyn: Event Planning.
You can also subscribe to the blog and contact Kaitlyn directly here.
Disclaimer: All of my DIY blog content is for informational and entertainment purposes only. I share what works for me in my home, but you should consult with professionals/landlords before taking on any construction projects. My blog does not constitute interior design advice for readers. I am not liable or responsible for any damages resulting from or related to your use of this information.
Reading time: 10 min
#Outdoorliving is a big trend right now, especially with the coronavirus prompting us to stay home a bit more in 2020. Summer in Florida can be a bit debatable with “feels like” temperatures encroaching 100+ degrees and frequent thunderstorms. But we’re incredibly lucky in this state to have affordable property prices and a climate that welcomes indoor/outdoor living year round. While you might not be ready for an extreme landscape renovation, or starting over with new outdoor furniture, this is the year you’ll want to enjoy it. So I’m here to meet you in the middle! I’m going to share over 25 ideas to step up your outdoor living game without starting from scratch.
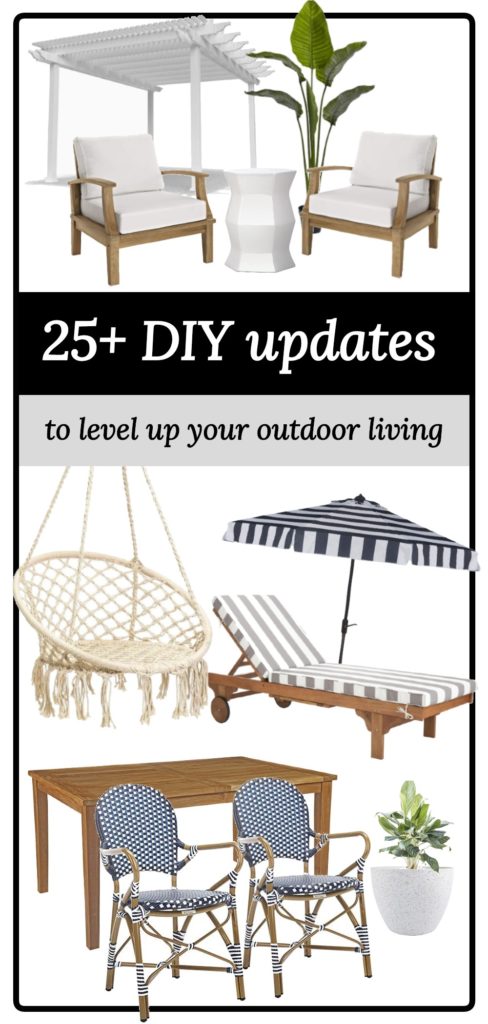
White and teak cushion chairs $471 each | White pergola $600
White ceramic side table $85 | Faux birds of paradise palm plant $84
Natural round swing $54 | Striped teak lounge chair with attached side table $343
Black and white striped outdoor umbrella $142 | Teak Wood Dining Table $567
Blue & White Bistro Outdoor Chair – $194 each
White speckled modern large planter pot $46
CAUTION: If you live with a partner, roommate or spouse, please prepare them that this article and the images presented may trigger those prone to DIY makeover projects. Side effects include: Amazon packages you are unable lift on your own, finding something new to paint every weekend for a month, and finding any excuse to host a barbecue. Please consider this fair warning before continuing to read the 25 ideas to step up your outdoor living game.
Tip #1: Simplify Your Outdoor Color Palette
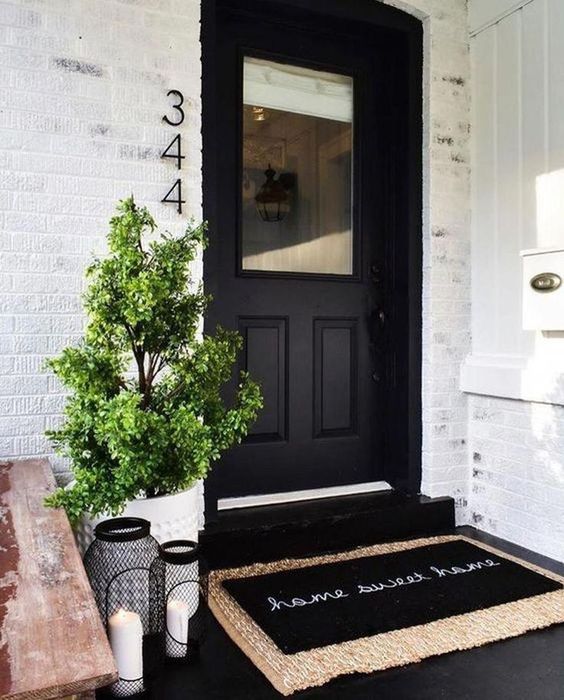
Inspired by the look:
Black outdoor welcome mat $25 | Jute rug (to layer) $35
Modern house numbers (various prices and finishes) | Textured white ceramic planters $29
Modern black candle lantern votive $27
A lot of people don’t treat their outdoor living space with the same rules as the indoors – and that’s okay. You may not have spent as much time researching the furniture, artwork, lighting, etc. as you would for your interior. Throughout this article I’m sharing multiple ideas to address and improve the overall design of your outdoor space. Let’s start with color since that is one of the quickest ways to step up your style game!
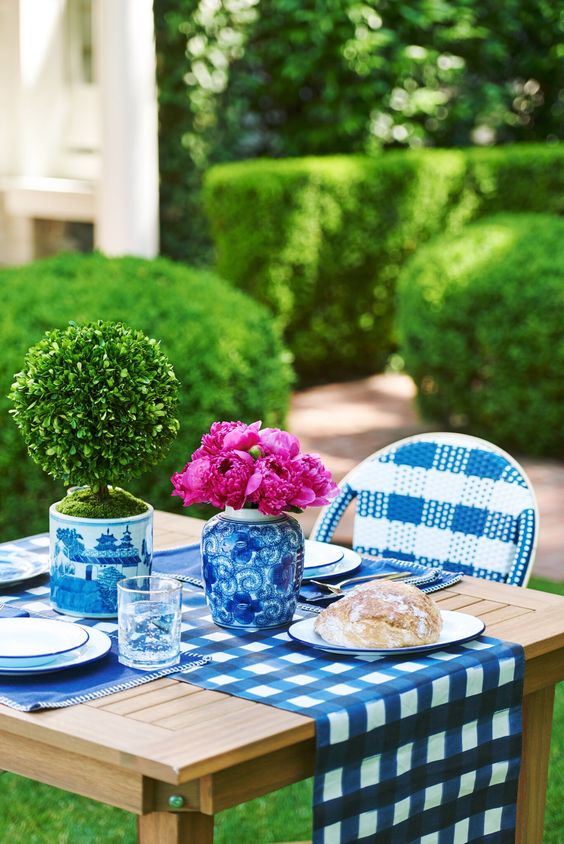
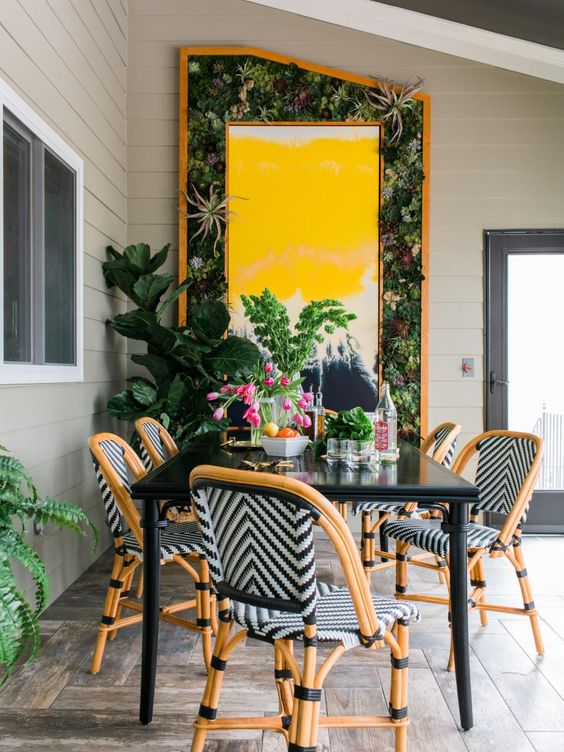
Inspired by the look:
Blue gingham indoor/outdoor table runner: $17 | Teak Wood Dining Table $567
Blue & White Bistro Outdoor Chair – $199 each
Chinoiserie Inspired Blue Ceramics – Large $23 Small $16
When you walk into a new home, you’re surrounded usually by light, neutral walls on 3-4 sides of you. Next, you move in and carefully add furniture and decor to color your space. When you go outside, your “blank canvas” is usually hardly blank at all. You may have beautiful trees, colorful botanicals, a bright aqua pool, kelly green grass, and some blue sky! What’s not to LOVE about that? I find that the trend now for outdoor living is to further emphasize the natural colors occurring in your outdoor space.
A great way to embrace this trend is to create contrast by limiting added color from the furniture and decor items. But this doesn’t mean your decor needs to be bland and boring! This can mean picking a monochromatic accent color like the blue table scheme above. Or this can mean playing more with pattern and texture in a neutral color palette like the example below.
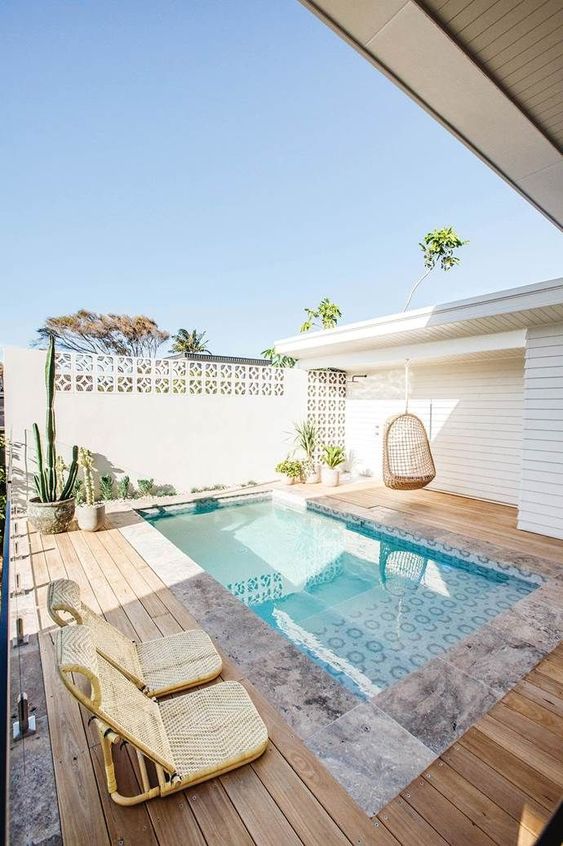
Inspired by the look:
Natural round swing $54 | Rattan folding beach chair $220 each
Alternative lounge chair option $246 each | White speckled modern large planter pot $46
By selecting a small, cohesive palette, you allow your space to feel balanced with nature. Once you have a color palette in mind, I recommend removing or repainting anything that doesn’t fall in with this plan. Secondly, you might want to pick up a can or two of outdoor spray paint here to try to give new life to some of your old pieces. A simplified color palette is such a timeless trend in general, and you’ll see this exemplified in many other outdoor idea photos shared throughout this article.
Tip #2: Create a Space Plan
If you’re reading this, like me, you’ve probably watched your fair share of HGTV in the past. So if you have a large backyard space, treat it like your fave designers would with a giant room. Create zones!
My mind instantly wants to visualize your backyard space as if it could host a party at a moment’s notice. This is typically when people are thinking of new ideas for their outdoor living look and feel. What areas would you want to create for a party? How many people would you typically host?
I love this example above from Studio McGee where they’ve created a small dining area and a good-sized conversation zone surrounding an outdoor fireplace. The sleek, modern furniture in muted tones lets the green, natural elements pop because it creates contrast.
If you have the space for it, I would start with a dining table, outdoor group conversation area, and one separate small conversation area. Space them out in a way that you can picture people moving through the space at a party. Play up your focal points and make sure all seating is actually comfortable and practical for the space.
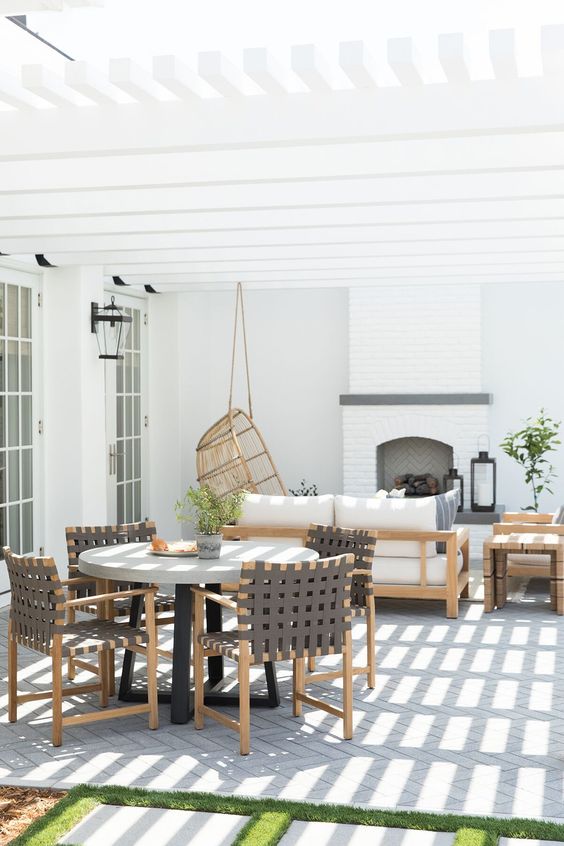
Inspired by the look:
White and teak cushion chairs $549 each | White pergola $600
Black outdoor throw pillow set of 4 $70
Then make sure some of these things meet what your family could use day to day. Would you read outside more if you had a beautiful shaded pergola ($600)? Do you like to grill out on the weekends? (Lots of grilling products linked in my recent Father’s Day Gift Guide) Would you invite a friend over to hang by the pool with a glass of rosé if you had a set of chic loungers?

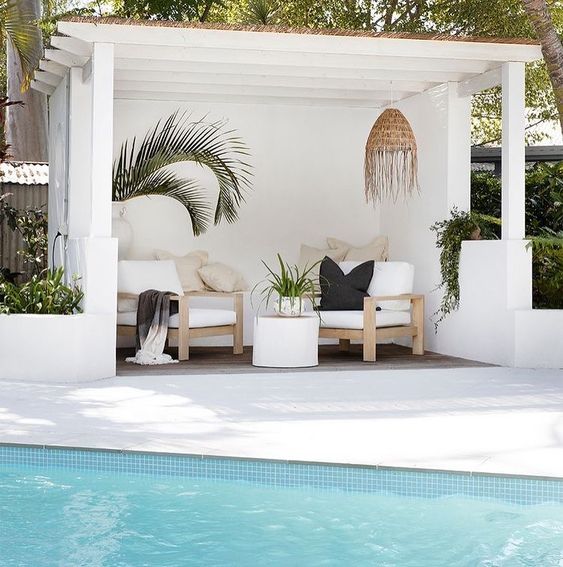
Inspired by the look:
White/wood curved lounge chairs $220 each
Gray outdoor lumbar pillows $29 each | White ceramic side table $85
Tip #3: Make Room for Play
In the spirit of parties, I’m a huge fan of having games or an activity for guests. While you probably don’t want your whole yard to look like a game room, adding 1-2 can create engaging moments for family or party time. A game or activity is also a chance to express your family’s personality or traditions.
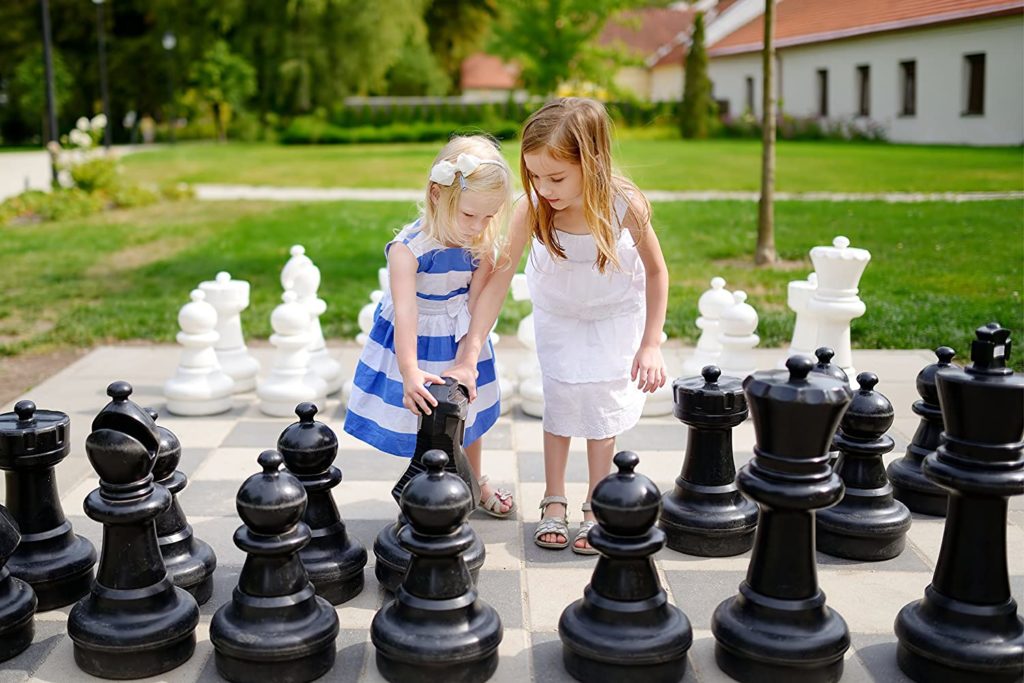
A swimming pool certainly counts for this, as would a fire pit ($76). Maybe you consider investing in a slide ($$$) addition to your pool or create a new seating area (new Adirondack folding chairs $75) around the firepit? A dartboard ($18) is a classic game that only requires an open wall and decent lighting. Some other game ideas are a DIY shuffleboard kit ($50), a giant set of chess ($359), cornhole ($56) or oversized Jenga-style blocks ($55). You may notice I chose options that are not colorful so you have the option to paint so it can be in your designated palette. 🙂
Inflatable outdoor movie screens ($160) are also an awesome option to use for kid sleepover parties, holiday parties, or family campouts in your backyard.
Tip #4: Utilize Repetition
Inspired by the look:
Terra cotta plant pots – set of 6 $27| Striped teak lounge chair with attached side table $343 each
48 ft solar string lights $60
One of my favorite design elements to make a big impact on a space at any budget level is repetition. This is because you’re not necessarily having to spend a lot of money on ONE big decor piece. I saw this outdoor space get made over on the new Genevieve Gorder show on Netflix “Stay Here” and I’m obsessed with the terra cotta cactus wall! As a seasoned designer, Genevieve also played with repetition with the stripe pattern fabrics and the plants along the walkway.
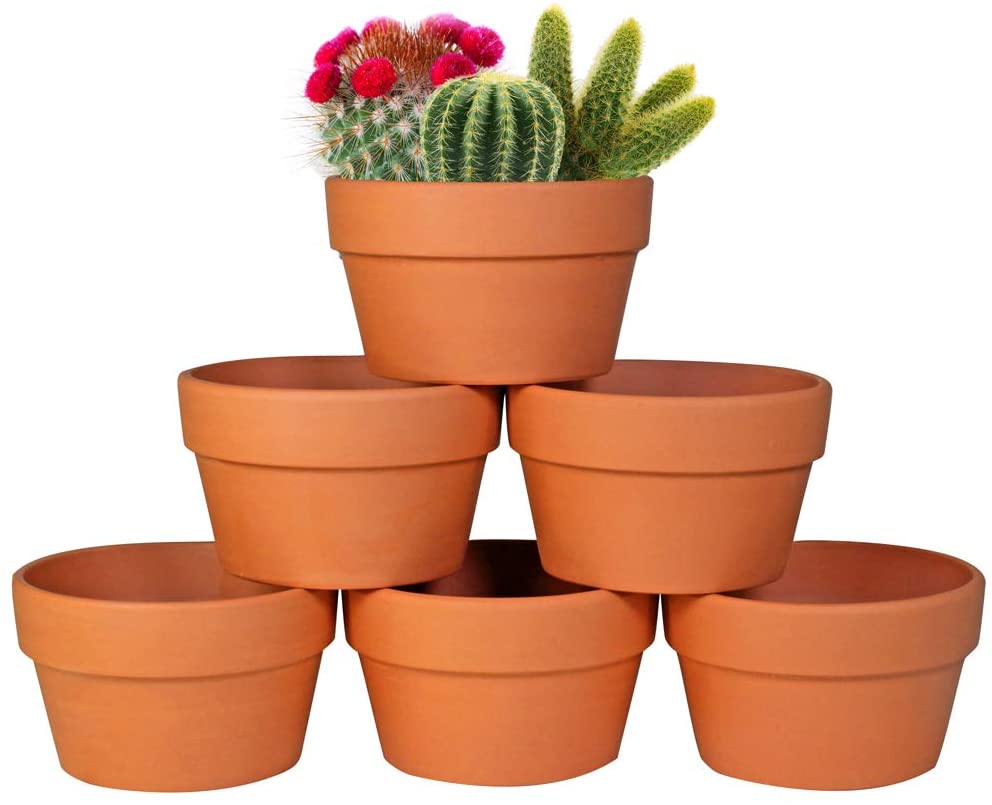
You can recreate a similar look with a set of same-size terra cotta pots like these and plants from your local home improvement store. You can also grab a set of these 48 ft solar string lights ($60) and a striped teak lounge chair with attached side table ($343 each) inspired by this space as well.
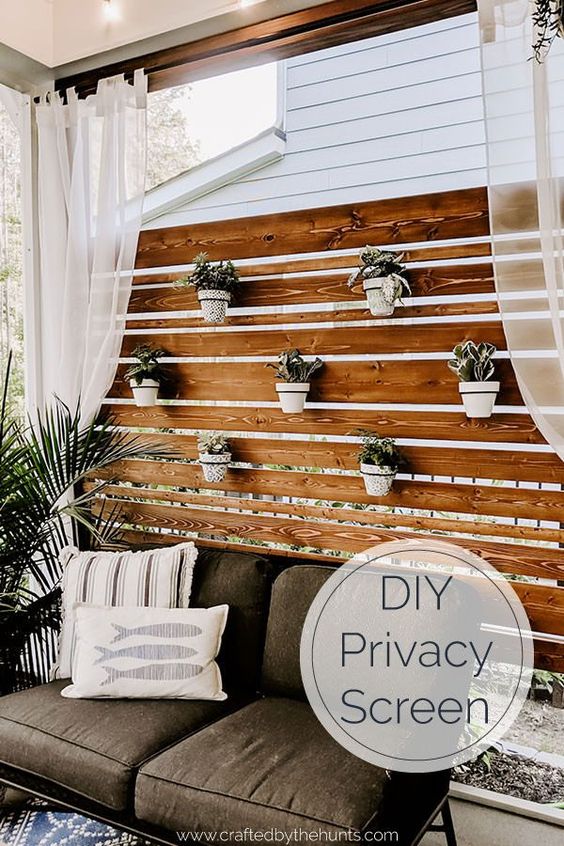
Image source: Pinterest/Crafted by the Hunts
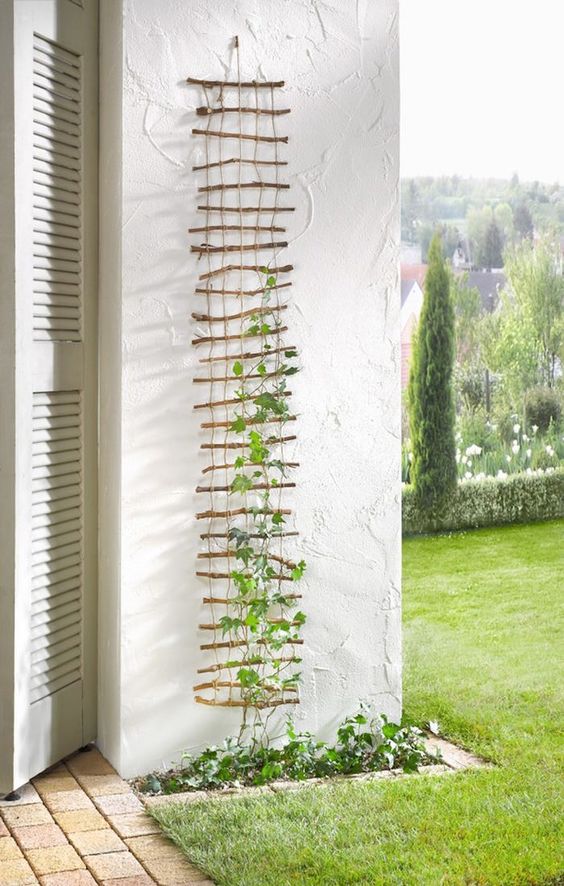
Tip #5: Take Greenery to the Walls
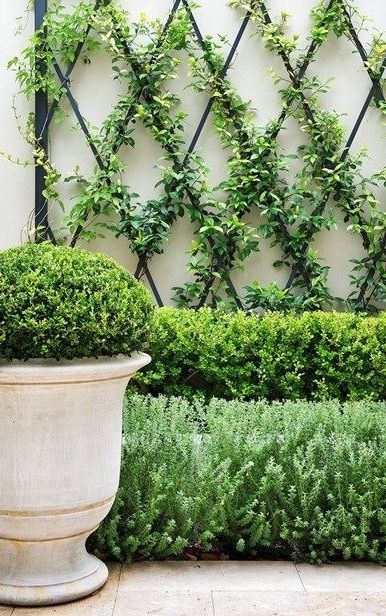
Create this look with a black plant box/trellis combination $70
Living green walls are a newer trend making waves in 2020 that I’m seeing pop up in luxury hotel lobbies, new bars and restaurants, and design publications. So why not turn your back patio into the new neighborhood hot spot and create your own green wall? You could do this many ways with a wall herb garden planter ($15), a vine trellis/plant box combo ($70), or creating your own decorative planter.
The key is to treat the plants as the artwork itself. In my professional opinion, those metal decorative outdoor wall pieces are out and green walls are in.

Tip #6: Create an Outdoor Dining Space
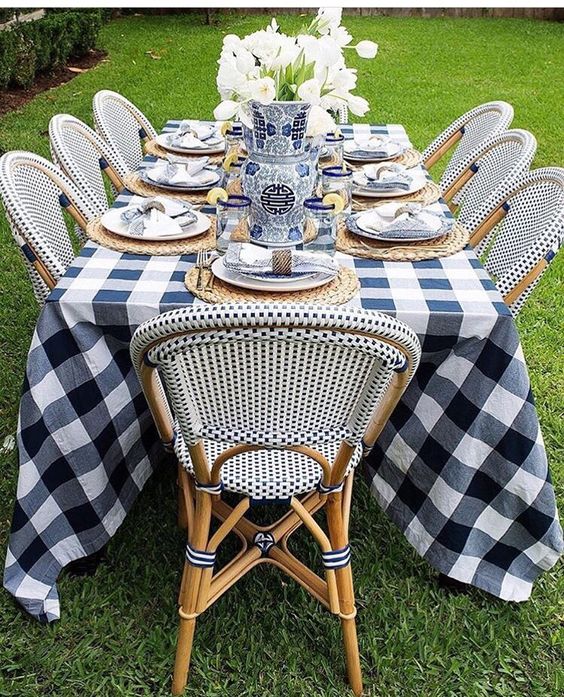
Inspired by the look:
Gingham table cloth $31 | Blue & White Bistro Outdoor Chair – $199 each
Jute chargers – set of 4 $27 | Chinoiserie Inspired Blue Ceramics – Large $23 Small $16
I think there’s something special about having an outdoor dining setup that is ready within minutes of a beautiful weather meal moment. For some, an outdoor dining set might be the first thing you think of for outdoor living, but if it’s not, let me tell you, it’s awesome.
You know those moments when you find yourself at the host stand of a restaurant and they ask if you’d like to sit outside and everything in you says YES? You might not wake up that day thinking anything of the weather, but when it’s nice out, it’s a no-brainer. If you have the space and the means to create this kind of experience in your backyard, I hope you do! All you really need is an outdoor table, outdoor chairs, and some good lighting. When the weather is nice, you can wipe the table down and serve!
If your style is a little more extra, then you can create a beautiful table setting like the example above, and store the table cloth, chargers, and centerpieces in one box for quick access. So say hello to fast outdoor dining in style!
Tip #7: Address the Climate
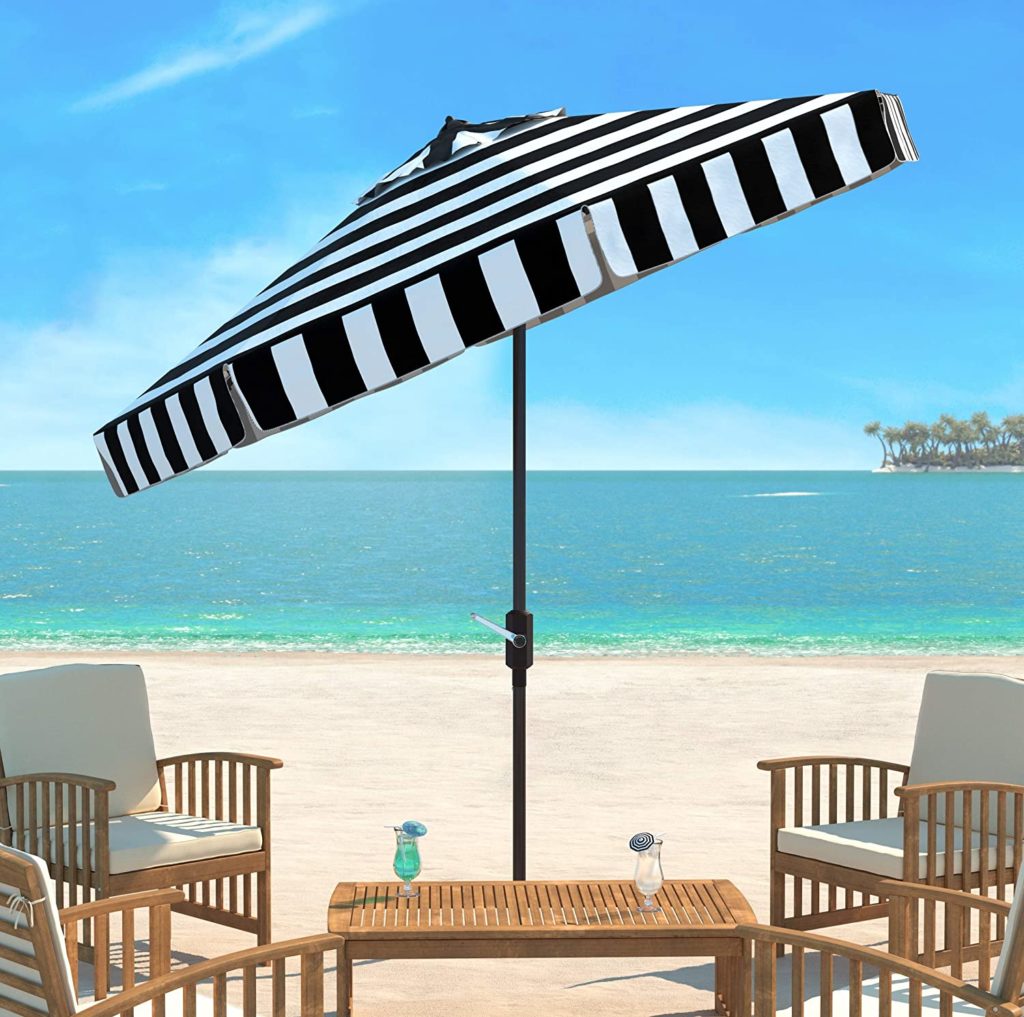
Another trick that you can steal from restaurants is to add a level of climate control to your outdoor spaces by adding a ceiling fan ($109), shading umbrella ($86) or a standing heater ($165) as needed. You’d be surprised how additions like these seem to extend the life of your outdoor space because of their impact on the overall temperature.
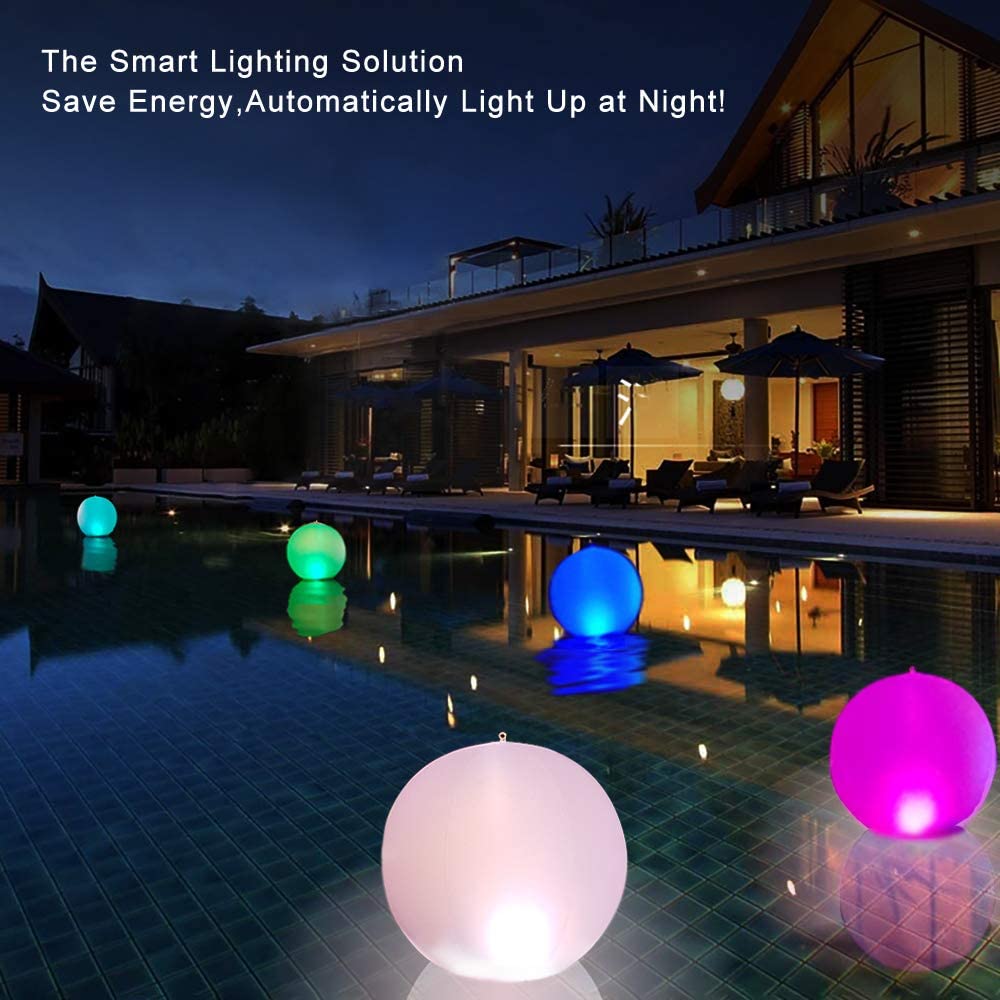
Tip #8: Create Ambience with Lighting

Inspired by the look:
Black outdoor wall sconce – set of 2 $70
Black outdoor planter set (smaller than pic above) – set of 3 $128
Outdoor lighting creates a very inviting atmosphere for your family and guests – and there’s so much new you can do with it! One idea is to update your outdoor fixtures to something more modern like the example above which shows off these beautiful planters at night. You can use 48 ft solar string lights ($60) like these above your pool or dining area. You can also find solar accent lights ($37 for set of 2) for your garden or living green wall areas. And who doesn’t love some rainbow solar pool lights ($32 for set of 2) to add a little whimsy? Solar powered lights and outdoor living go together like PB&J because they’re earth-conscious and typically low maintenance.
Tip #9: Consider Adding Color or Pattern to the Floor
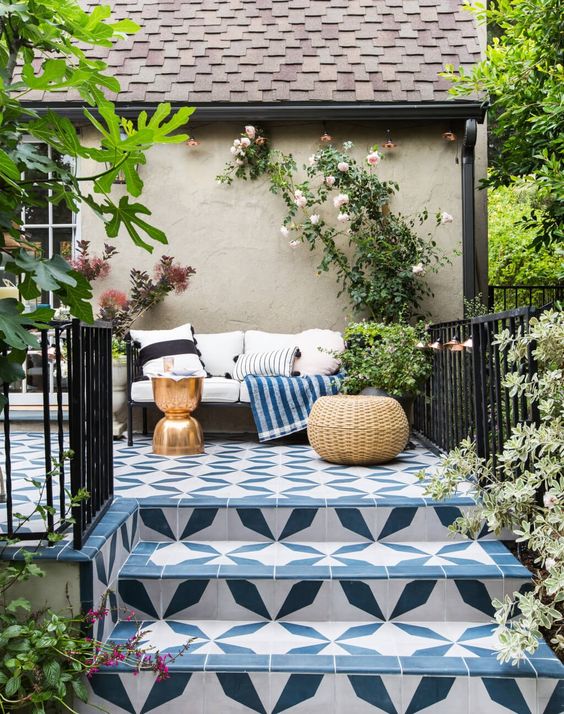
While outdoor rugs are a nice addition to create zones in your outdoor space and add a pop of color or pattern, many of them don’t hold up a long time. Whether this has to do more with maintenance or style, I’m noticing an increase in painted/patterned tiles and pavers. These examples should stand the test of time a bit longer than a rug if you are in an area with a lot of rain/humidity like Florida.
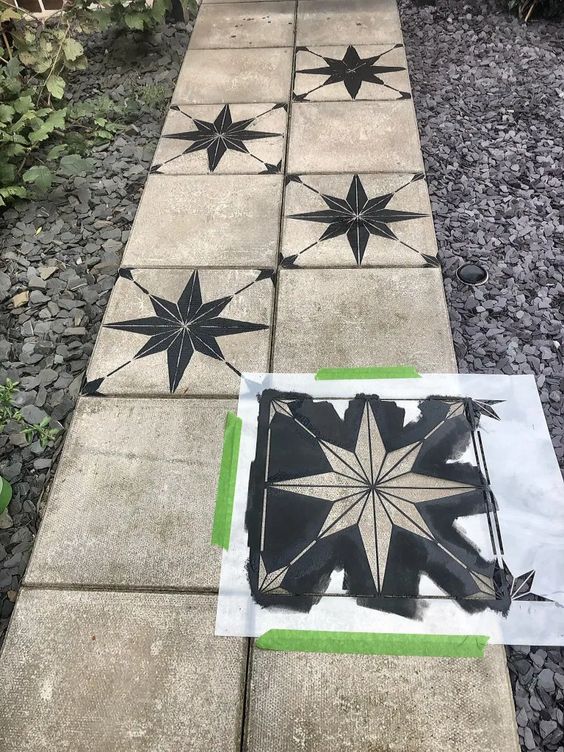
Inspired by the look:
Star tile stencil – various sizes – $24
You can easily update your existing outdoor tile or stones with a Mediterranean inspired stencil ($21) or star tile stencil ($24) or many other various pattern and size options. A little DIY time here can go a long way to stepping up your outdoor game because it adds unlimited style for the cost of paint and a stencil. No pun intended! 🙂
Tip #10: Create a Feature Focal Point
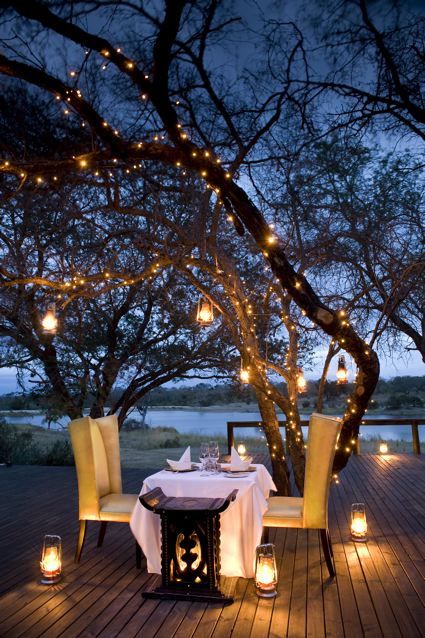
Image source: Pinterest
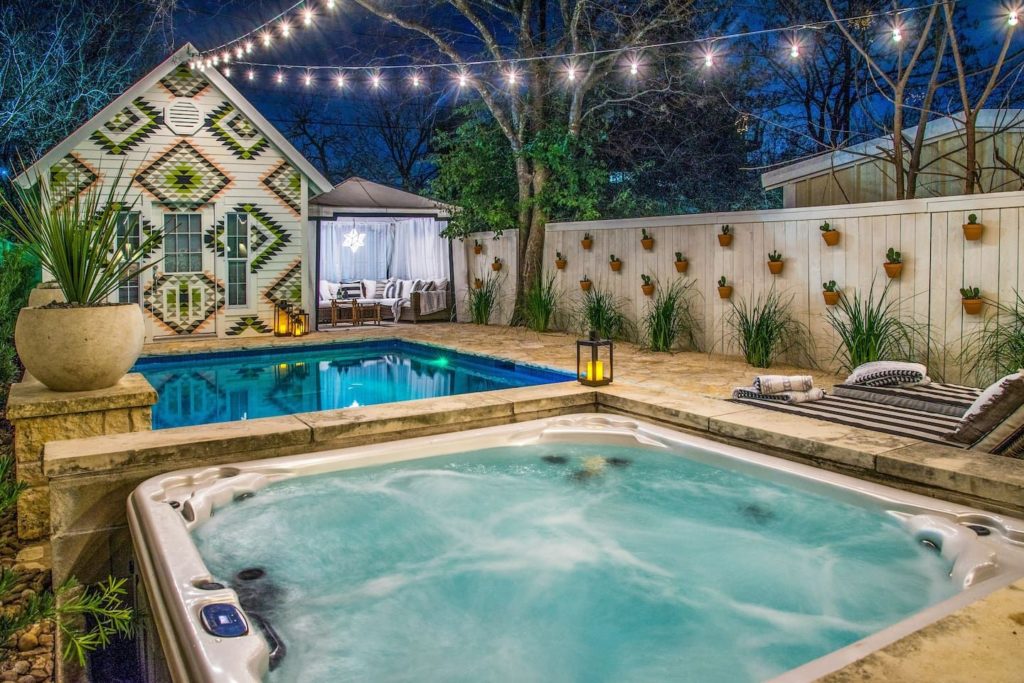
Much like a beautiful fireplace in a living room, your outdoor area will feel more designed if it has a focal point. A focal point is something that the eye is first drawn to when viewing a space. It could even BE an outdoor fireplace or fire pit. The focal point is often at the center view or it can be the biggest/tallest/widest thing in your landscaping. You may already one, and if so, it can be fun to play it up. I love how the example below takes an outdoor fire pit to the next level with a hexagon of swings. And Pinterest makes everything look so easy!
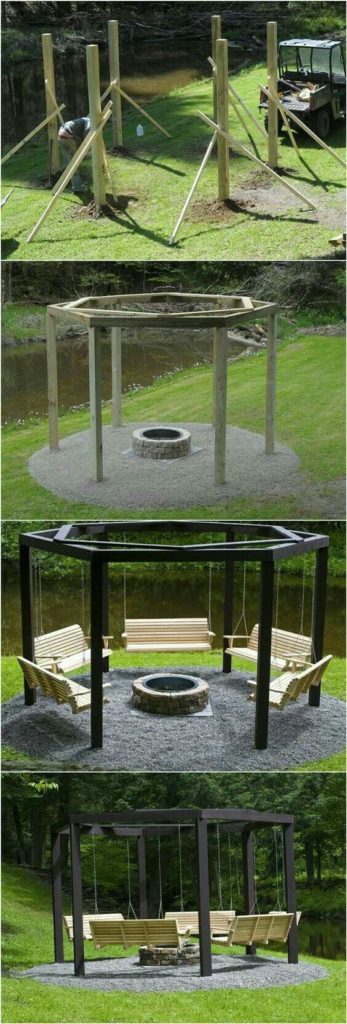
The focal point could be the beautiful view itself, so the best way to play that up is to create seating areas that frame and provide opportunities for your family or guests to enjoy it. It’s also typically a good photo taking space.
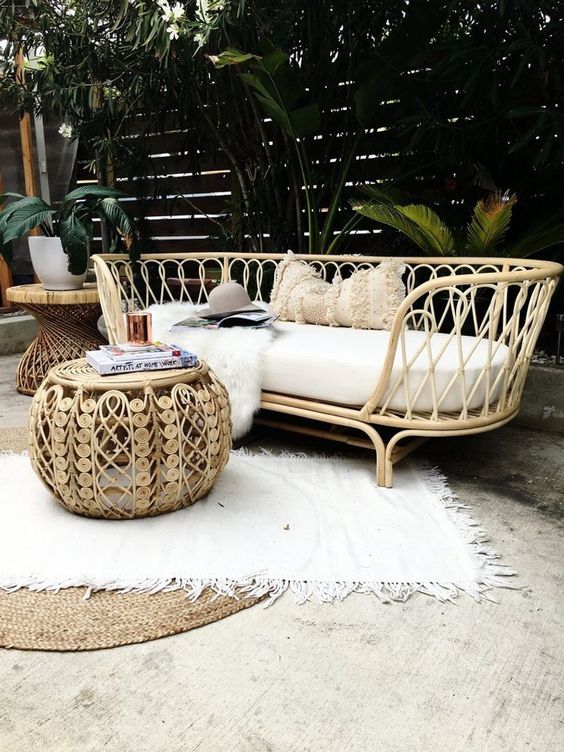
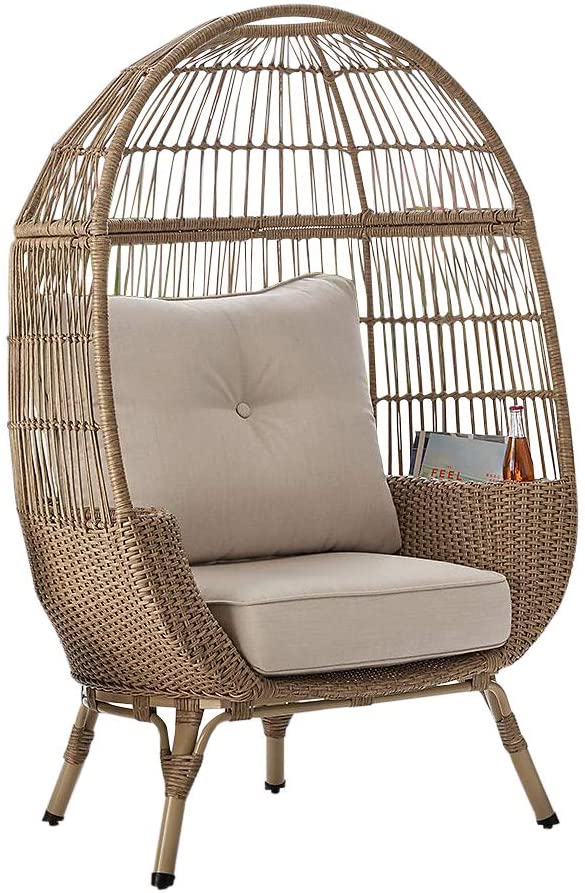
You can also create your own focal point with a few modern pieces that express your style placed in a key area. Love the rattan sofa and bold egg chair for this purpose! You know your guests are going to want to snap their Instagram pictures here!
Oh my gosh, this feels like one of my longest articles yet. There’s just SO much you can do to extend your living space outside. Like I mentioned earlier, you don’t need to completely start from scratch and redo your space. The idea is to assess your own space and take even just one or two of my 25 ideas or tips to implement and really step up your outdoor living game.
Let me know in the comments which ideas were your favorites. And be sure to tag me on Instagram so I can see your finished projects!
About Kaitlyn Loos
Kaitlyn Loos [loh-s] is a virtual e-designer for interiors and organizing. She helps busy moms with young families create dreamy spaces that function for their unique needs. She notably developed the Decluttering Personality Type quiz which has helped hundreds of people break down mental barriers about clutter. Kaitlyn loves to collaborate with clients to bring modern, fresh, and color-savvy design into their homes. Kaitlyn Loos Design delivers style for nearly any investment level. She also enjoys sharing her ideas and projects through her blog and discussing hot design topics on Instagram live.
Kaitlyn is located in the west-central Florida area (Tampa, Ocala, Gainesville, and everywhere in between) with availability for select in-person projects for 2021.
You can also subscribe to the blog and contact Kaitlyn directly here.
Disclaimer: a small percentage of purchases from select links will benefit me via an affiliate program. I appreciate anyone who wants to support my blog by shopping the products, but there is no obligation to buy.
Reading time: 13 min
It’s almost that back to school time of year! And this is another topic on my blog post bucket list I’m so excited to do. College bound this summer or fall? Those weeks before leaving for college are so fun to prepare ideas for your space! I’ve got 40 decor ideas to transform your dorm room. You’ll never want to leave campus again!
For me, my college years were some of the best of my life. As someone who spent the majority of my time in college living in dorm rooms, I learned a lot about what works and what doesn’t. It’s such a great time for fresh high school graduates to get a taste of freedom and personalize a new space of their own. However, it’s so easy to go overboard and buy things that are gimmicky or just won’t work.
But I’ve got a ton of ideas from my personal experience that you can steal from my book! This is not just a list of cute decor items; this is how you take your space to the next level.

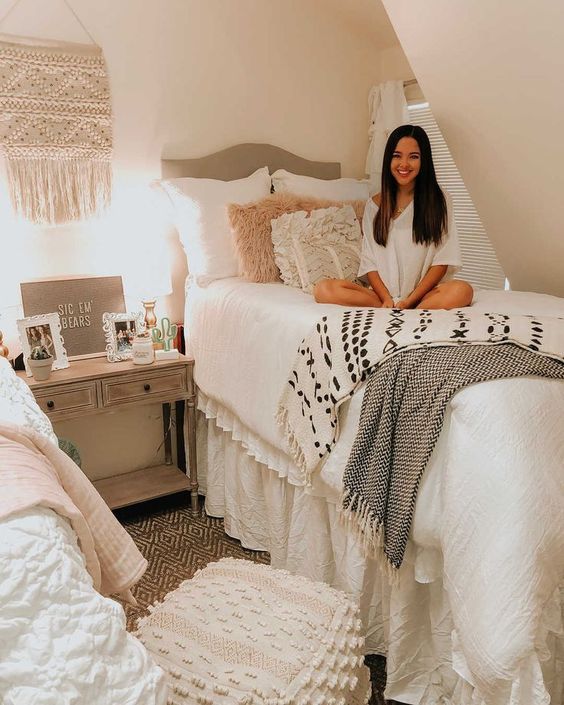
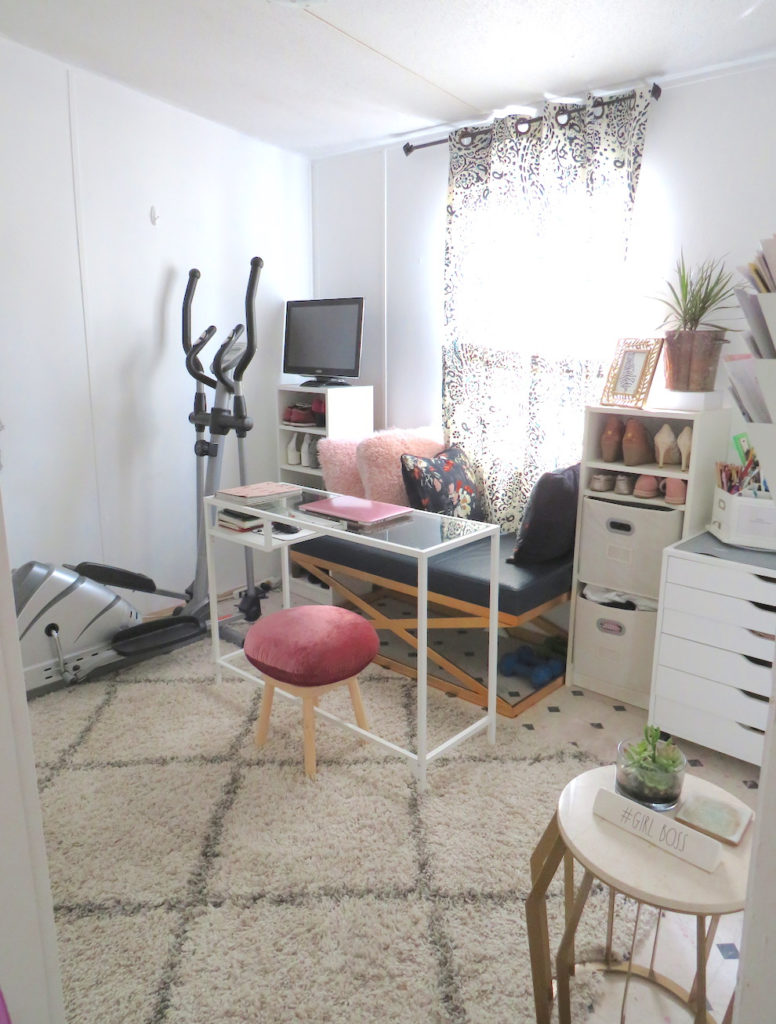
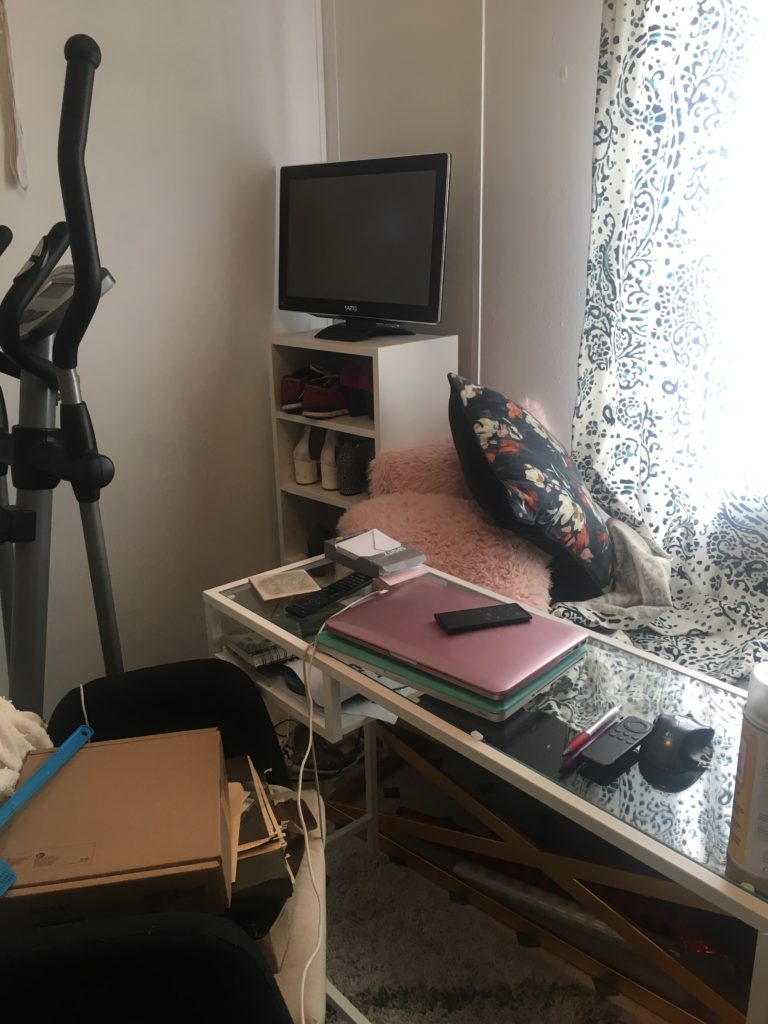
Tip #1: Create a Stylish, Cozy Corner
Dorm rooms are often equipped with classroom-style florescent lighting, blah furniture, and minimal storage. So the fastest way to add a splash of personality is to bring in elements to intentionally warm up the space to feel more like a home. And what’s more homey than a cozy reading corner?
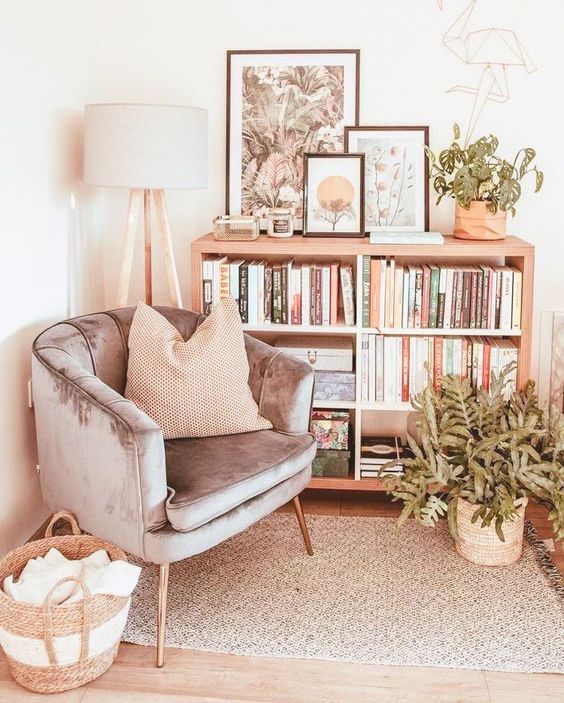
The image here show here shows multiple tactics you can borrow to make a small, corner space feel inviting. Create a similar space with these products.
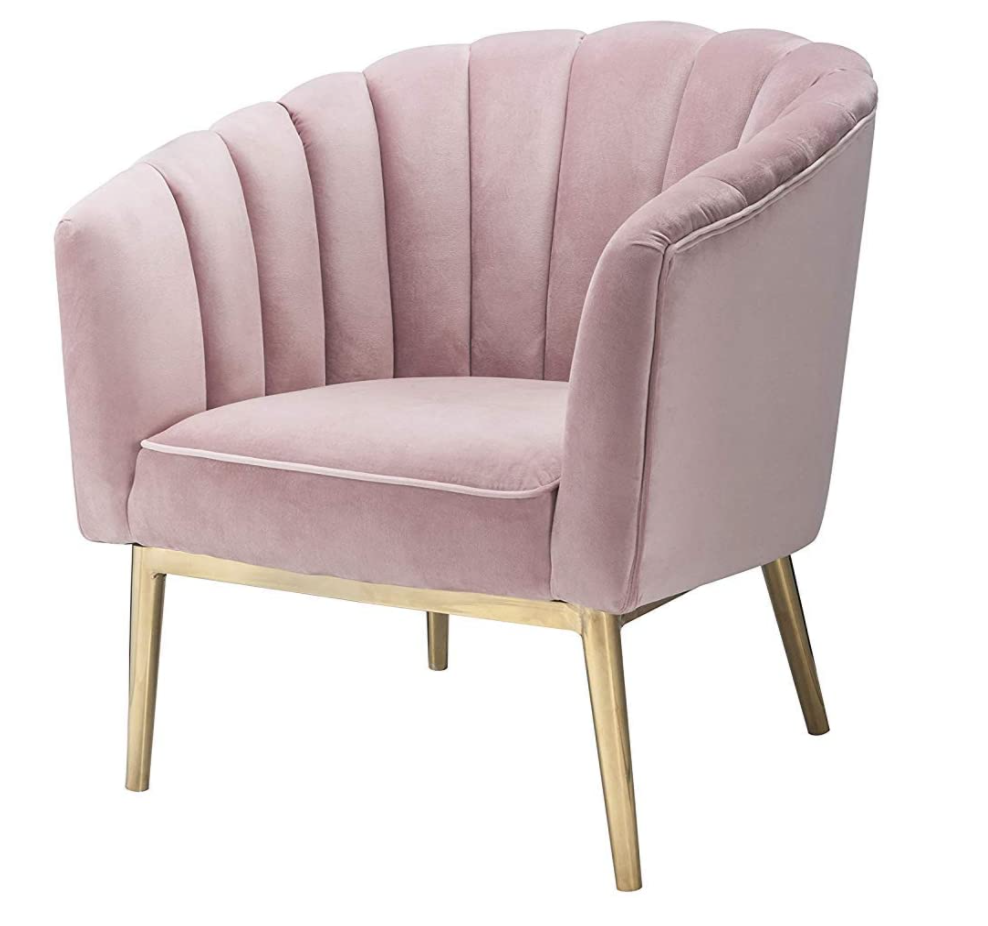
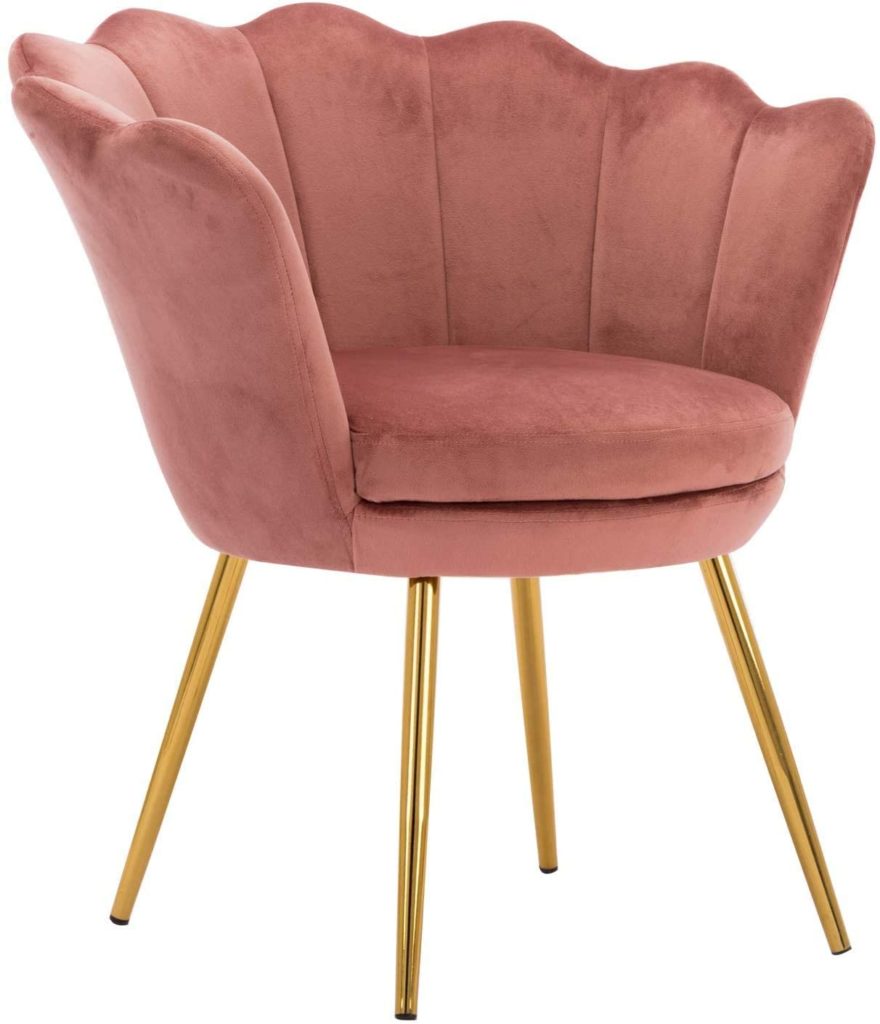
A comfortable, stylish chair adds instant style and creates an inviting space for reading or guests. A lot of times, popular college shopping stores like Target, Walmart, and Bed Bath & Beyond will have chairs in the back-to-school section that are often cheap or uncomfortable. My recommendation is to avoid these and get something that you’ll totally enjoy for years.
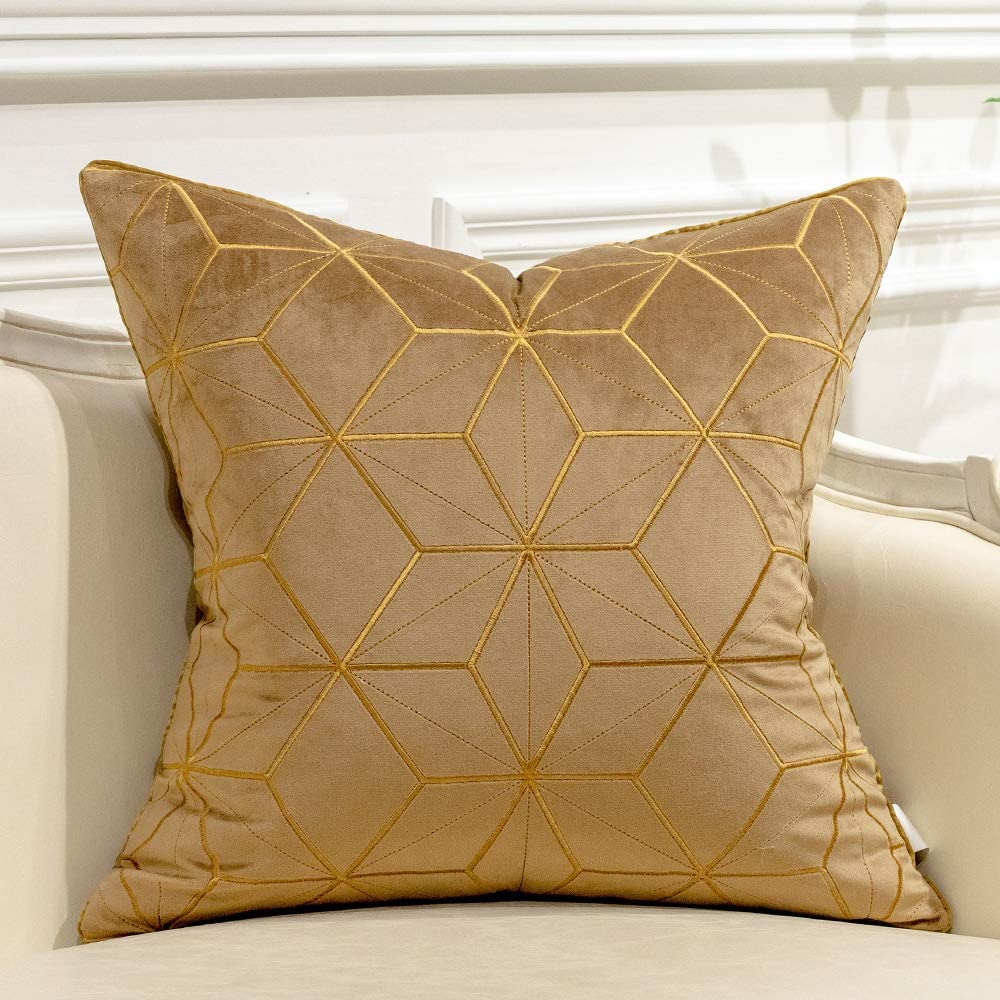
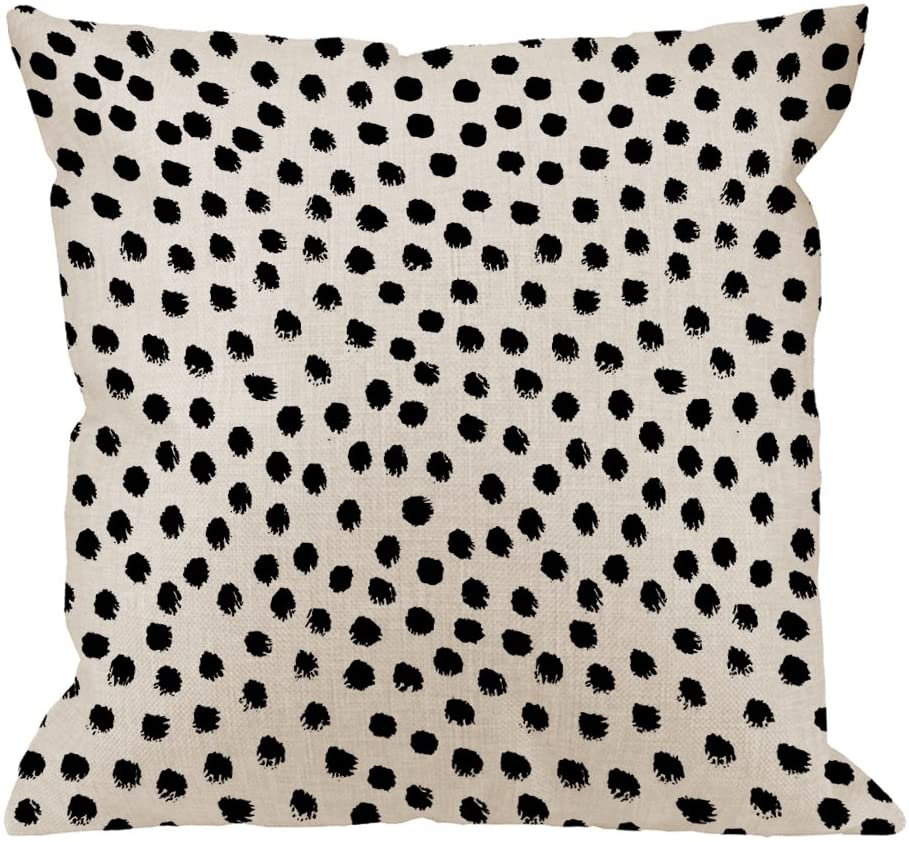
You can top your adorable new chair with a fun throw pillow, like this geometric gold velvet one.
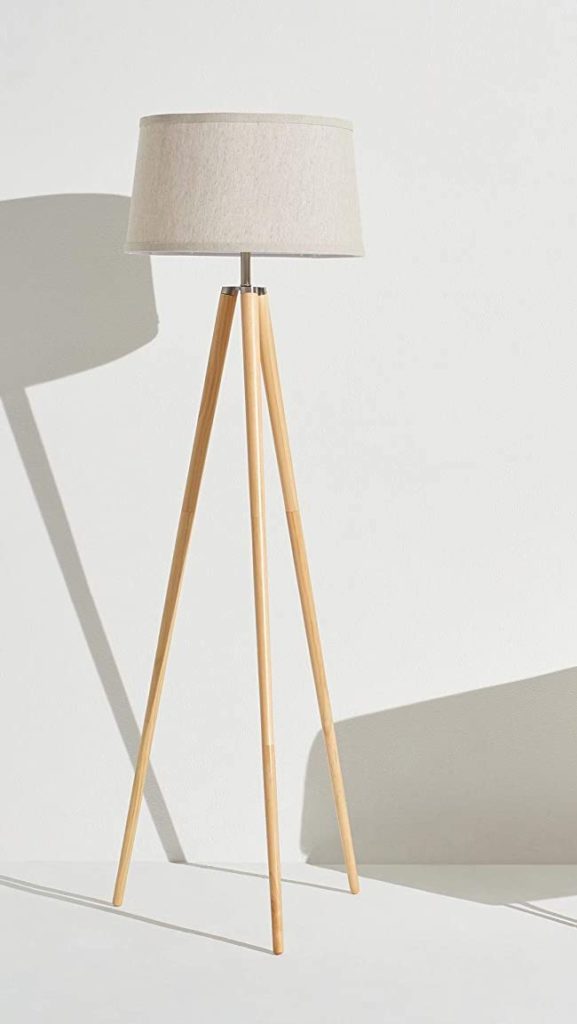
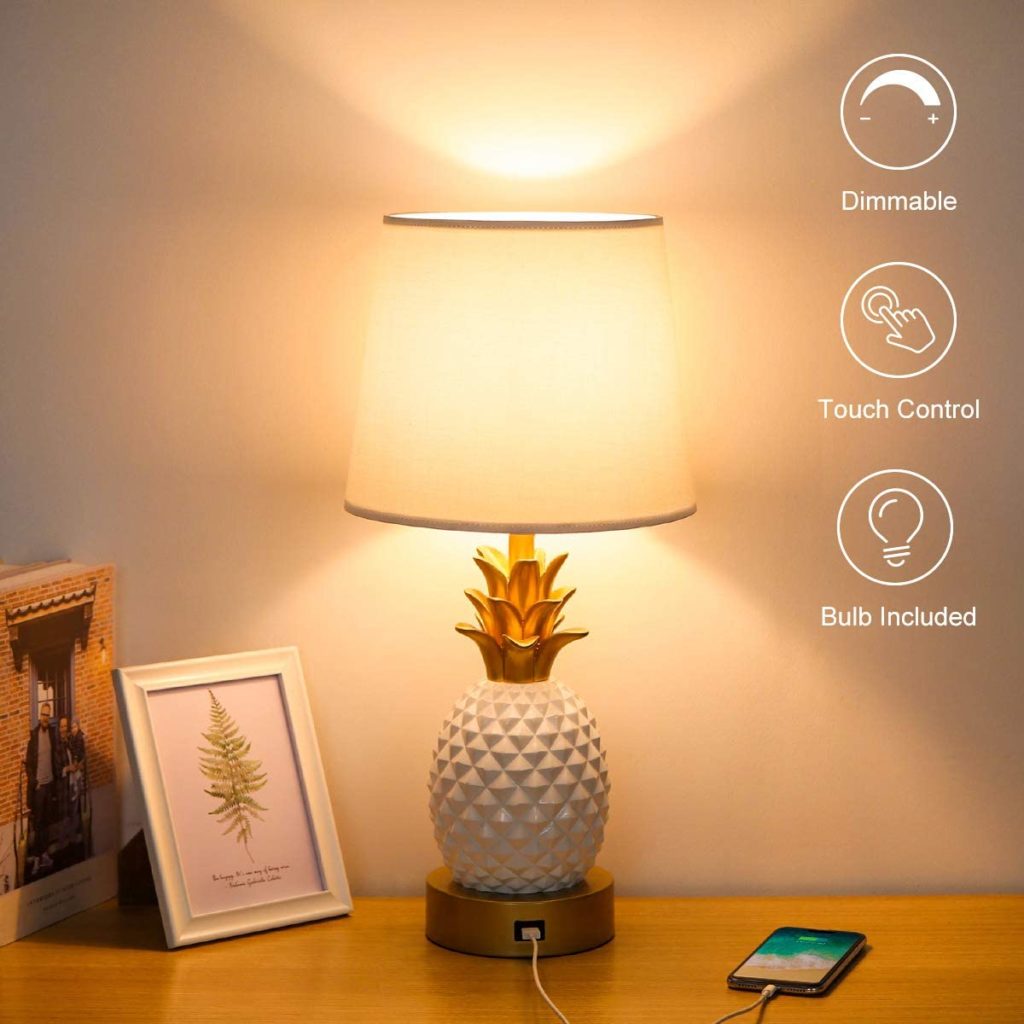
A floor lamp virtually dissolves the need to have bright florescent lights on which creates a more zen vibe for you and your roommate. This is another area where you can shop the main home section!
Be sure to order low energy LED bulbs in a warm white color to help combat the cool tones and make your space feel cozy.
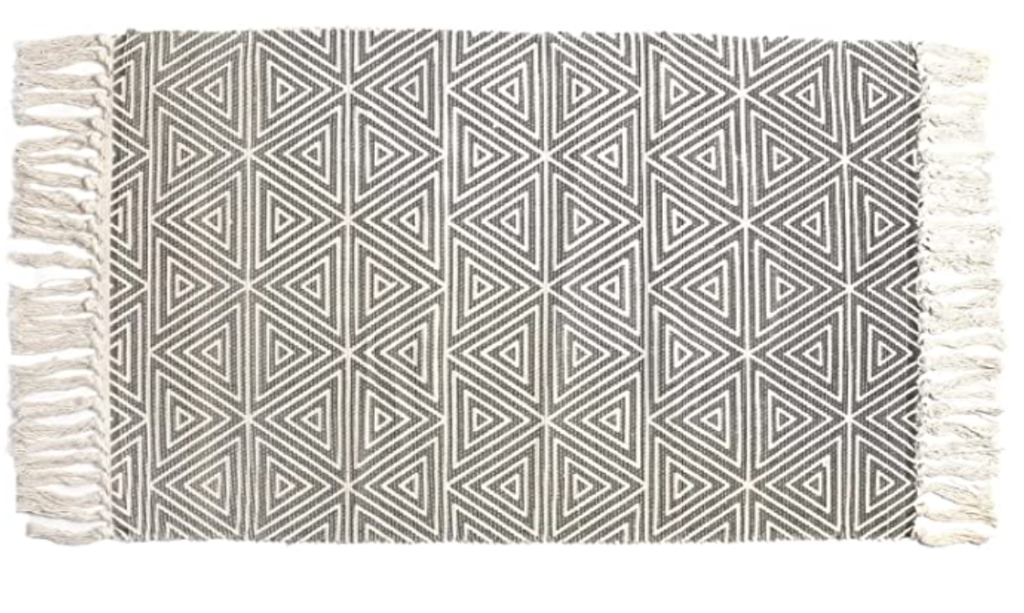
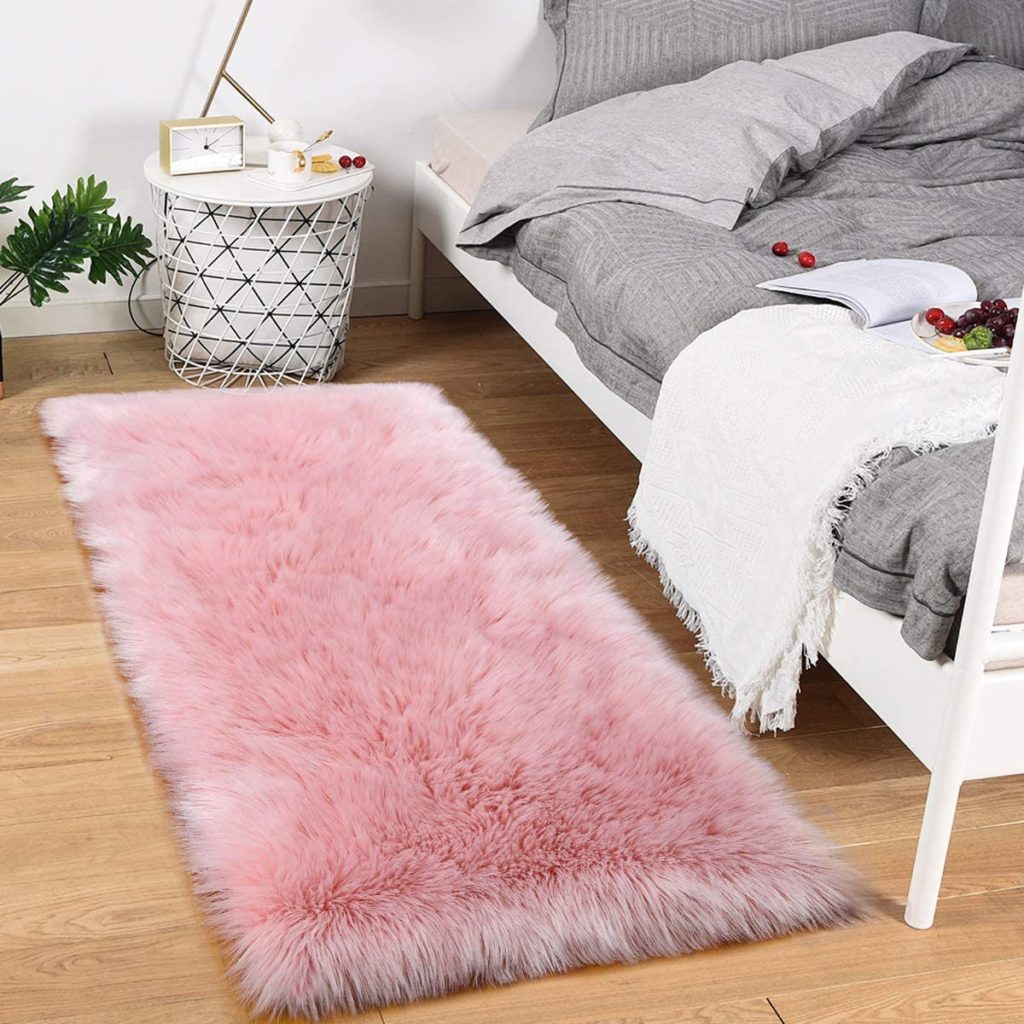
Rugs add color, texture, and warmth to cold dorm room floors. Look for flat weave, washable rugs that can handle college life in “high traffic” areas.
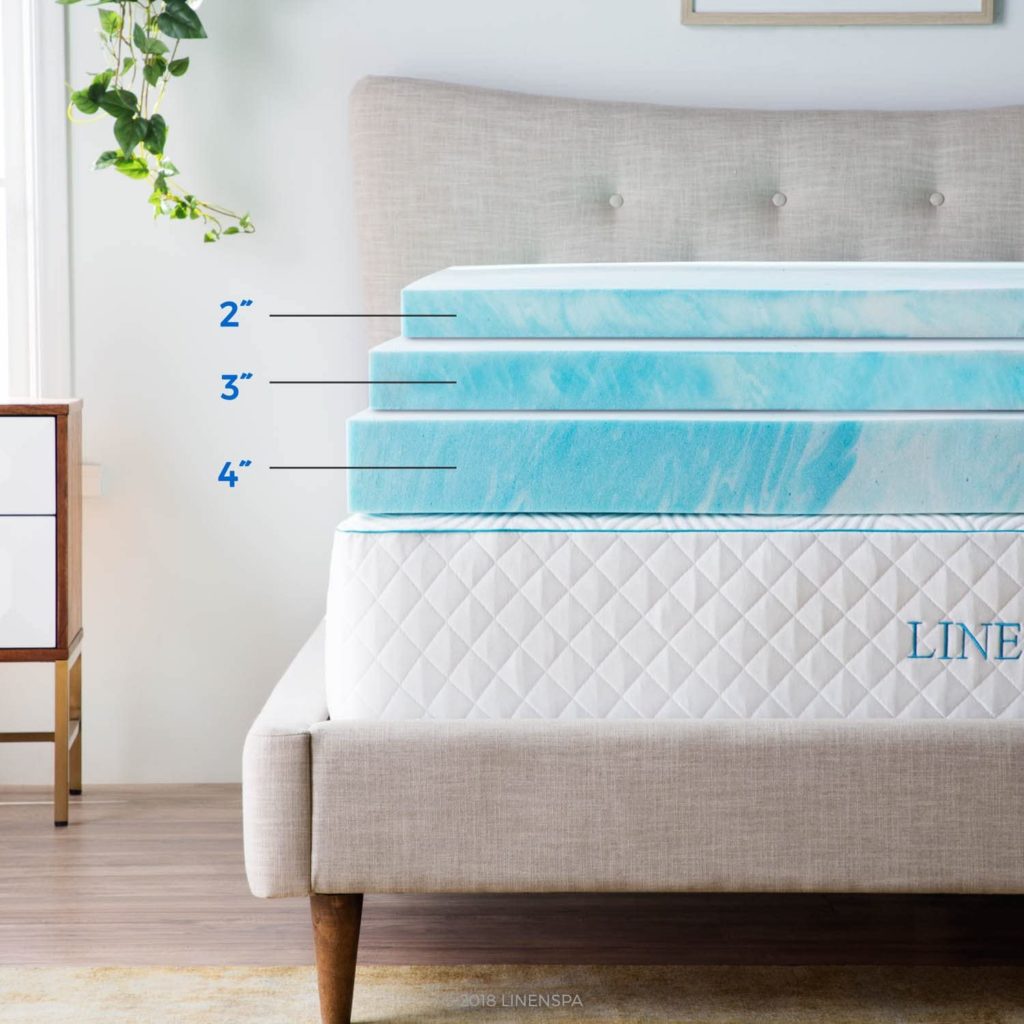
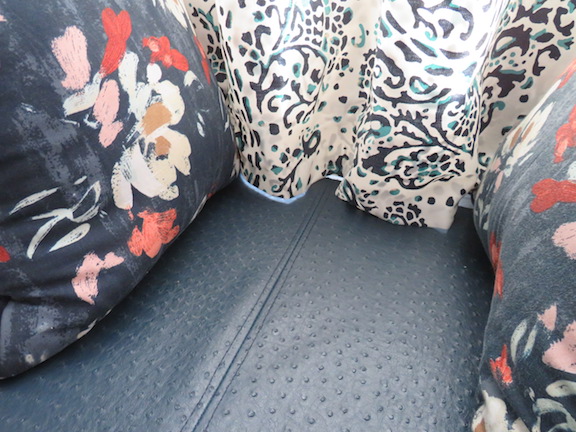
Tip #2: Make Your Bed a Sanctuary
Source: Pinterest
Dorm room mattresses are probably nothing like what you’re used to at home, being much thinner and firmer. So you may want to order an XL twin memory foam topper. The one below comes in different sizes, depending on how soft you want to make your bed.
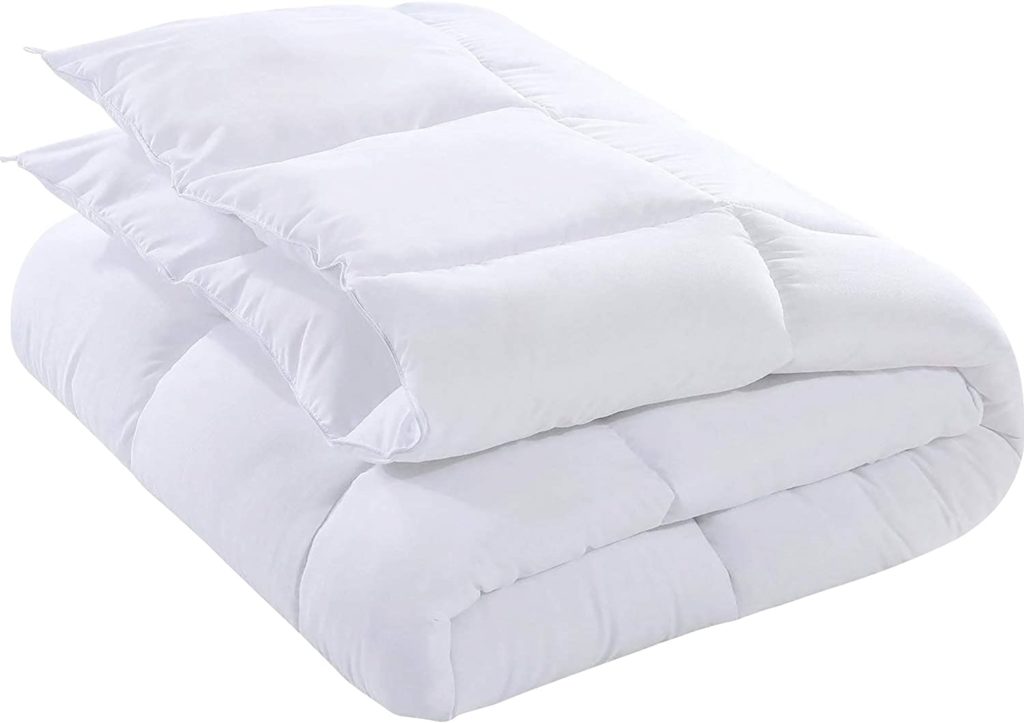
A down alternative duvet and duvet cover can also add to the cloud-like bed vibe. Look for duvet covers and inserts that are both machine washable and dryer friendly so that you can wash them every few weeks.

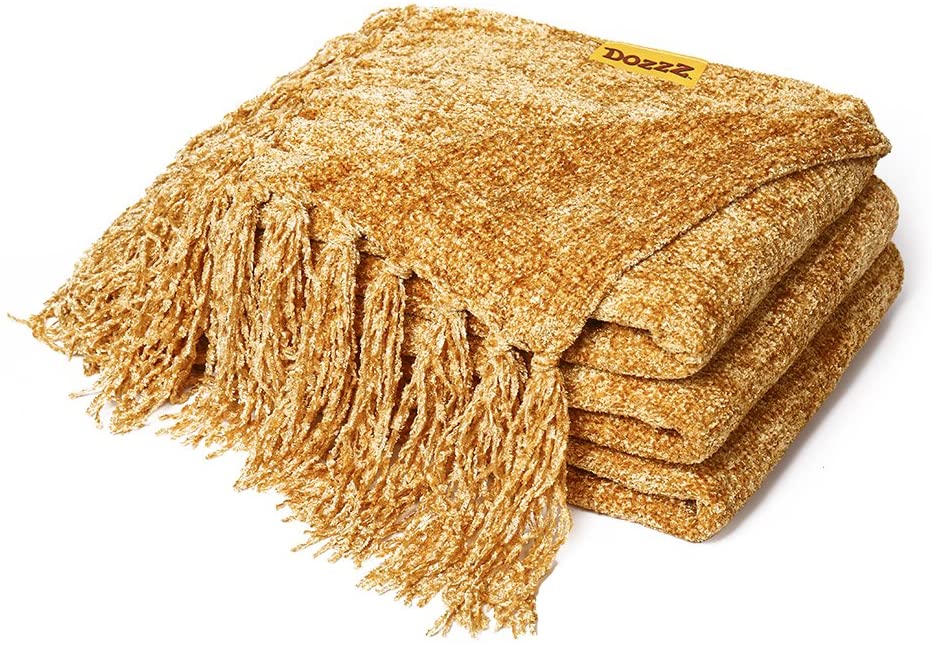
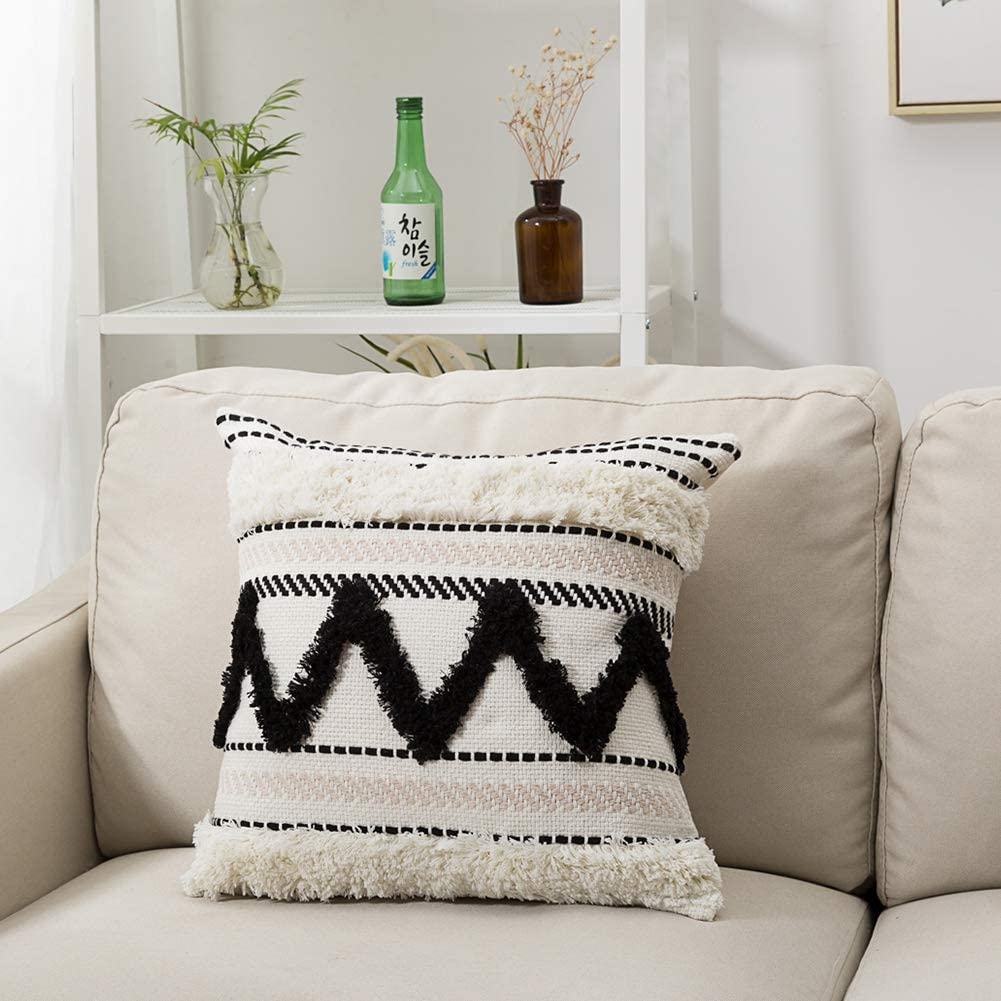
The other thing to take into consideration is that some dorm rooms might not allow you to control the temperature. It’s often colder than you’re used to! In that case, it’s great to layer up your bedding with a super soft throw blanket. I love these three options to add a pop of color/pattern for this white bedding scheme.

While the inspiration bed image is beautiful, it’s really not that practical to have five or more pillows on an XL twin size bed. (They’ll be piled on the floor quicker than you know!) I recommend getting one pillow to sleep on, one to go in the matching sham, and one accent pillow. Below are some ideas for those.

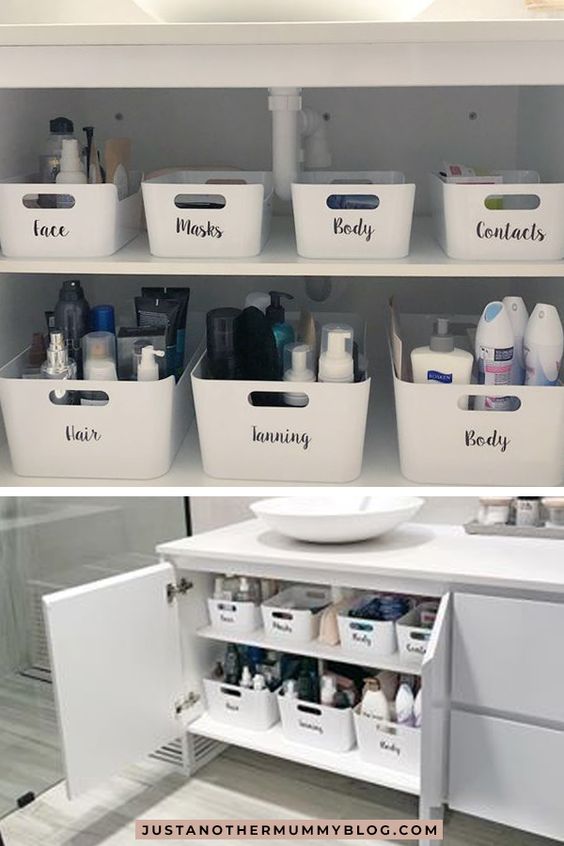
Tip #3: Create a Custom Plan for Clutter
Clutter in dorm rooms is really public enemy #1. But I’m not just your mom telling you to keep your room clean! I’m the type of person who believes that orderliness can come to most if you have a strategy. If you come into it thinking it’s not going to get messy, that’s like going to a water park and forgetting a bathing suit! It’s just going to happen.
And it totally sucks if you’re like I was and you spend money and time decorating your dorm room and it hardly looks tidy. It’s a smaller space, plain and simple! You’re often sharing the room that may also be your kitchen and bathroom, all in one. It’s inevitable that it will look more cluttered than your bedroom at home. The trick is to take the time to create a plan to minimize the look of your clutter.
Don’t just push your cart down an aisle at Target or IKEA grabbing every organizer product you can find. I challenge you to really think about this and create a custom solution.
Do you have a humongous collection of hair or beauty products? Does your desk tend to get cluttered? Do you have an overflowing closet? A coffee addiction with lots of machine accessories and an abundance of flavors? Do you have more books than one person could read in a lifetime? I’m no Marie Kondo, though I do know there’s a lot of value in decluttering your stuff before you move. However, I believe you can have the things you love in excess if you have a smart storage strategy. A few ideas below!
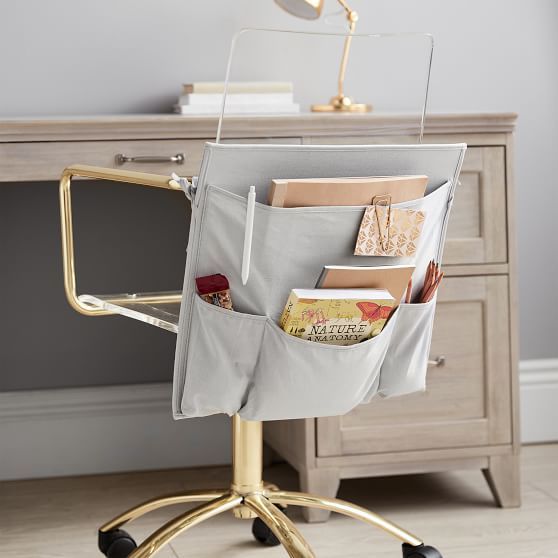
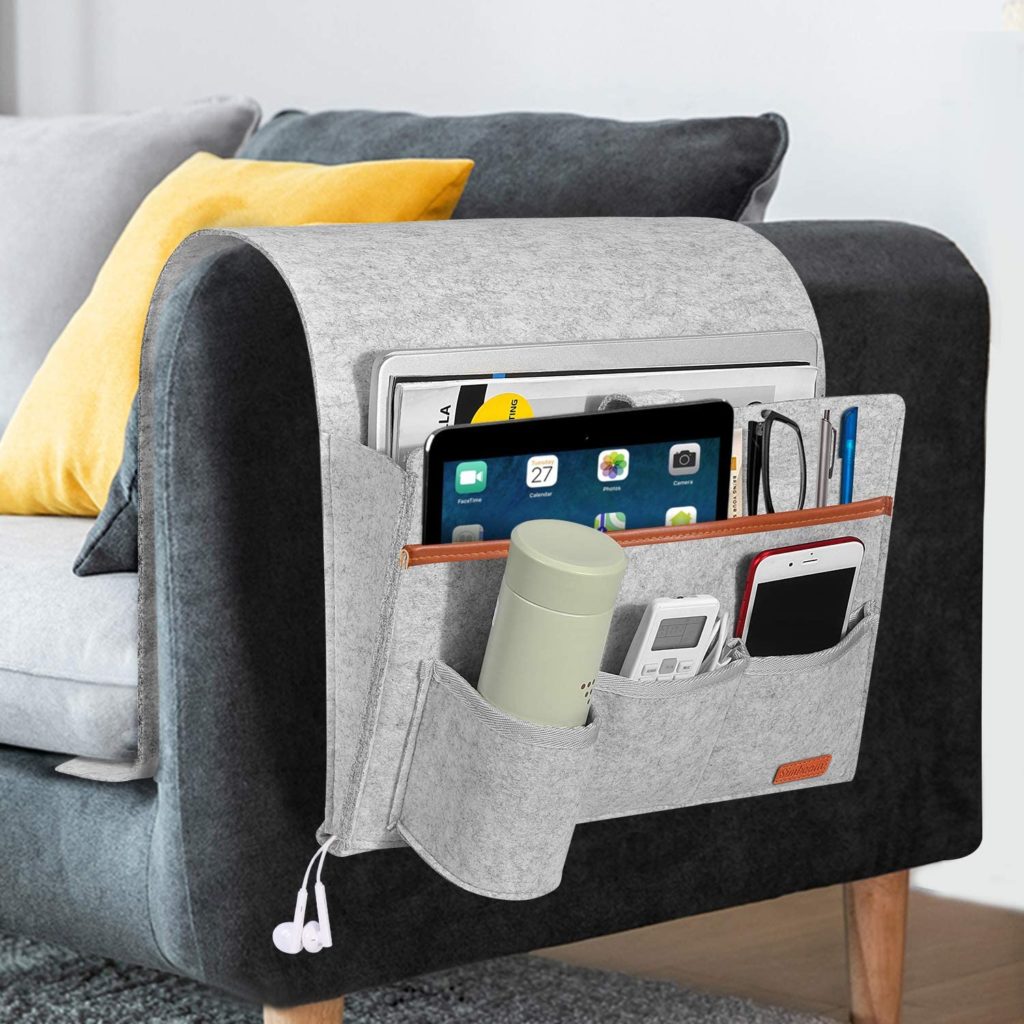
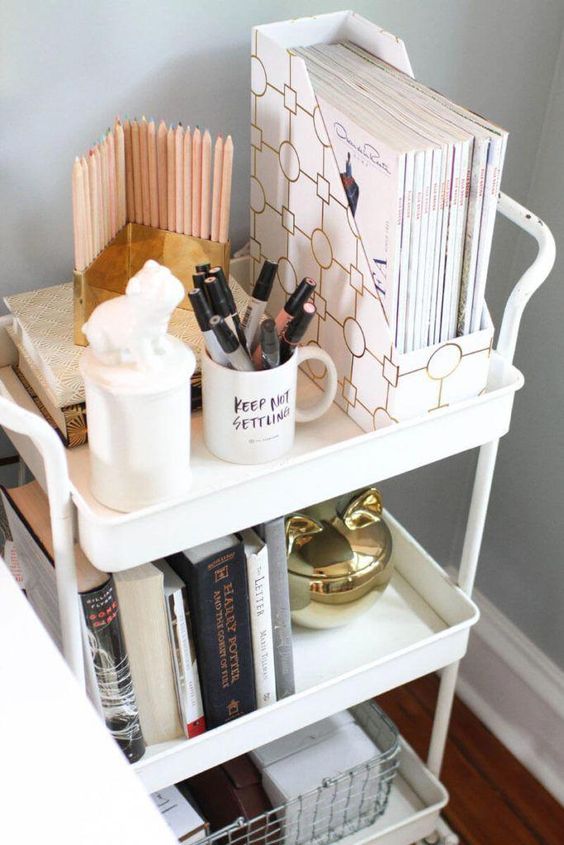
If You Keep A Lot on Your Desk
If You Have a Lot of Beauty Products
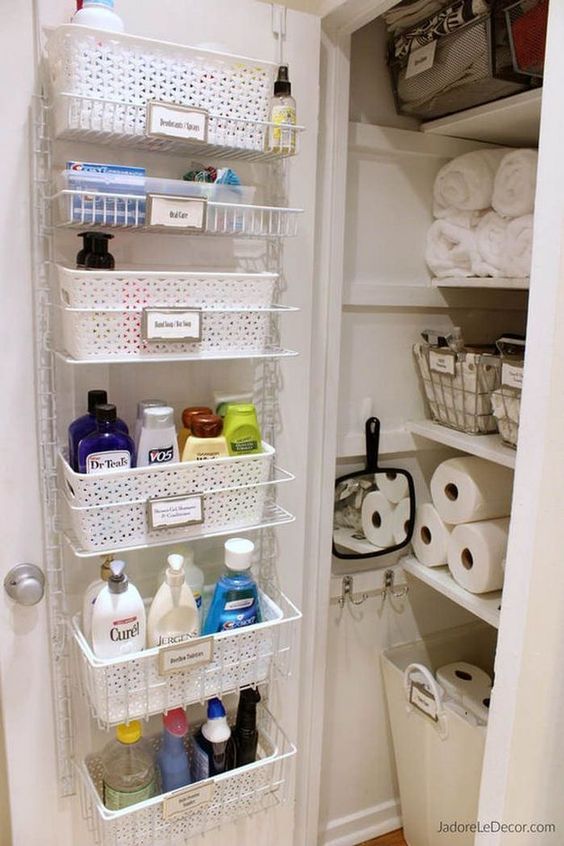
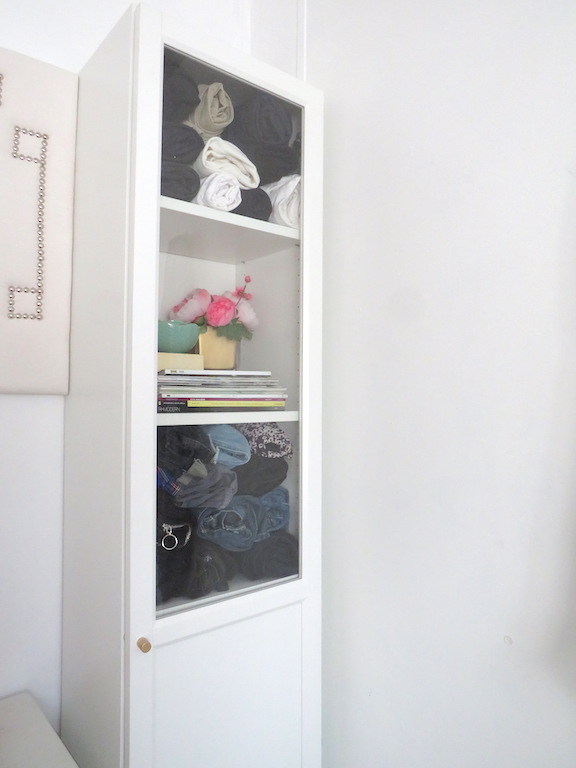
If You Have a Big Closet
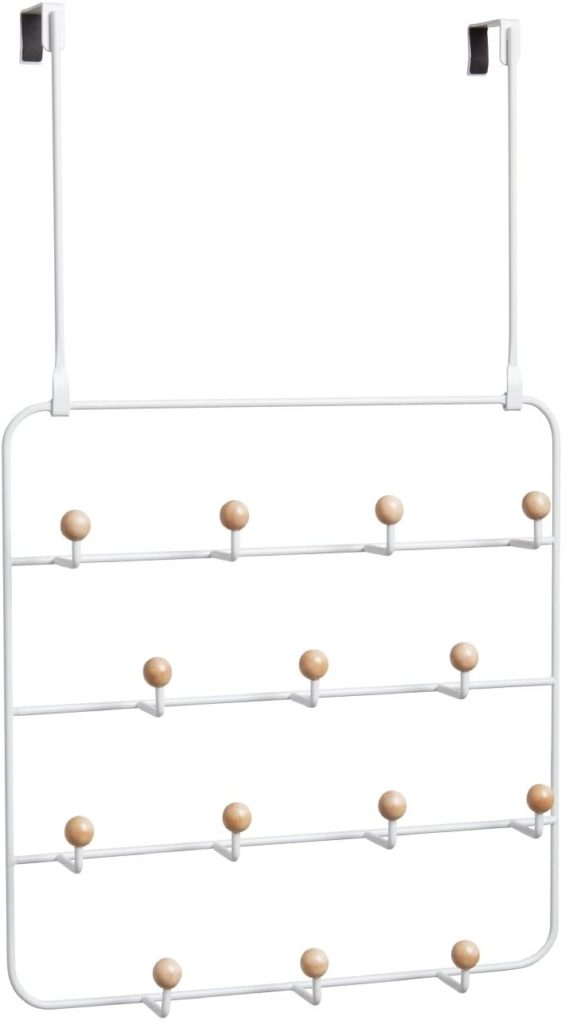
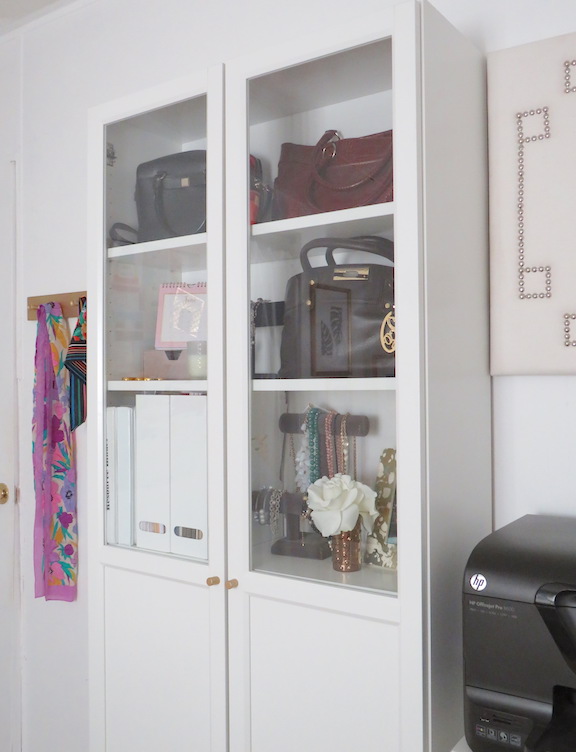
Use behind the door racks to contain the overflow of heavy coats, scarves, and handbags. Think of every behind-the-door space as an opportunity to store items from your closet!
Tip #4: Your Stuff is Now Your Primary Decor
When you’re in college, pretty much everything in your dorm room should serve a purpose. So I’m really big on the idea of making everything you NEED look like decor. Or sourcing things you need that look good to you stylistically. Some ideas below.
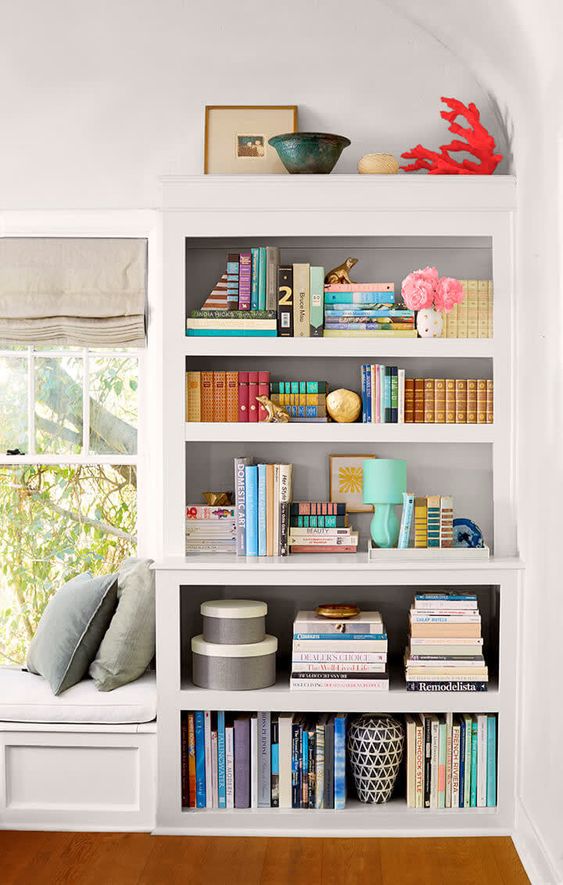
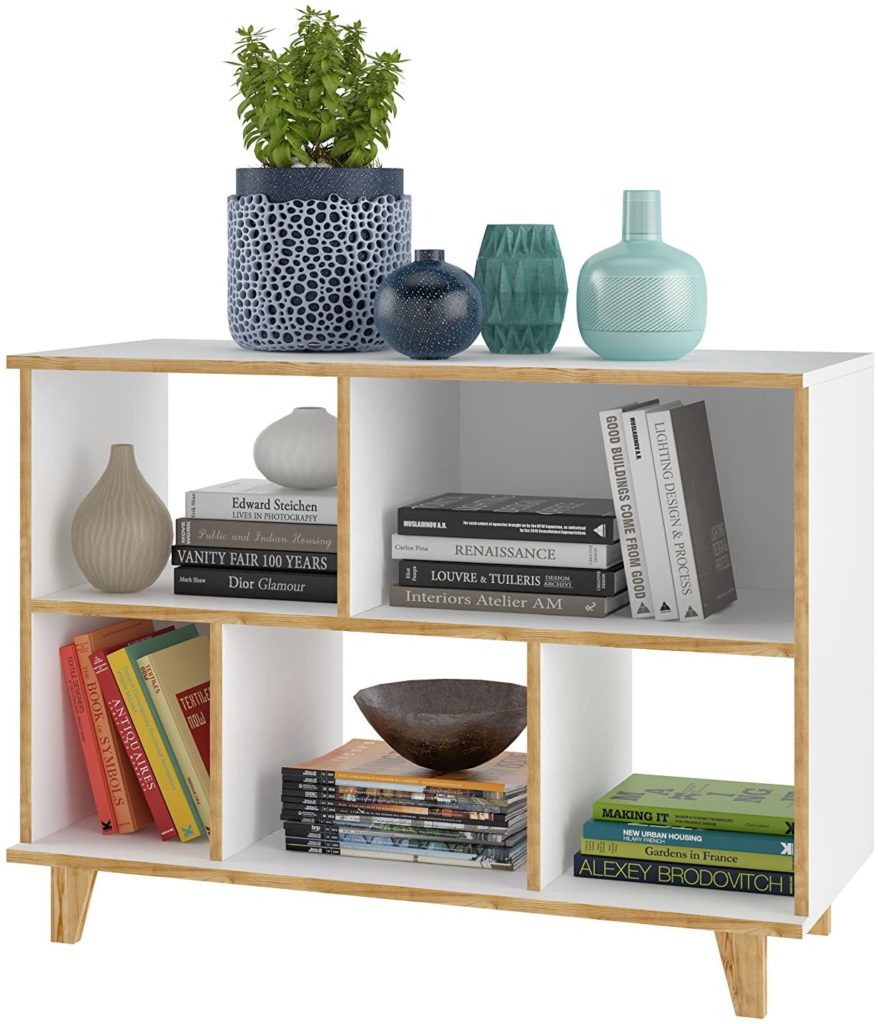
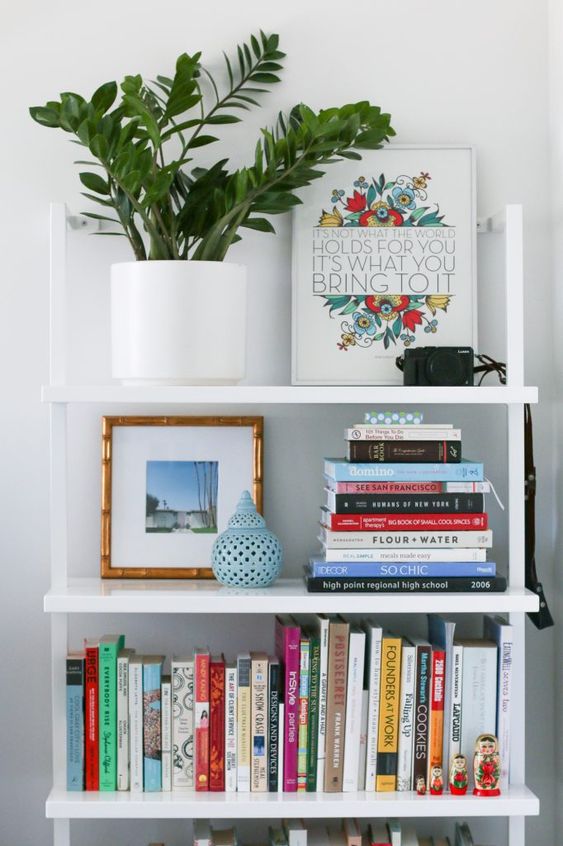
When I went to school, I had a bookshelf from home that followed me to every dorm room. A tall bookshelf can be extremely helpful with organizing your new space. And whenever you can arrange something in a systematic or styled way, like the bookshelf examples here, it looks less cluttered.
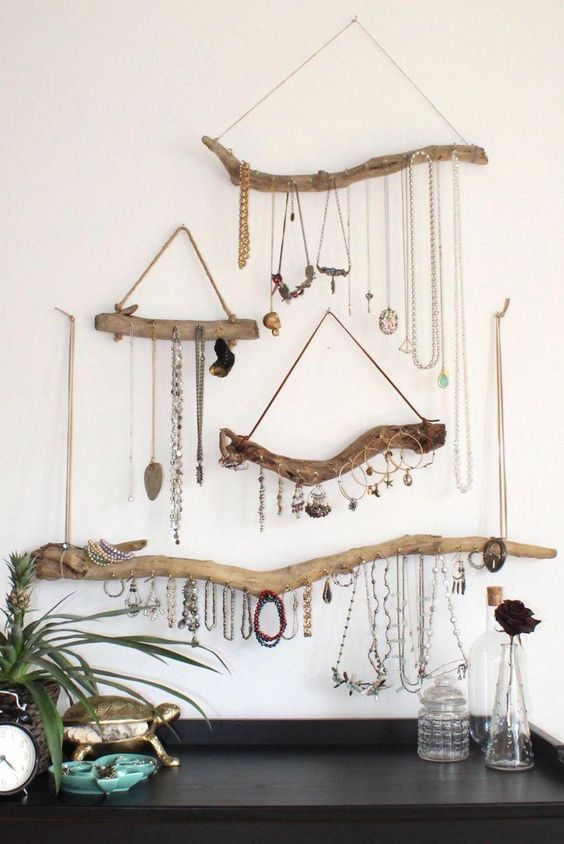
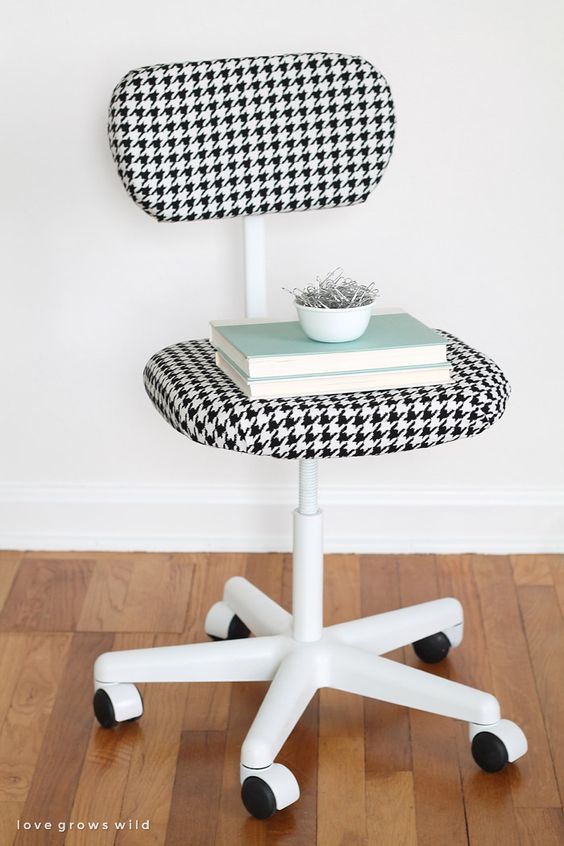
Your costume jewelry can be a part of the decor parade and save you valuable surface or drawer space. Just make sure you hang the driftwood pieces from a command hook and NOT a nail in the wall.
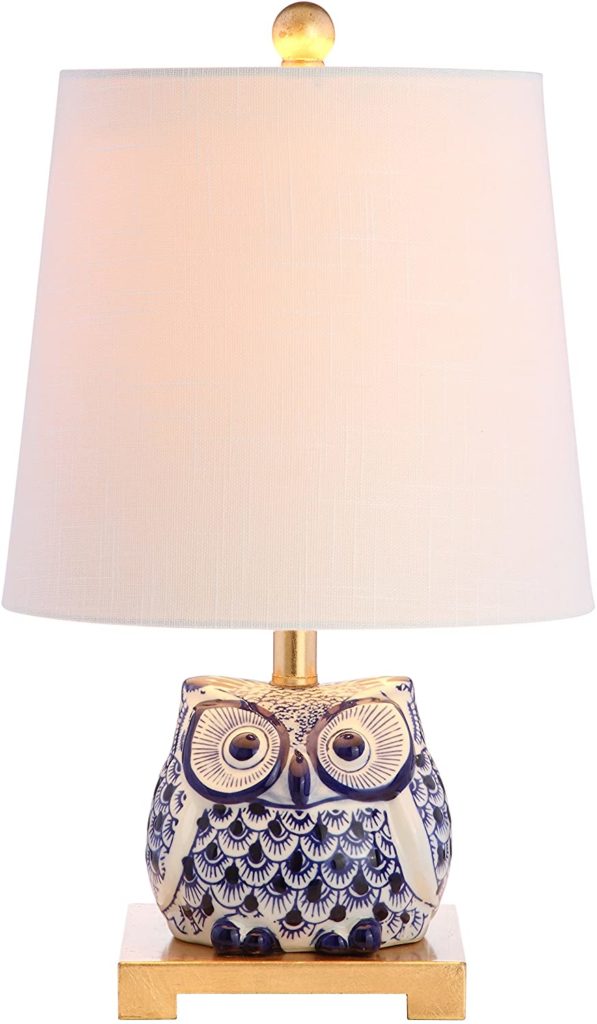
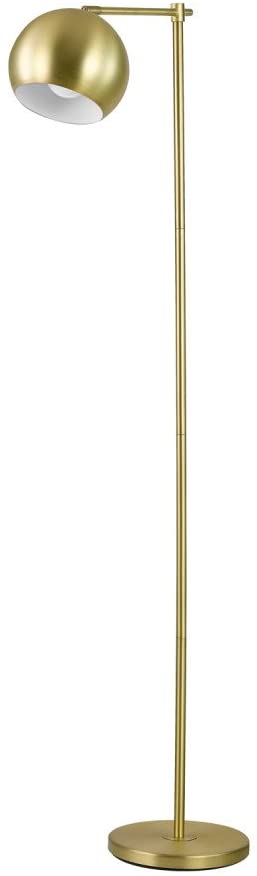
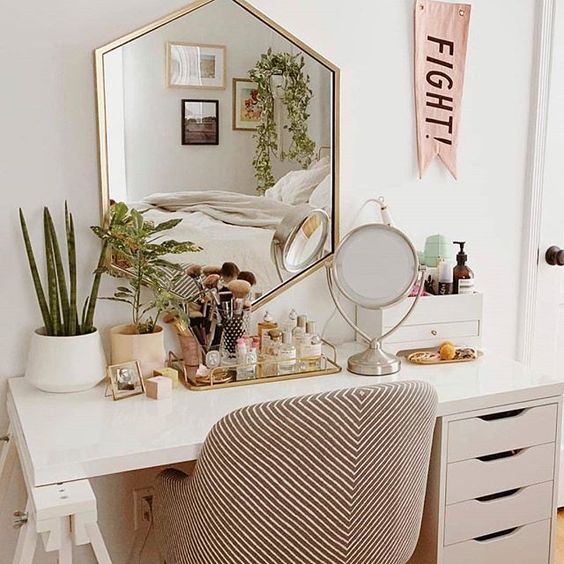
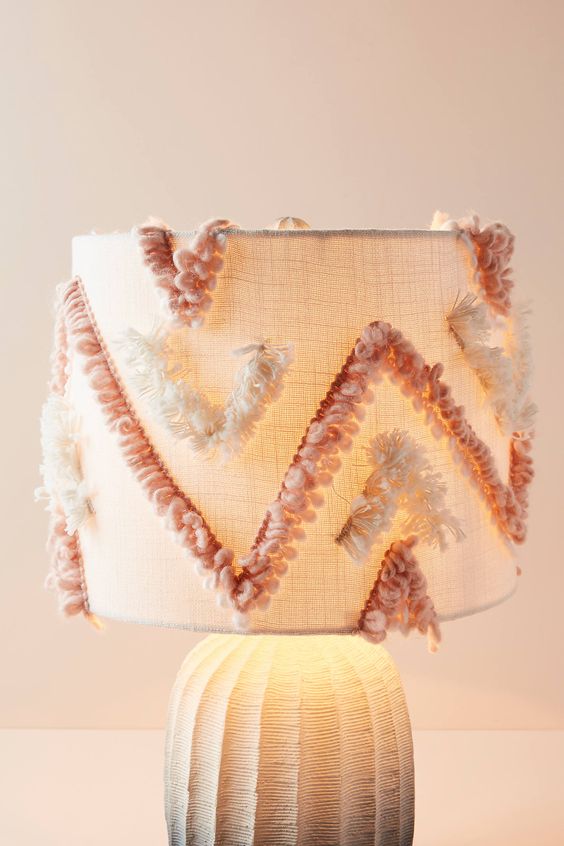
As I mentioned earlier in this article, bringing in your own lighting is a key decor element to transform your dorm room. Instead of standard desk lamp, why not get a cute table lamp like the owl above? Get something that works AND makes you happy to look at it!
Tip #5: Go Crazy with Wall Art
Just because you can’t put holes in the walls, doesn’t mean you can’t transform your walls with decor. The walls will be the first expression of your space, so take time sourcing the items that will communicate your vibe. Some ideas below.
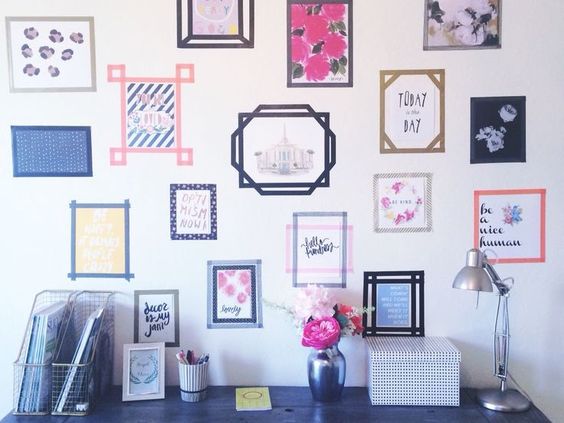
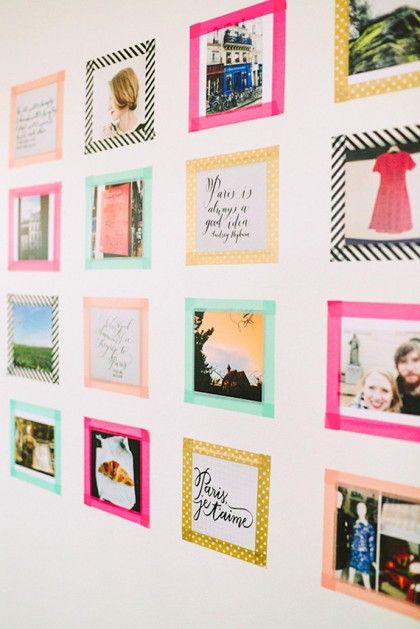
If I had to go back to college today, I would be doing a washi tape gallery wall for sure! It comes in so many patterns but it’s about as sticky as painter’s tape, so that means it usually won’t destroy walls. You can print your own photos, quotes or use favorite cards and notes from your friends. And you can get a huge pack of washi tape in a variety of patterns that will last you all four years. A few options I found on Amazon below.
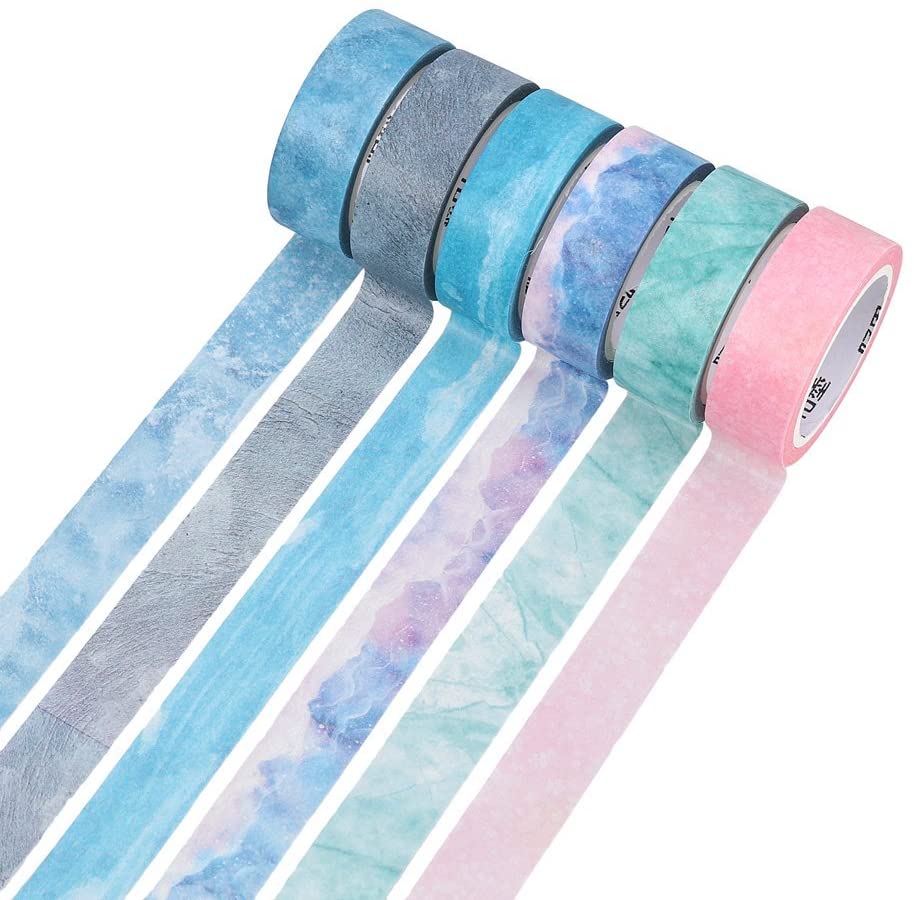
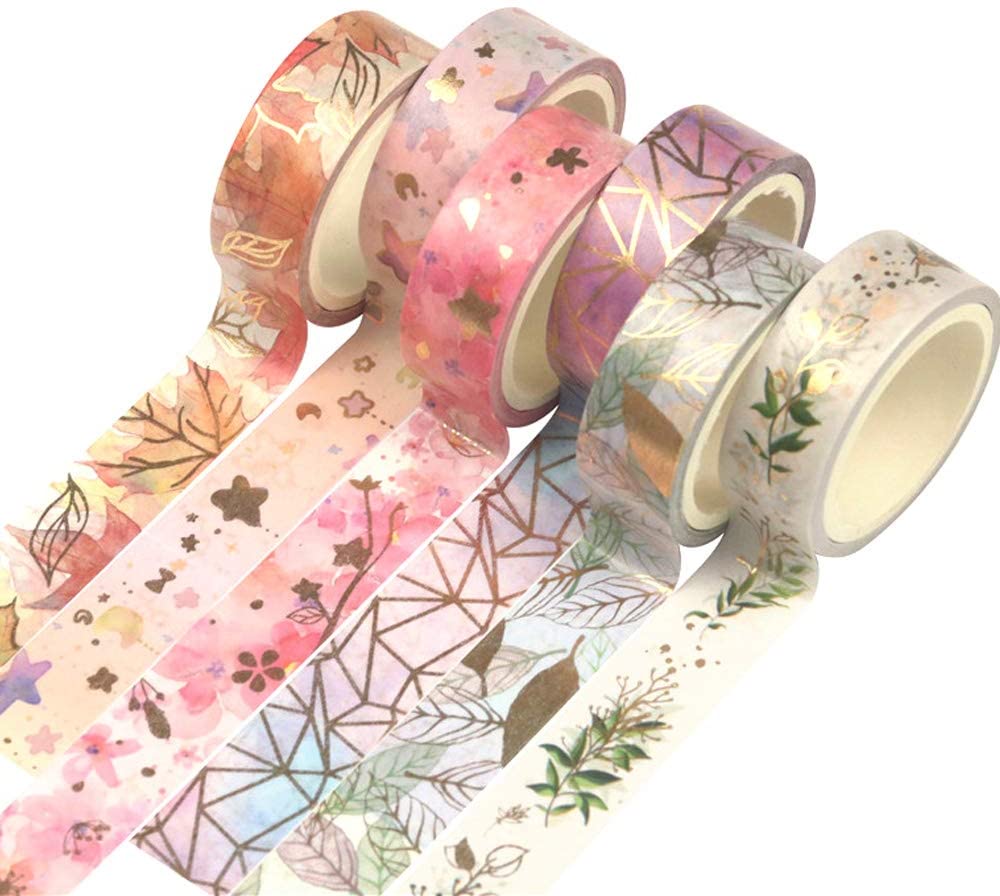

Gold foil patterns washi tape set, $7
Modern foil patterns washi tape set, $7
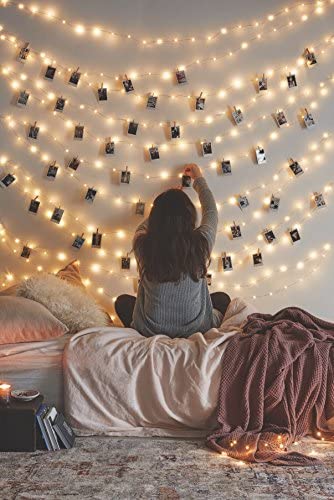
While I am NOT the first person to suggest fairy lights in a dorm room, I want to suggest an accent wall of lights. I love how this example uses super long strands of fairy lights ($14) with photos clipped on. Mini pack of 50 craft clips ($5). Be sure to use mini command hooks for hanging and arranging so that you don’t damage the walls.
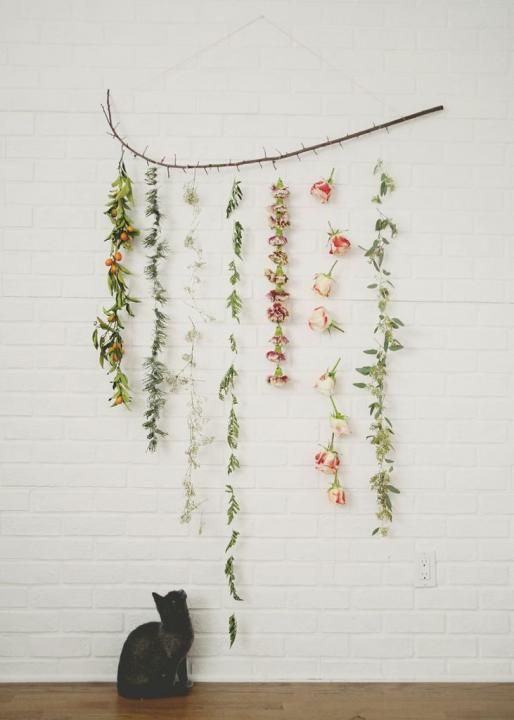
You can make your own ethereal, boho art piece with a branch, string, and florals from the Dollar Tree or Michael’s. Just be sure to hang from a command hook. Oh and leave your cat at home! 🙂
Tip #6: Decorate with Plants
Real plants, if you can take care of them, are awesome in a dorm because they look great and really bring the essence of home. Some of them may even clean the air a bit for you! Just to be sure to read up on their care instructions and find places where they can live that don’t cut into your valuable desk or dresser surface space.
While it’s best to purchase plants from your local grocery or home improvement store, you can order cute plant stands or pots online to up your style game.
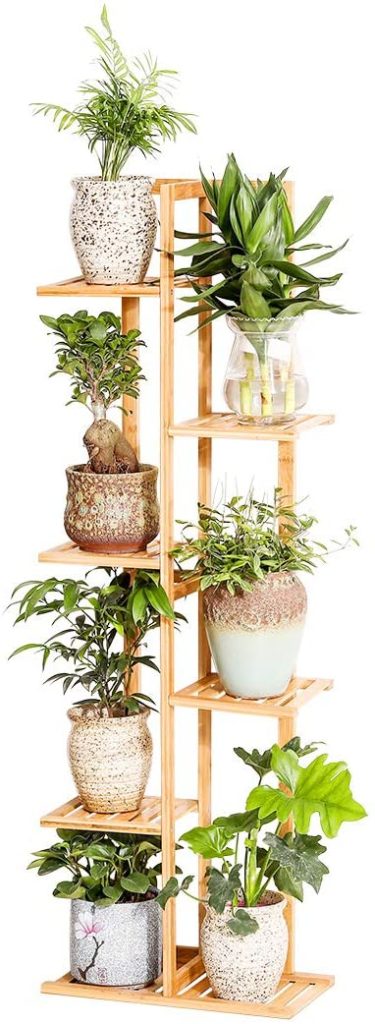
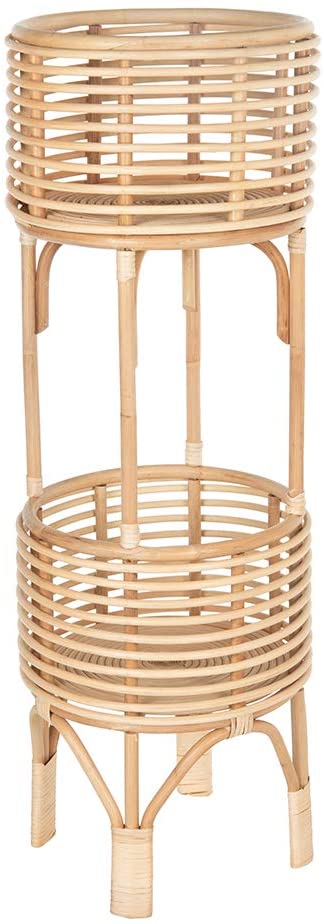
Rattan stacked planter $85
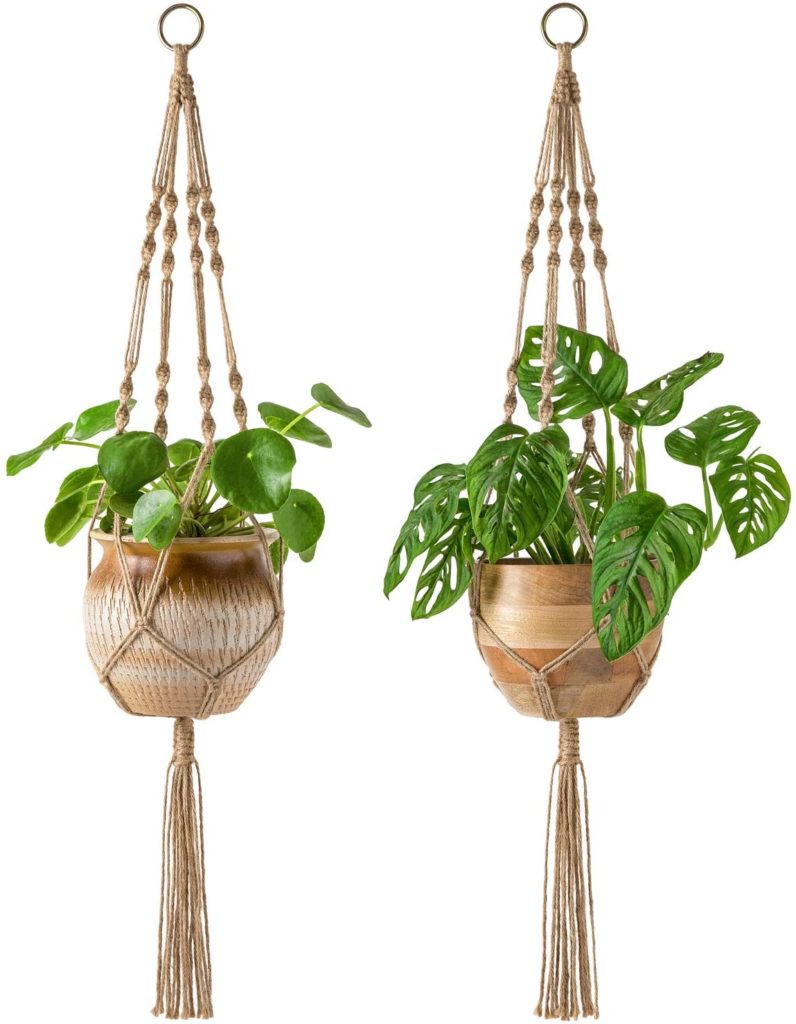
Macrame boho hanging planter set of 2, $14
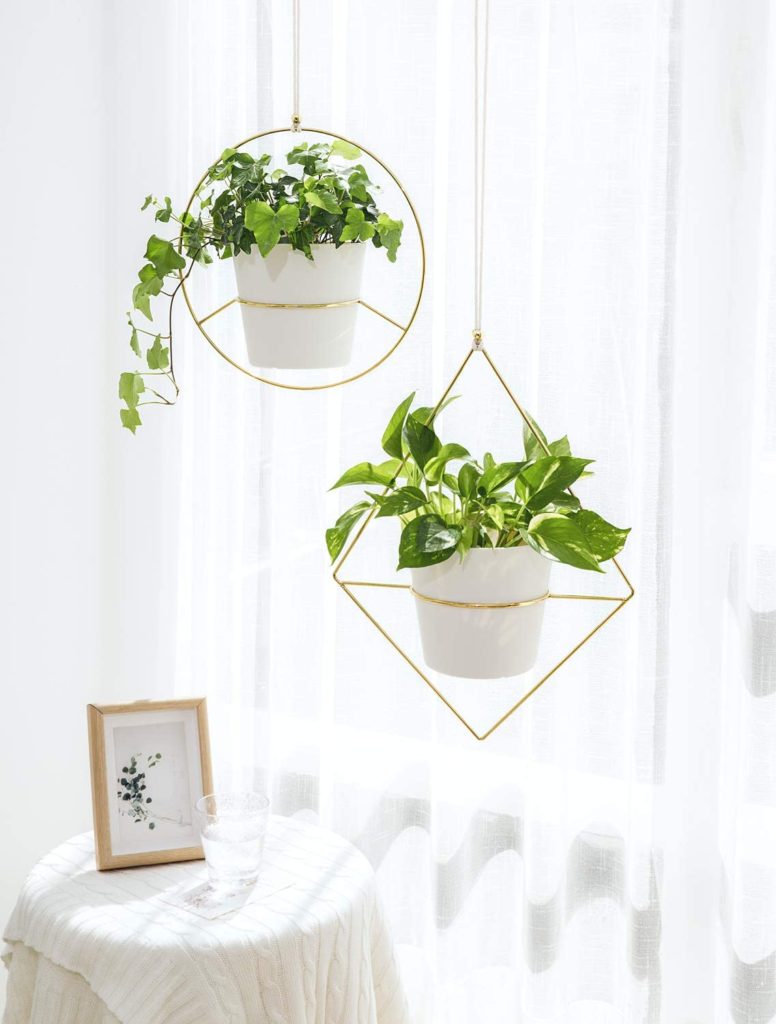
Hanging planters are a great way to bring the look of live plants to your space without taking up surface space. Lightweight ones like these should be able to hang from a command hook as long as the total weight doesn’t exceed three pounds. I can’t get over how cute these are!
Tip #7: Consider Going EXTRA with Home-y Touches
Without decor, dorm rooms really aren’t that different from the vibe of sitting in a hospital. This is why no one will fault you for taking the cozy home accents a little over the top!
I love the idea of bringing in a faux sheepskin rug to be the first thing your feet will feel in the morning. You can also use to soften up a chair like the example below.
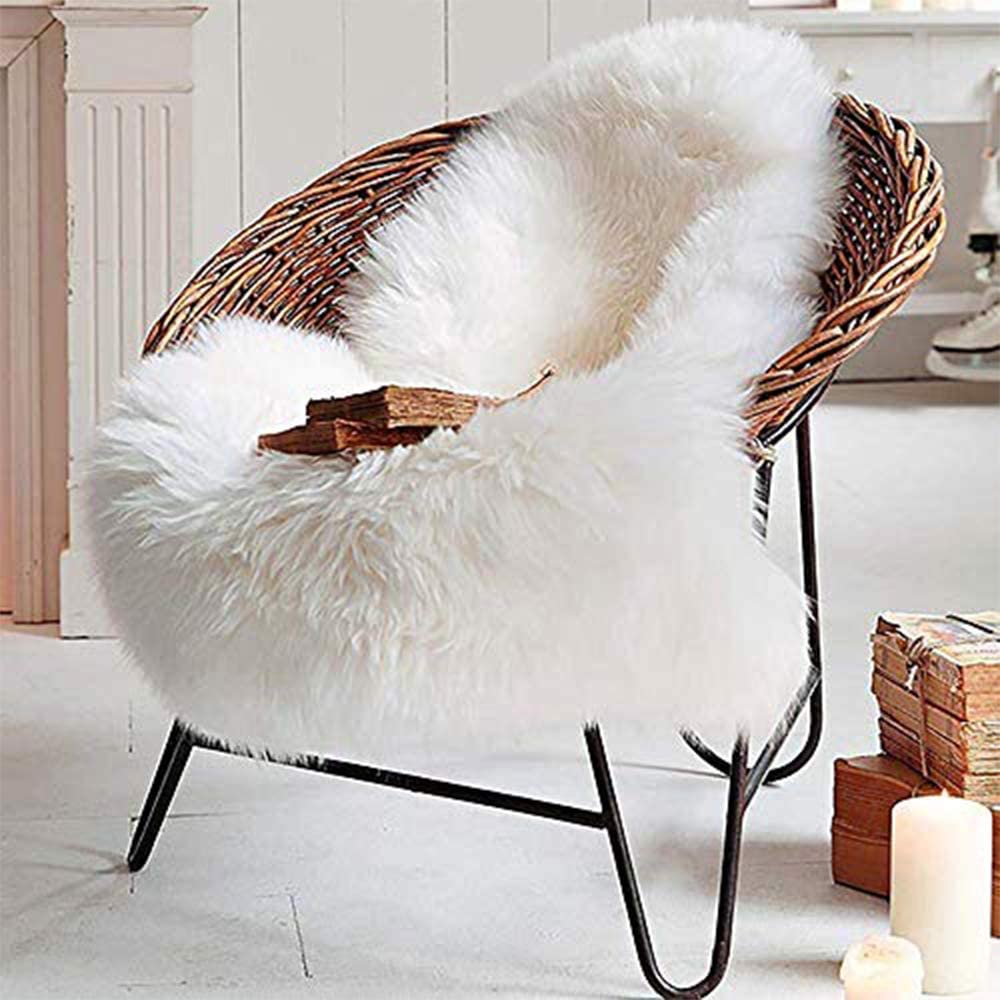
White faux sheepskin (multiple colors), $17
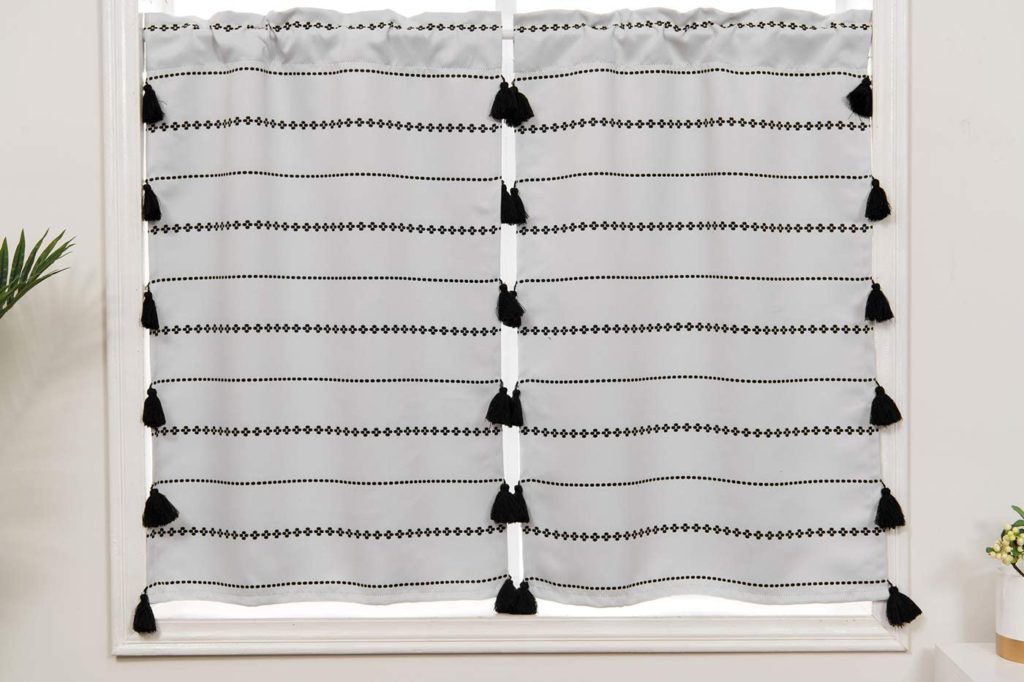
Usually dorm rooms are pretty good about having blinds or some way to block light, so curtains are totally in the “extra” zone. I had a bay window in my first RA room in a building that was over a hundred years old. The future designer in me could NOT resist dressing up that space with beautiful sheer curtains. You can accomplish the same with a set of cute sheer curtains and a tension rod like you would use for a shower curtain!
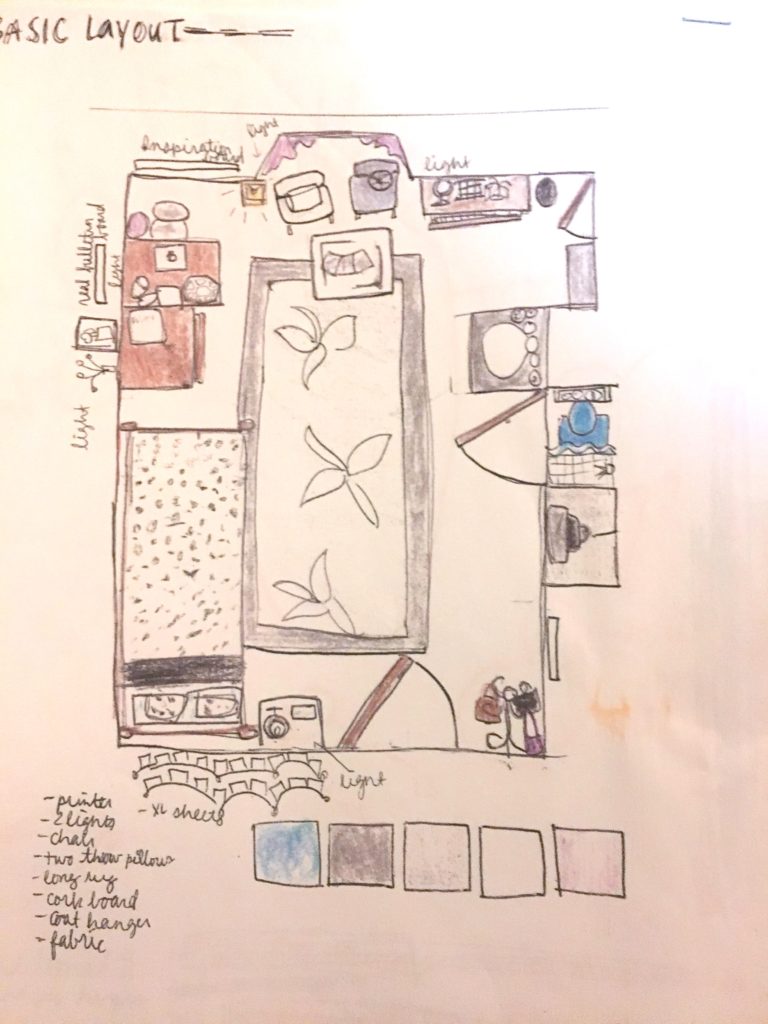
Tip #8: Consider Repurposing Items from Your Home
The set of chairs in my floor plan drawing were created by picking up some used chairs from Craigslist and reupholstering in a funky fabric. I kept those chairs for nine years because I loved them so much! It was so cool to transform something that could’ve easily gone to the dump. If your family has offered you some old lamps, chairs, mirrors, etc. don’t be so quick to turn them down! Nowadays you can find upcycled DIYs for all sorts of things on Pinterest. The sky is the limit for these type of projects, and why not try it out?
Oh my goodness, this was a lot but SO much fun to put together. I’ve been even unintentionally listening to some of my college music favorites on Pandora as I worked on this. I hope you enjoyed these 40 (or more) decor ideas to transform your dorm room!
If you try any of these ideas, please be sure to tag me on Instagram as I’d love to see it! @kaitlynloosdesign
Moving into an apartment or renting a new house? I have lots more interior design inspiration and budget design recommendations under the Interior Design section of this blog. Lots more ideas where this came from!
About Kaitlyn Loos
Kaitlyn Loos [loh-s] is one of the newest designers for interiors and events in the Tampa, Ocala, and Gainesville area. She brings over seven years of graphic design, project management, and event planning experience to create amazing spaces and experiences for her clients. She is one of the only interior design companies in her area who offers modern, fresh, pattern and color-savvy designs. From styling an event to designing an entire home, Kaitlyn Loos Design is a full service company that delivers style for nearly any investment level. She also enjoys sharing her ideas and projects through her new blog which reaches over 325 people monthly.
For more information about Kaitlyn, check out: About Kaitlyn: Interior Design, and About Kaitlyn: Event Planning.
You can also subscribe to the blog and contact Kaitlyn directly here.
Disclaimer: a small percentage of purchases from select links will benefit me via an affiliate program. I appreciate anyone who wants to support my blog by shopping the products, but there is no obligation to buy.
Reading time: 12 min
I can’t believe this day is here! I feel like it was a blink of an eye when I first read about the One Room Challenge and decided to try it out. About 1800 shopping trips and five ambitious DIYs later, and the end is here! The One Room Challenge is an 8-week community event in partnership with Better Homes & Gardens. More info in last Thursday’s blog post if you haven’t checked it out. Today I’m so excited for my One Room Challenge office reveal.

Finishing Week was the Toughest!
If my office looks easy breezy now, just know it took a lot of work to get here. And if you’ve been following me from the first One Room Challenge blog post, I have to be totally honest and say it got messier before it got better. But now that the office reveal is here, I want to snap my fingers and make this happen for the rest of our house!
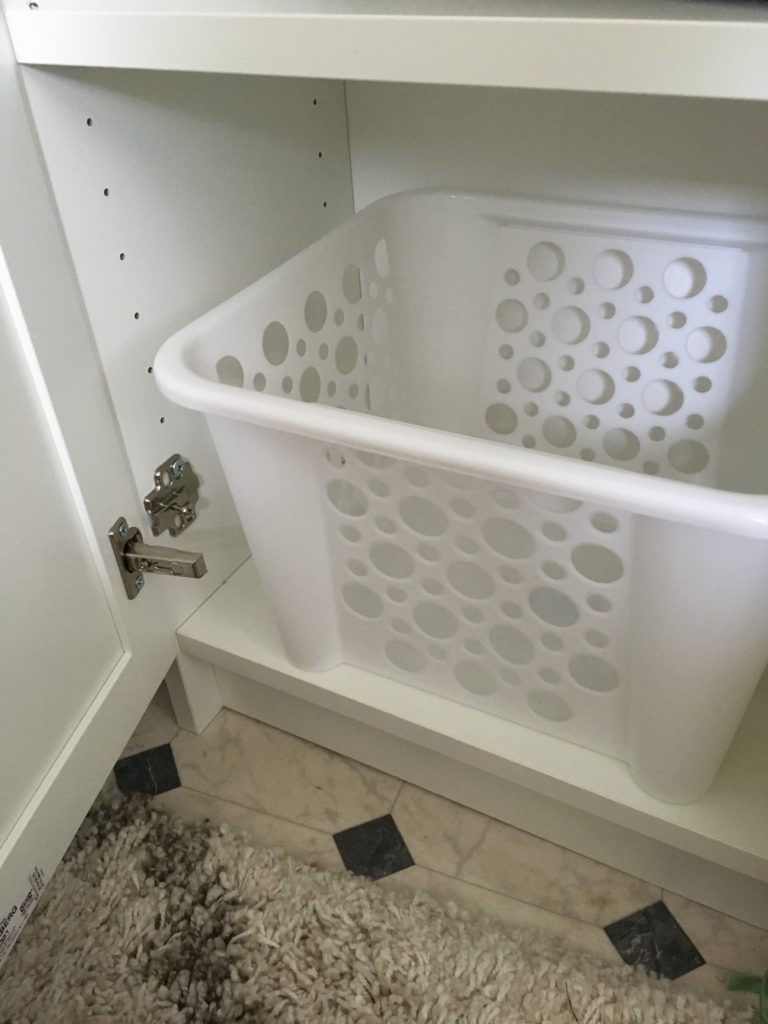
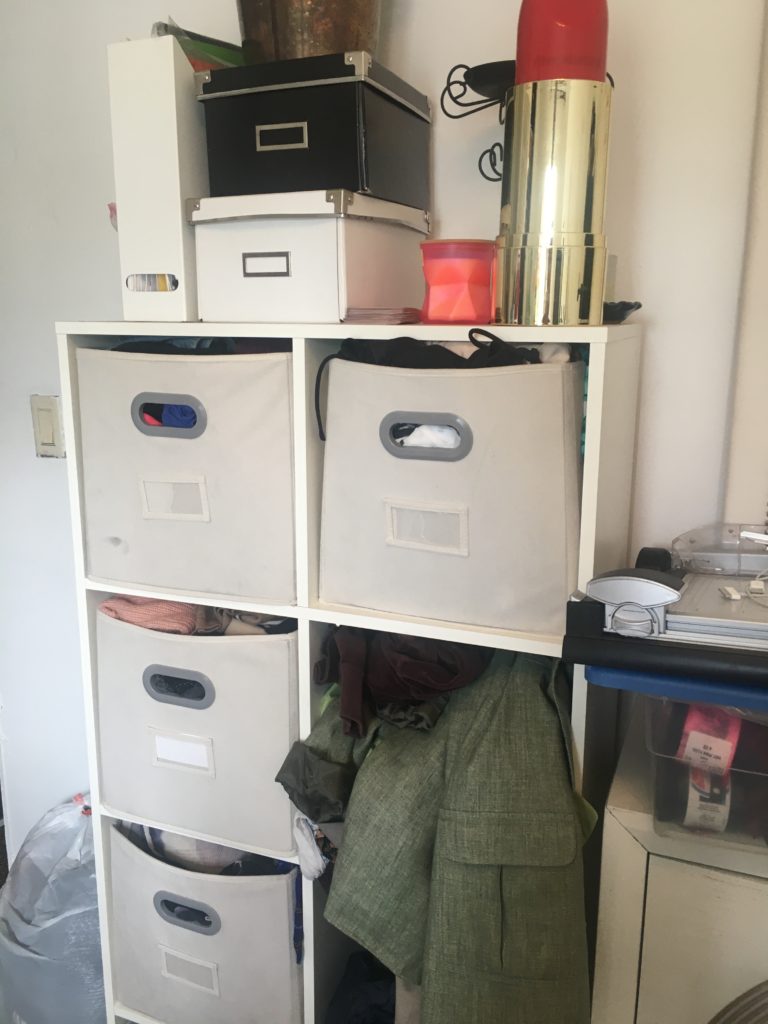
The first thing on my list was to purchase new storage bins to sort out my Poshmark inventory for all of the concealed storage areas in the new cabinets, since my old bins were too large. Word to the wise, the Dollar Tree is an excellent place to save money on organization bins, but be sure NOT to rely on their online measurements. Bring your own measuring tape to make an accurate call. It took going to three Dollar Trees to find the white bins pictured below and they ended up being about two inches too wide for the shelf. Luckily, I was able to correct this before the big reveal day!
They don’t call it the One Room CHALLENGE for nothing! 🙂
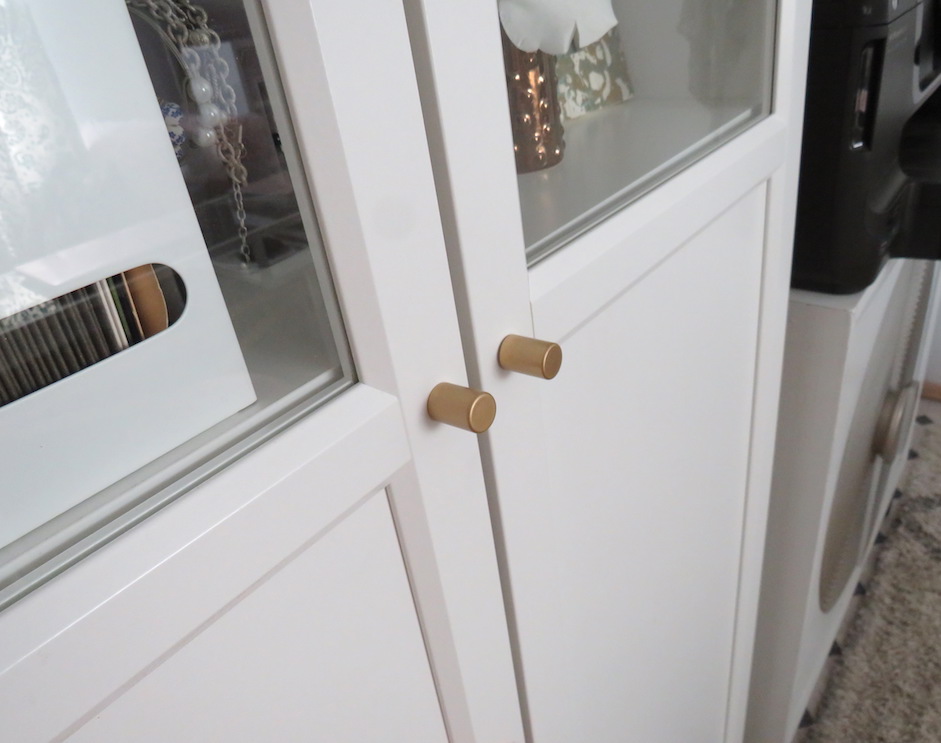
You’ll also see above that I sprung for the matching door for the single Billy shelf unit. I was worried there wasn’t enough space to open it, but I made it work, and the door opens freely!
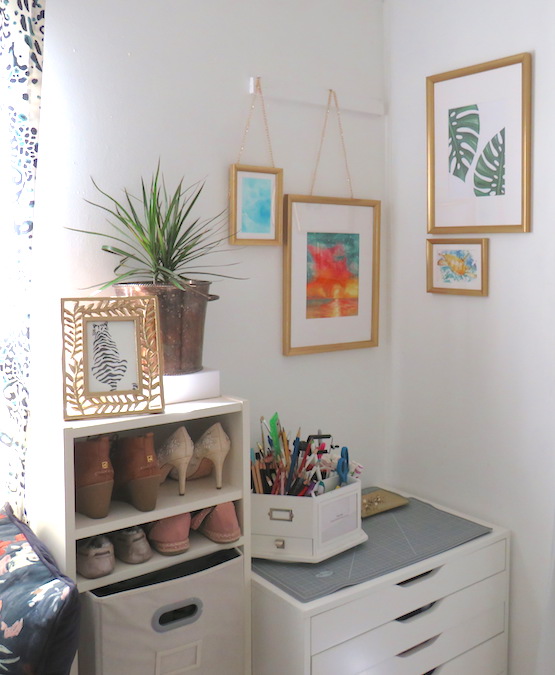
New Corner Gallery Wall
One of my favorite additions to the new office was this corner gallery wall. The piece of wood on the wall was here before us, and I had a vision to hang a few pieces from it. The gallery theme is watercolor which is something I’ve consciously added upon learning more about the principles of Feng Shui. While some people might include a fountain or aquarium to symbolize the water element in their office, I thought this would be cool to do with the artwork. As noted in the caption below, the sunset piece is by Omar Richardson. The sea turtle is by Marie Holdaway. The monstera plant print is from Target. And the last 4×6 blue piece is actually a water color that I created…TODAY…to further bring in the symbolic element.
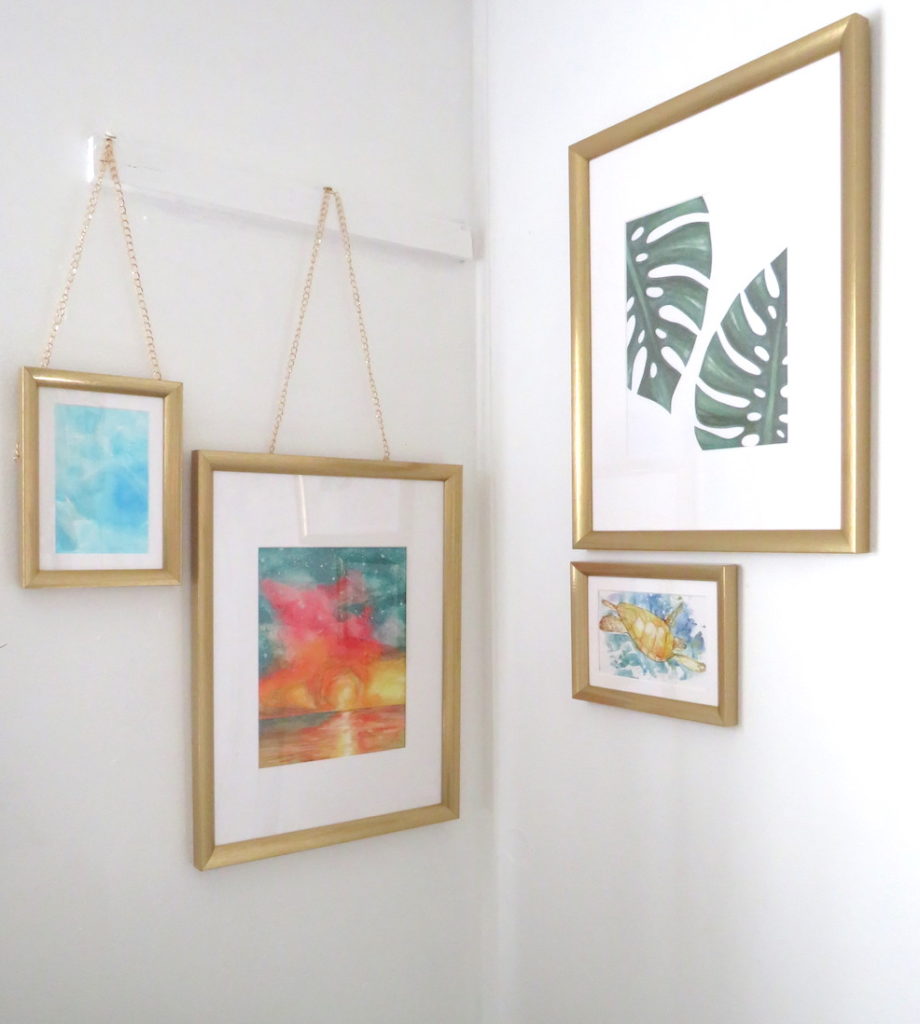
The gold frames are from IKEA and I love them. None of them actually came with the chain, so this was a DIY. If you’d like to replicate this in your space, Home Depot didn’t have any gold chain that was fine enough for my vision. I actually ended up purchasing jewelry chain from Hobby Lobby and learned that they are like Michaels with their coupon situation. Although I paid full price, (ugh) I definitely love them! I hot glued the chains to the back of the frame, but actually hung the frames from the wall and tacked up the chain so the chain is not the only support.
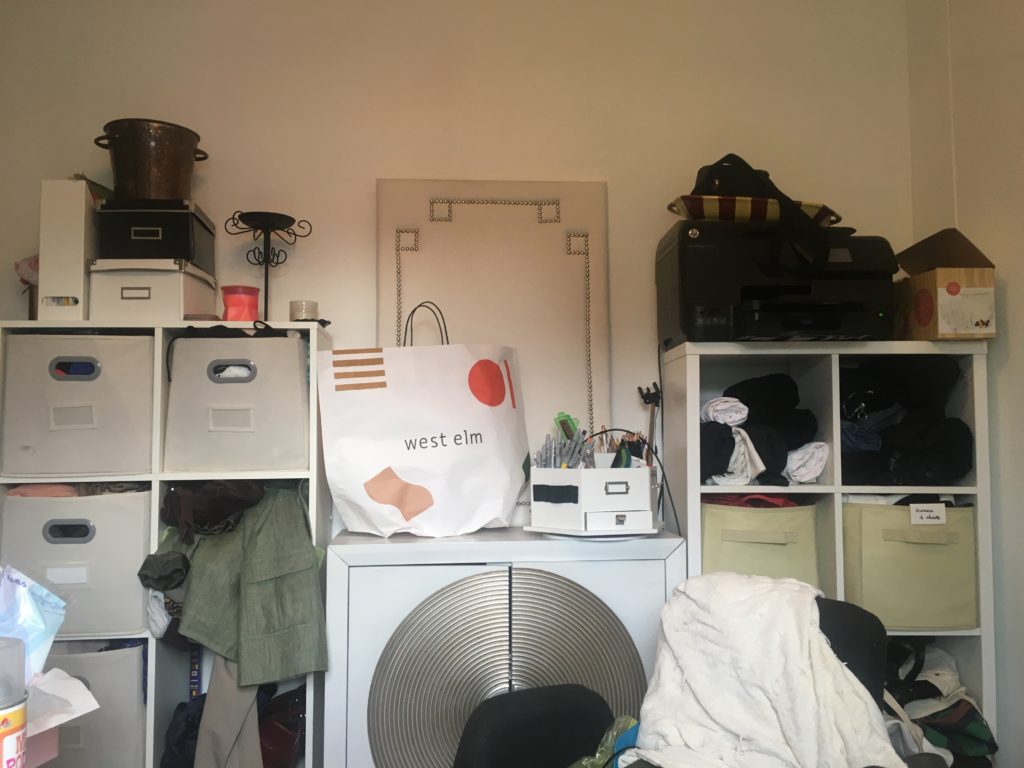
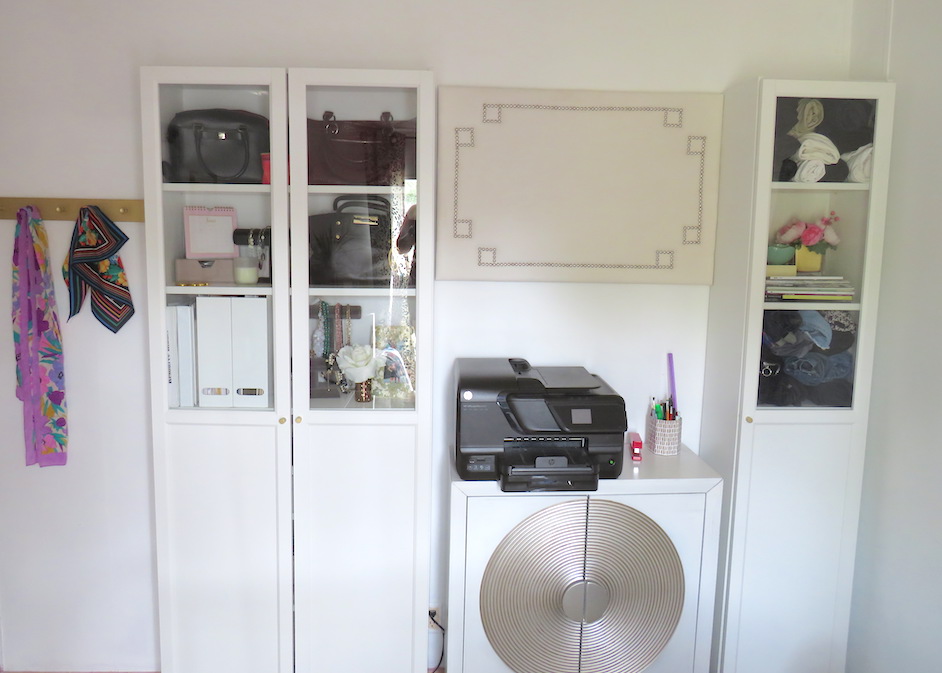
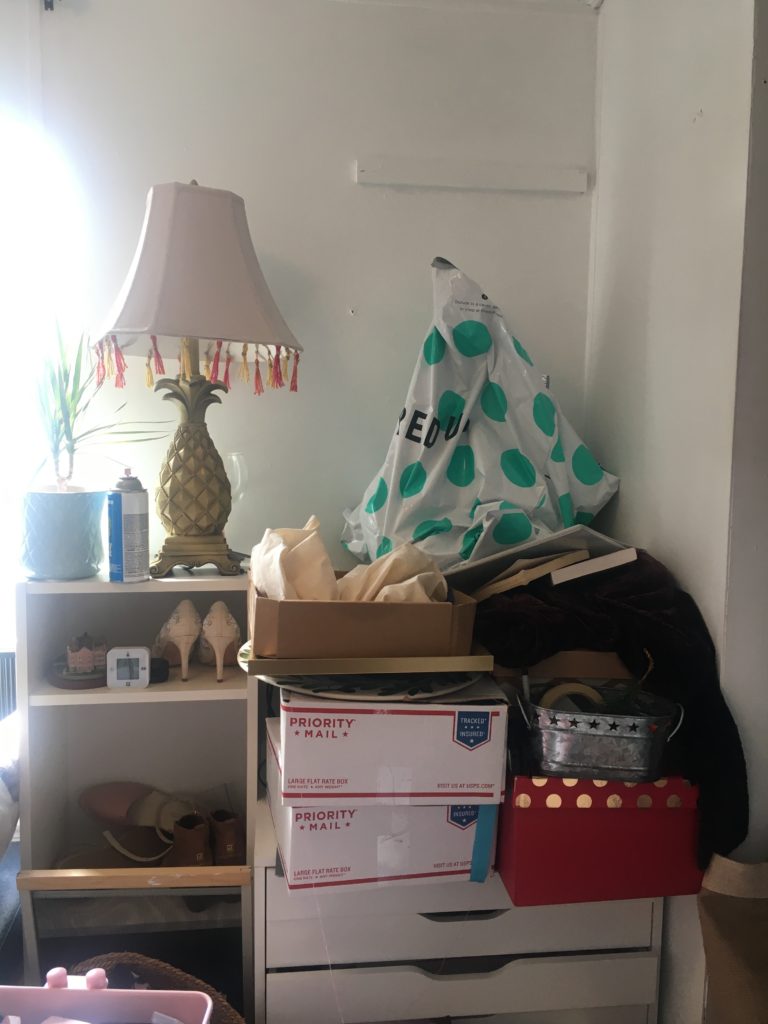
More Before and After Photos
So much of this project was reorganizing, unpacking some final boxes and decluttering! As you can see in the photos below, that alone made an impact, but so did my new furniture design plan. 🙂
Other Final DIY Successes
If you checked out my story yesterday, you saw that I was spray painting with less than 24 hours left to go. I feel like I’m on HGTV’s Design Star! Working down to the final minutes. But I’m really happy with how the wall hook piece and cabinet knobs came out in the gold. The reason I have lots of hooks on the walls is for taking photos and hanging pieces that are part of my Poshmark inventory.

I definitely felt like I was part of a design reality show when I was hemming my curtains also TODAY. I used iron on hem tape which is great for me because I could let the curtains back out later. A great idea for people renting or in a situation where they frequently move. I love how it made the bench area look less cluttered.
Overall, I’m extremely pleased with what I’ve been able to accomplish in my office in under three weeks. I feel like I’ll be able to do better work for my amazing current and future clients from this space. I love how my Poshmark inventory now is arranged more like a store or a beloved closet. It’s definitely not as overwhelming as it once was. I love how the vertical and wall spaces are now more maximized, making my space feel more open. Everything is easier to find and it makes me even more excited to do my work.
What do you think of my One Room Challenge Office Reveal? Let me know in the comments and be sure to tag me on Instagram if you try any of these little DIYs.
Now Offering Strategy Sessions Online!
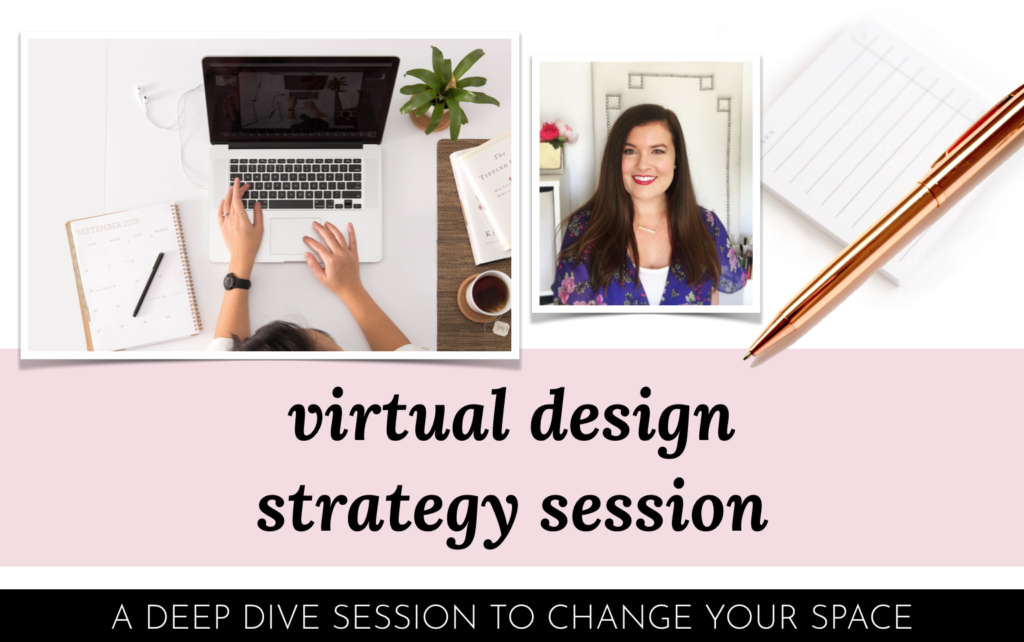
Also, if you want help in 1-3 areas of your home that you’re stuck on or want design guidance on, I’m currently offering Virtual Design Strategy Sessions through the end of the year. This consists of a style assessment, a concentrated strategy discussion on three areas of concern, a prioritization roadmap, and linking you to relevant resources with a summary PDF at the end. All totally remotely by the way. And in as little as three business days. If this sounds like a fit for you, click here to learn more.
Hope you enjoyed today’s post! Stay tuned for part two. 🙂
About Kaitlyn Loos
Kaitlyn Loos [loh-s] is one of the newest designers for interiors and events in the west-central Florida area. (Tampa, Ocala, Gainesville, and everywhere in between.) She brings over seven years of graphic design, project management, and event planning experience to create amazing spaces and experiences for her clients. She is one of the only interior design companies in her area who offers modern, fresh, pattern and color-savvy designs. From styling an event to designing an entire home, Kaitlyn Loos Design is a full service company that delivers style for nearly any investment level. She also enjoys sharing her ideas and projects through her new blog which reaches over 325 people monthly.
For more information about Kaitlyn, check out: About Kaitlyn: Interior Design, and About Kaitlyn: Event Planning.
You can also subscribe to the blog and contact Kaitlyn directly here.
Reading time: 6 min
Start with Your Assessment

Browse Design Services