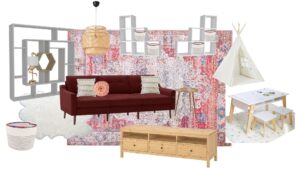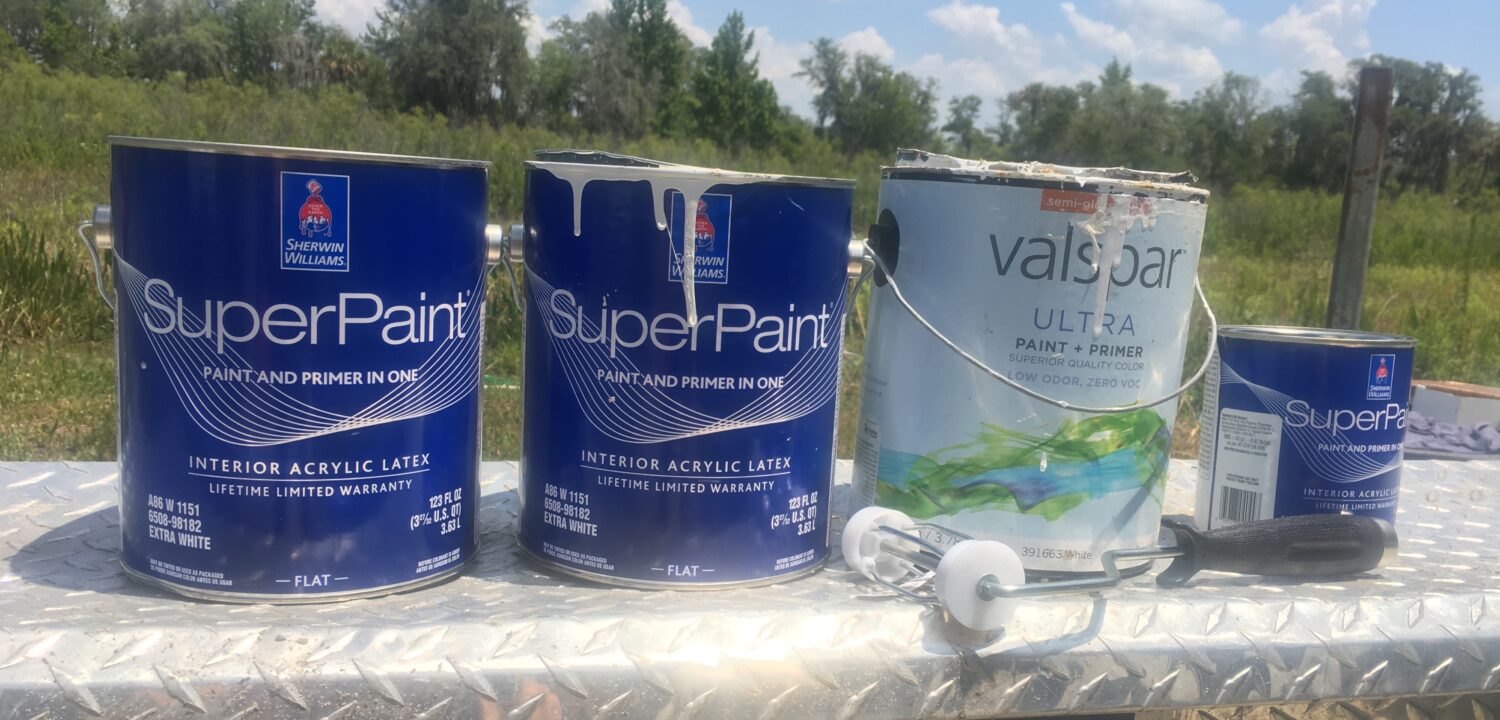
Week 4 of the One Room Challenge in our farm living room felt certainly like “the messy middle.” For a moment I couldn’t remember if we’re on week 4 or week 5. It’s that kind of vibe! And Week 4 of our One Room Challenge farm living room was all about paint, paint, and MORE paint. And I’m not done painting. Here’s some updates and thoughts from the week!
If you’ve been following since my very first blog post, then you know that 2020 has been a fun year of experimentation at my own house. I love trying things here – especially projects on a budget – so I can advise on whether a client or friend should try the same thing. Today we’re trying three (3) experimental paint techniques on some home decor items.

Rewind a few weeks back, and you may have joined me on my Thrift with Me blog post where I found some cool items I wanted to makeover for the mini-farm. I rode the high of excitement over to Michael’s craft store and picked up supplies to start these DIYs. Between waiting out summer non-stop showers to paint and having one fail pretty fast…this post was almost #cancelled. But since this blog is in the spirit of experimentation, I wanted to explore so I can share my thoughts with you.
We’re not failing, we’re learning! 🙂 I’ll start with my favorite…
Glass Lamp Base Painting
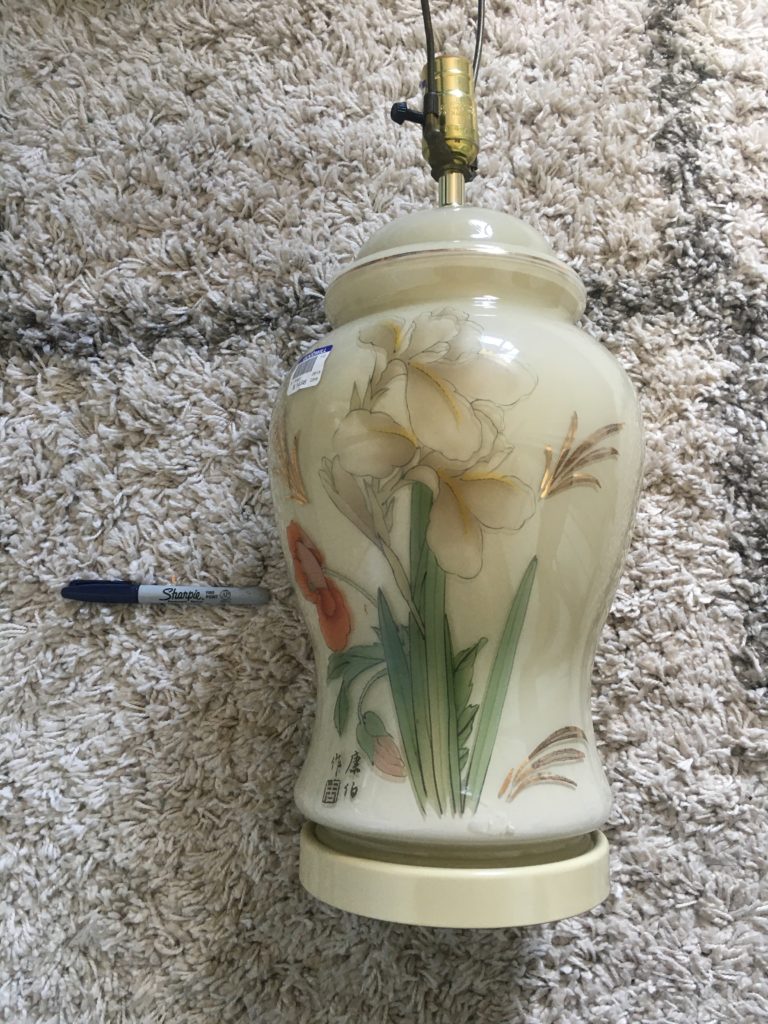
I had a lot of confidence in this project because of how well I learned the Dollar Tree glass vases take paint. (You can check out that super fun DIY in my Instagram Story Highlights!) New lamp bases, especially big ones like this, are often pretty expensive to replace. Using this $16 Goodwill find, I used some leftover paint to give this guy a new life!
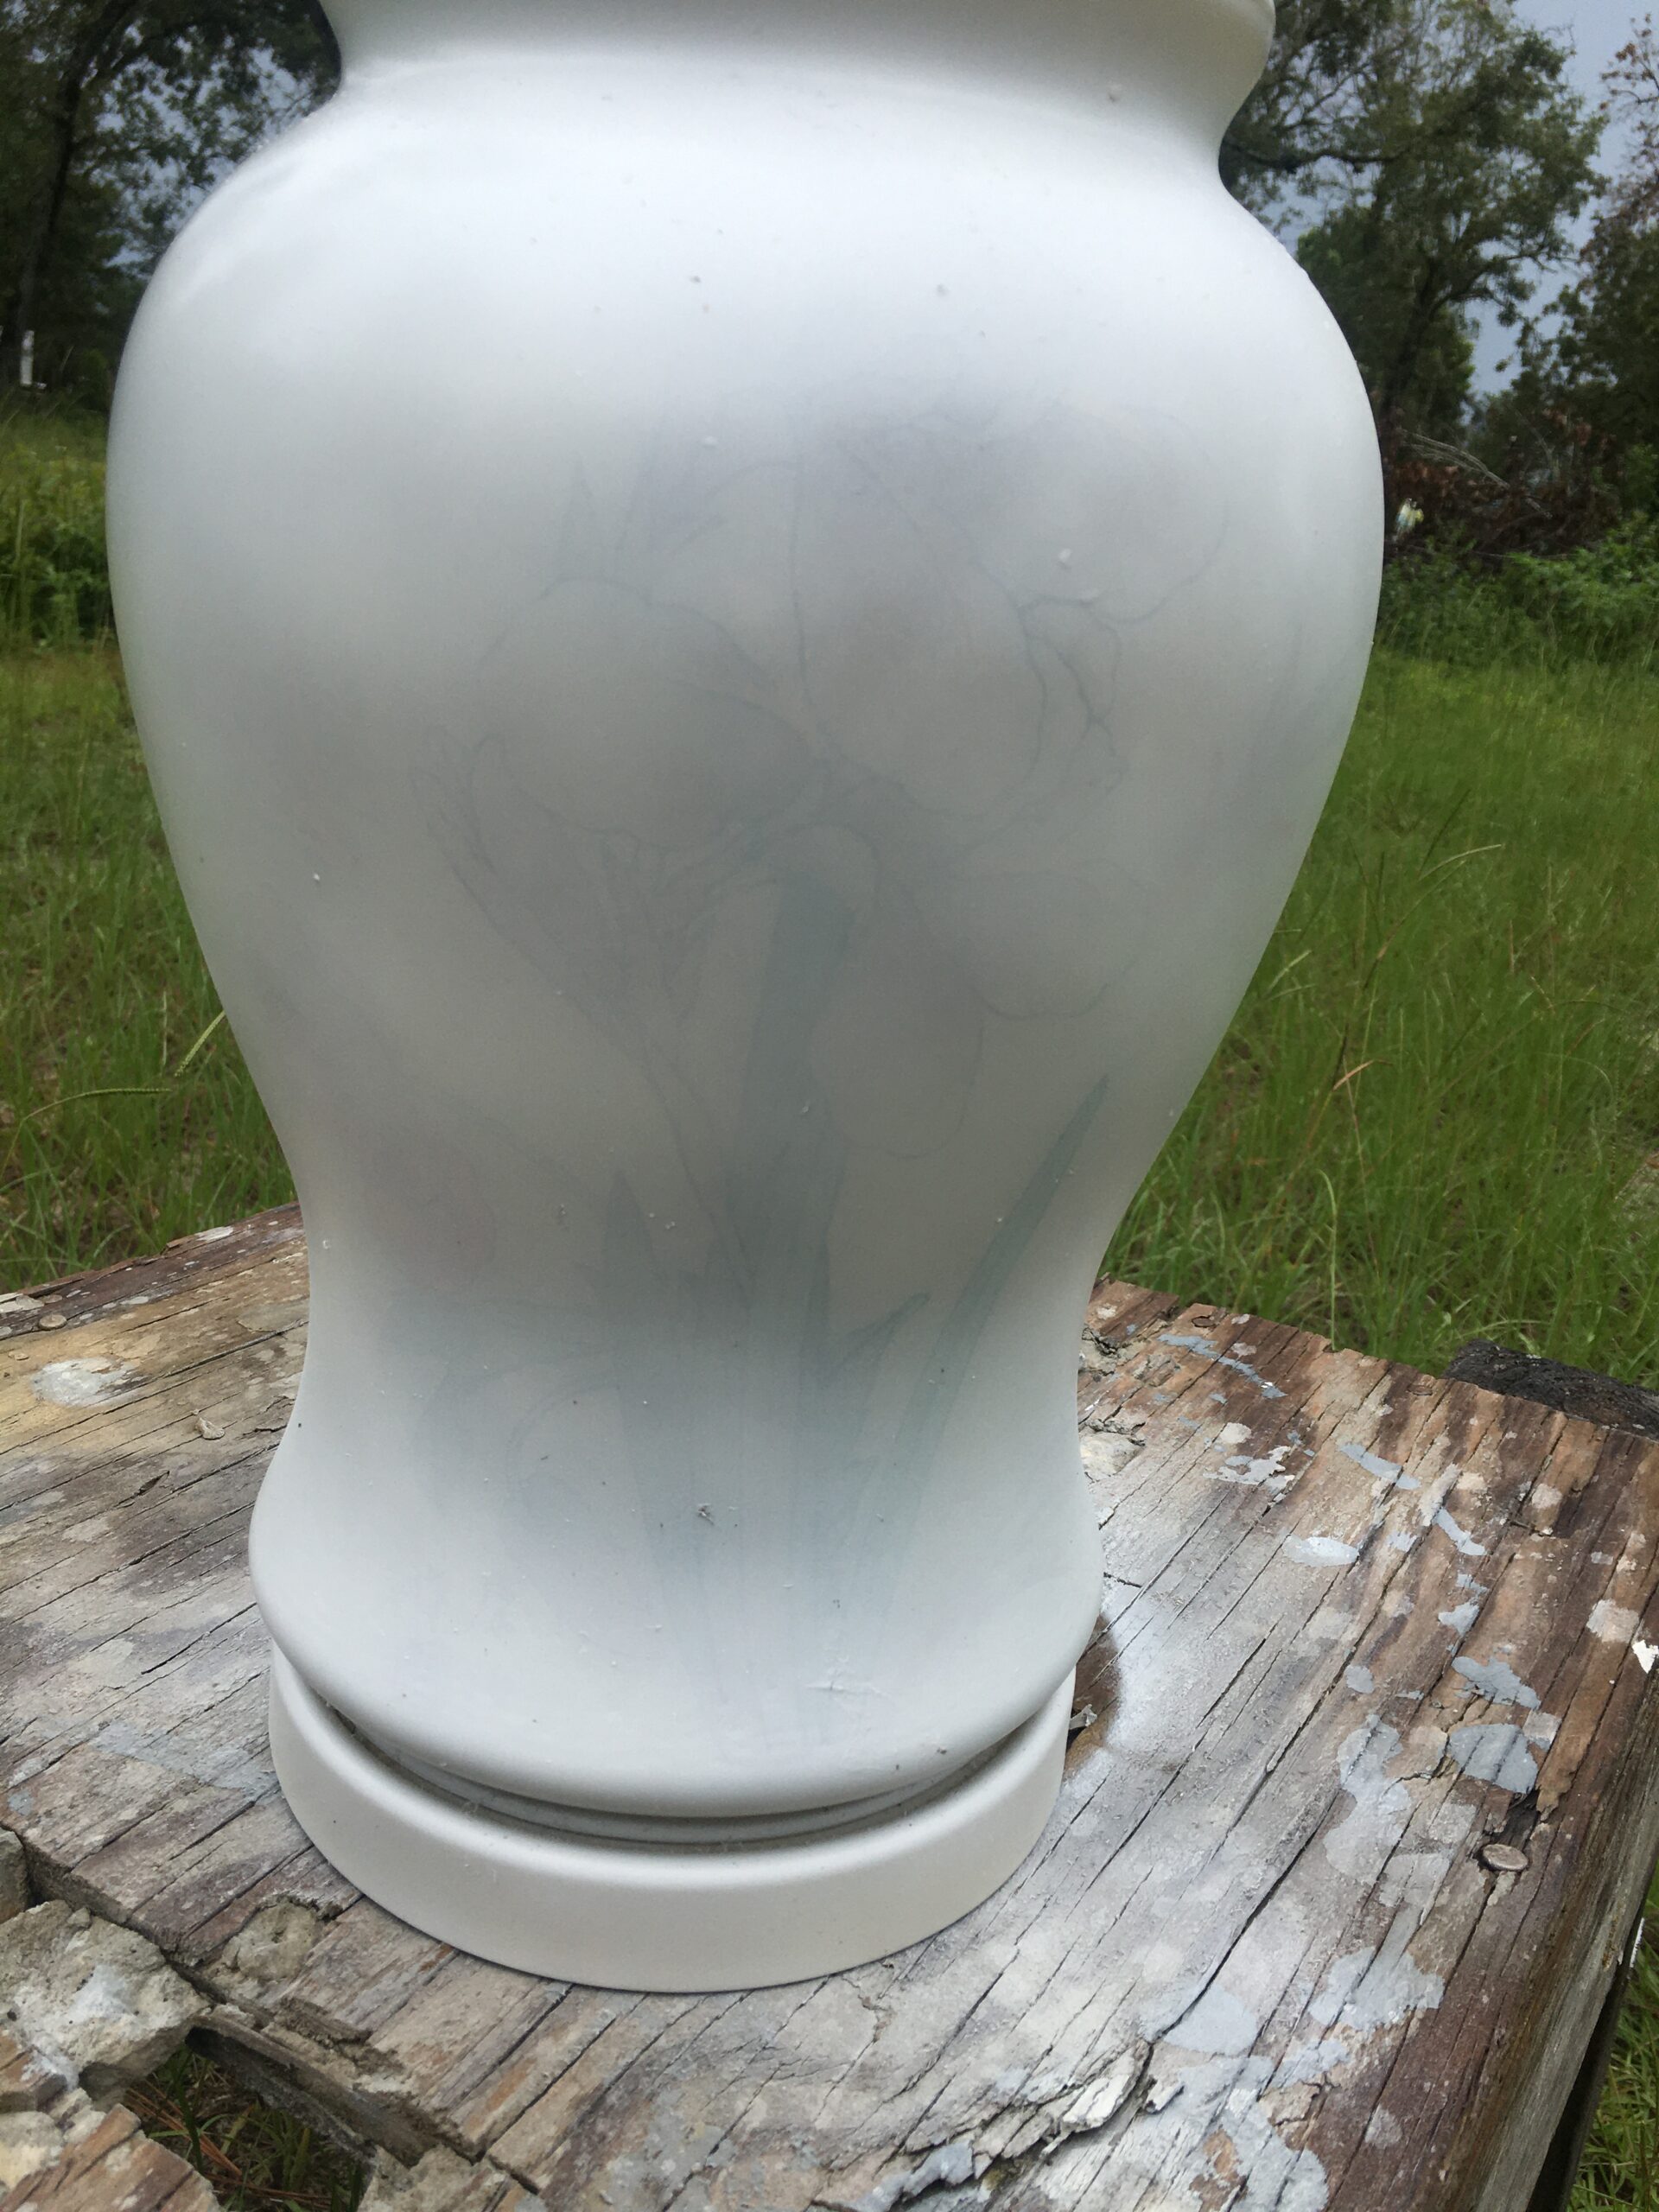
First I went in with one layer of white spray paint. But as you can see in the photo above, it definitely needed about 2-3 total coats to cover.
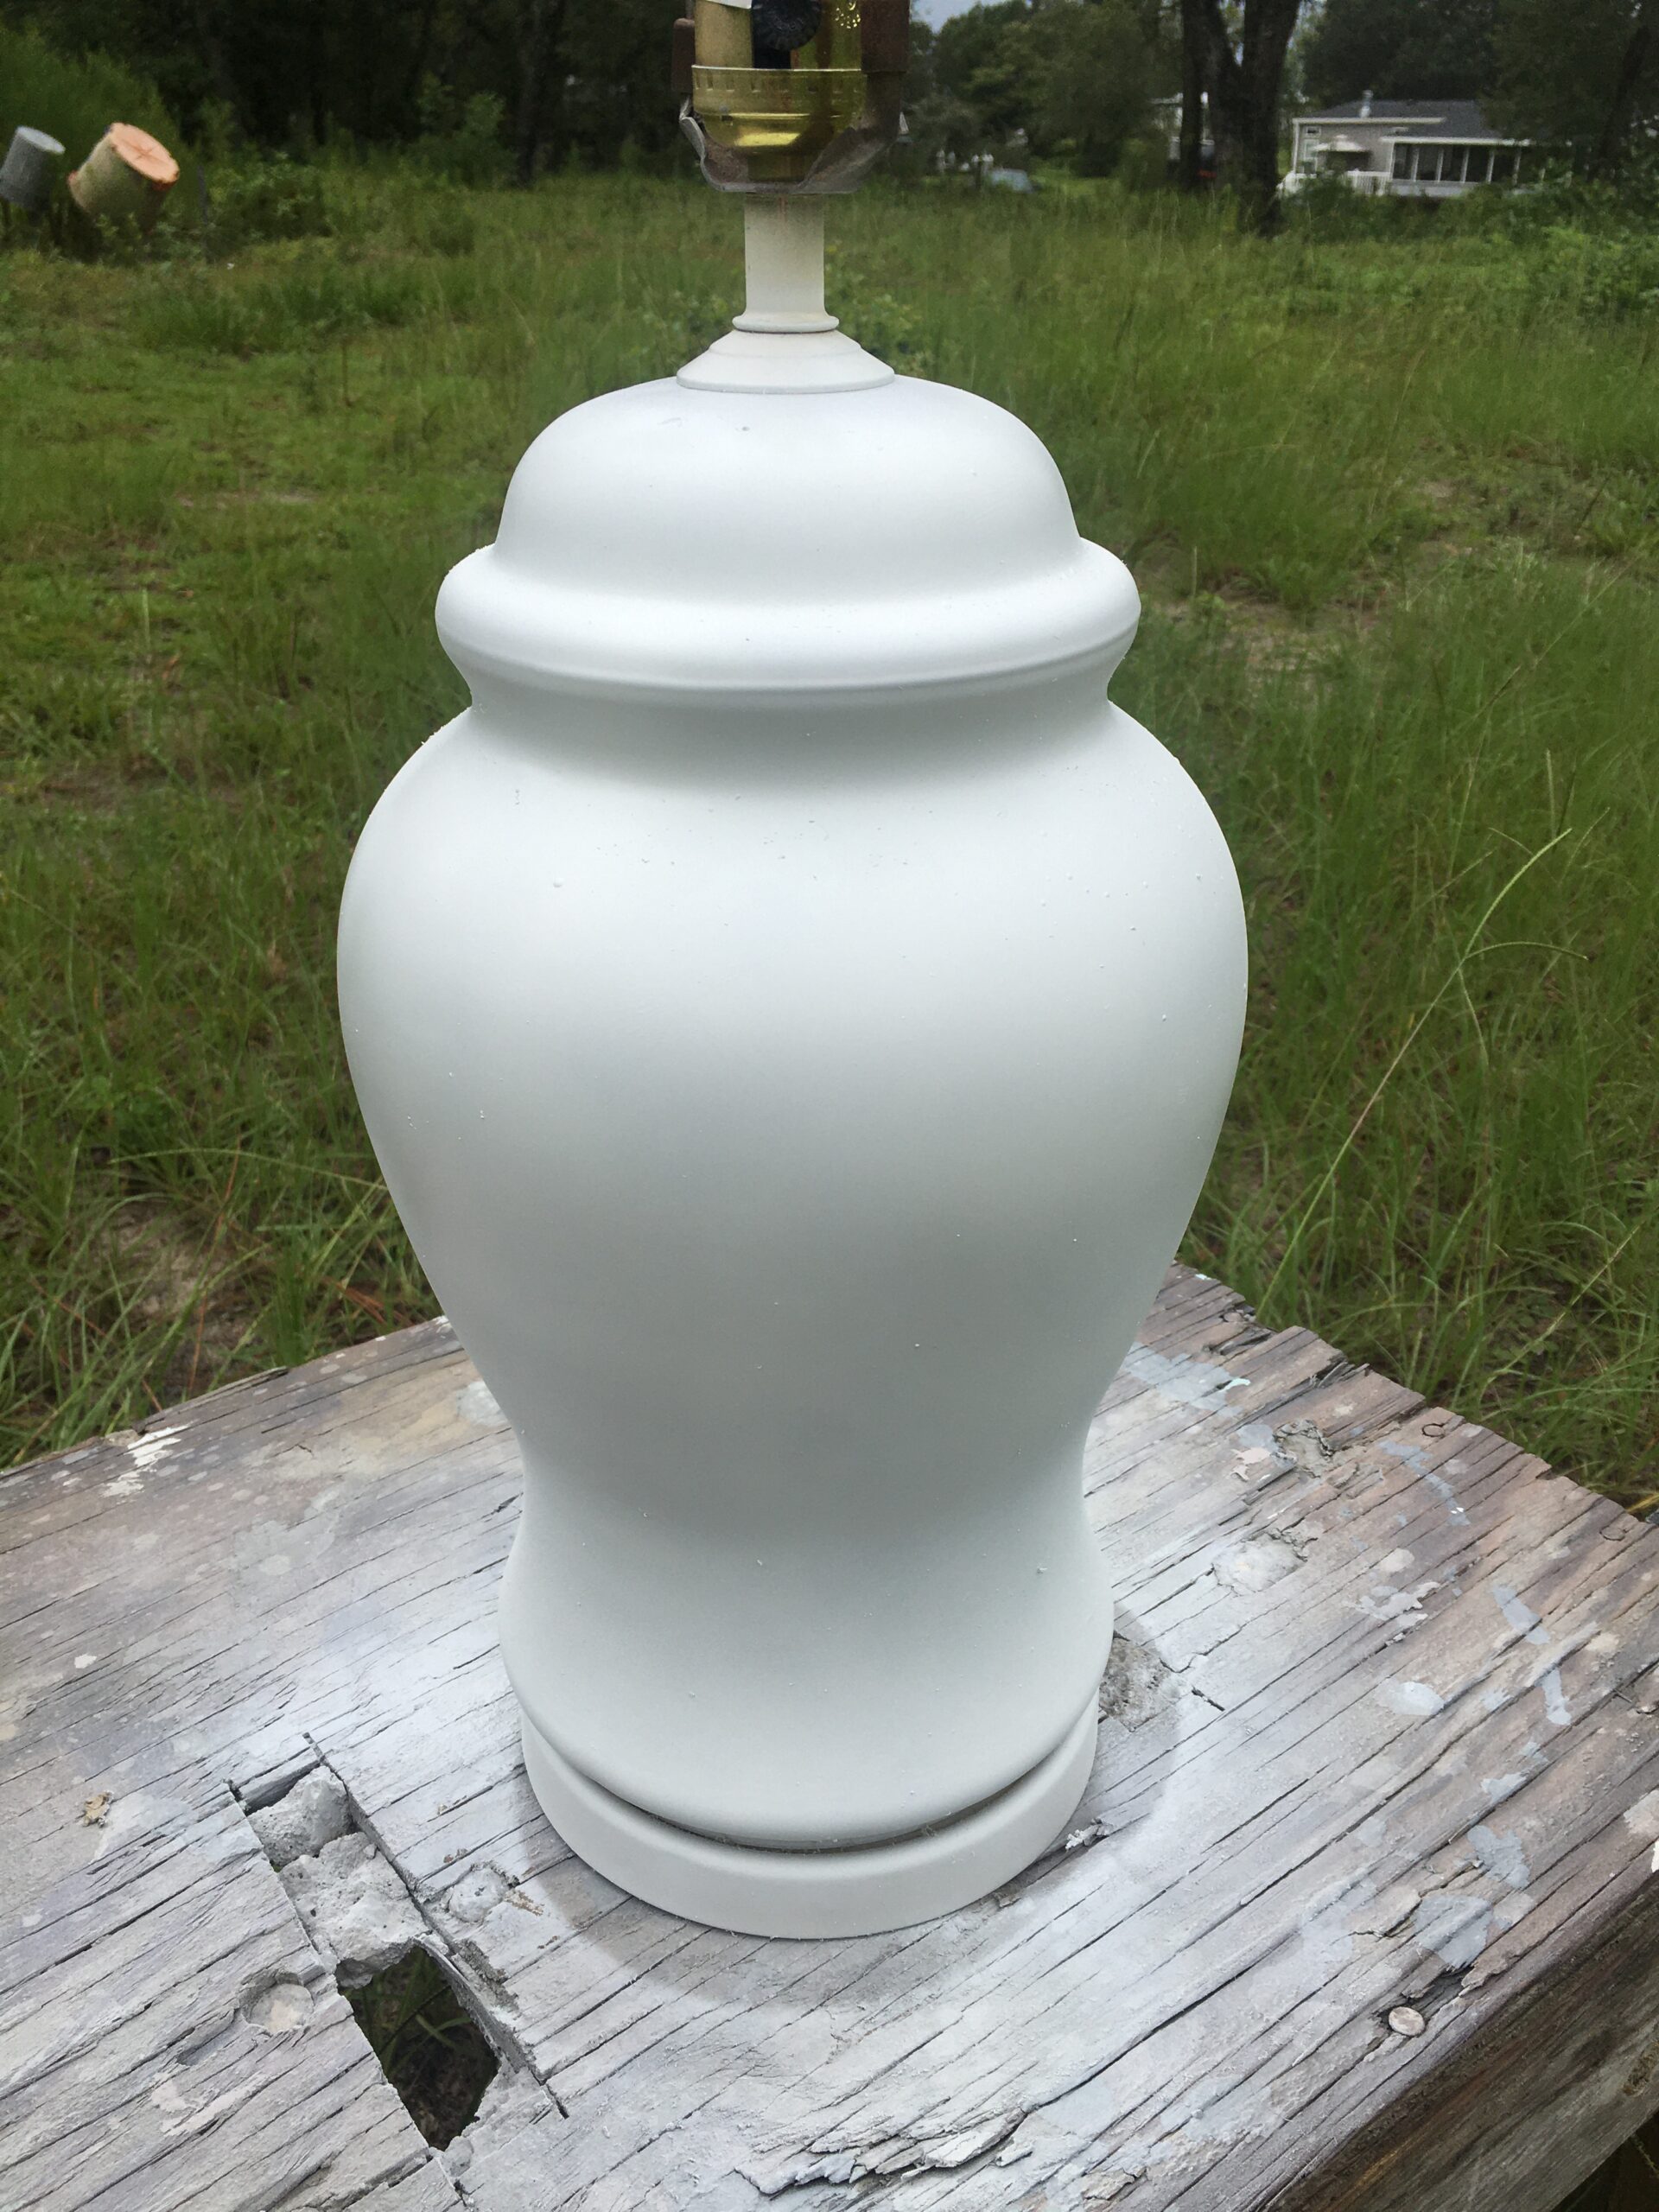
Photo after the second or third coat of spray paint was applied. With spray paint, you always have to move the piece around to ensure you’ve touched all angles.
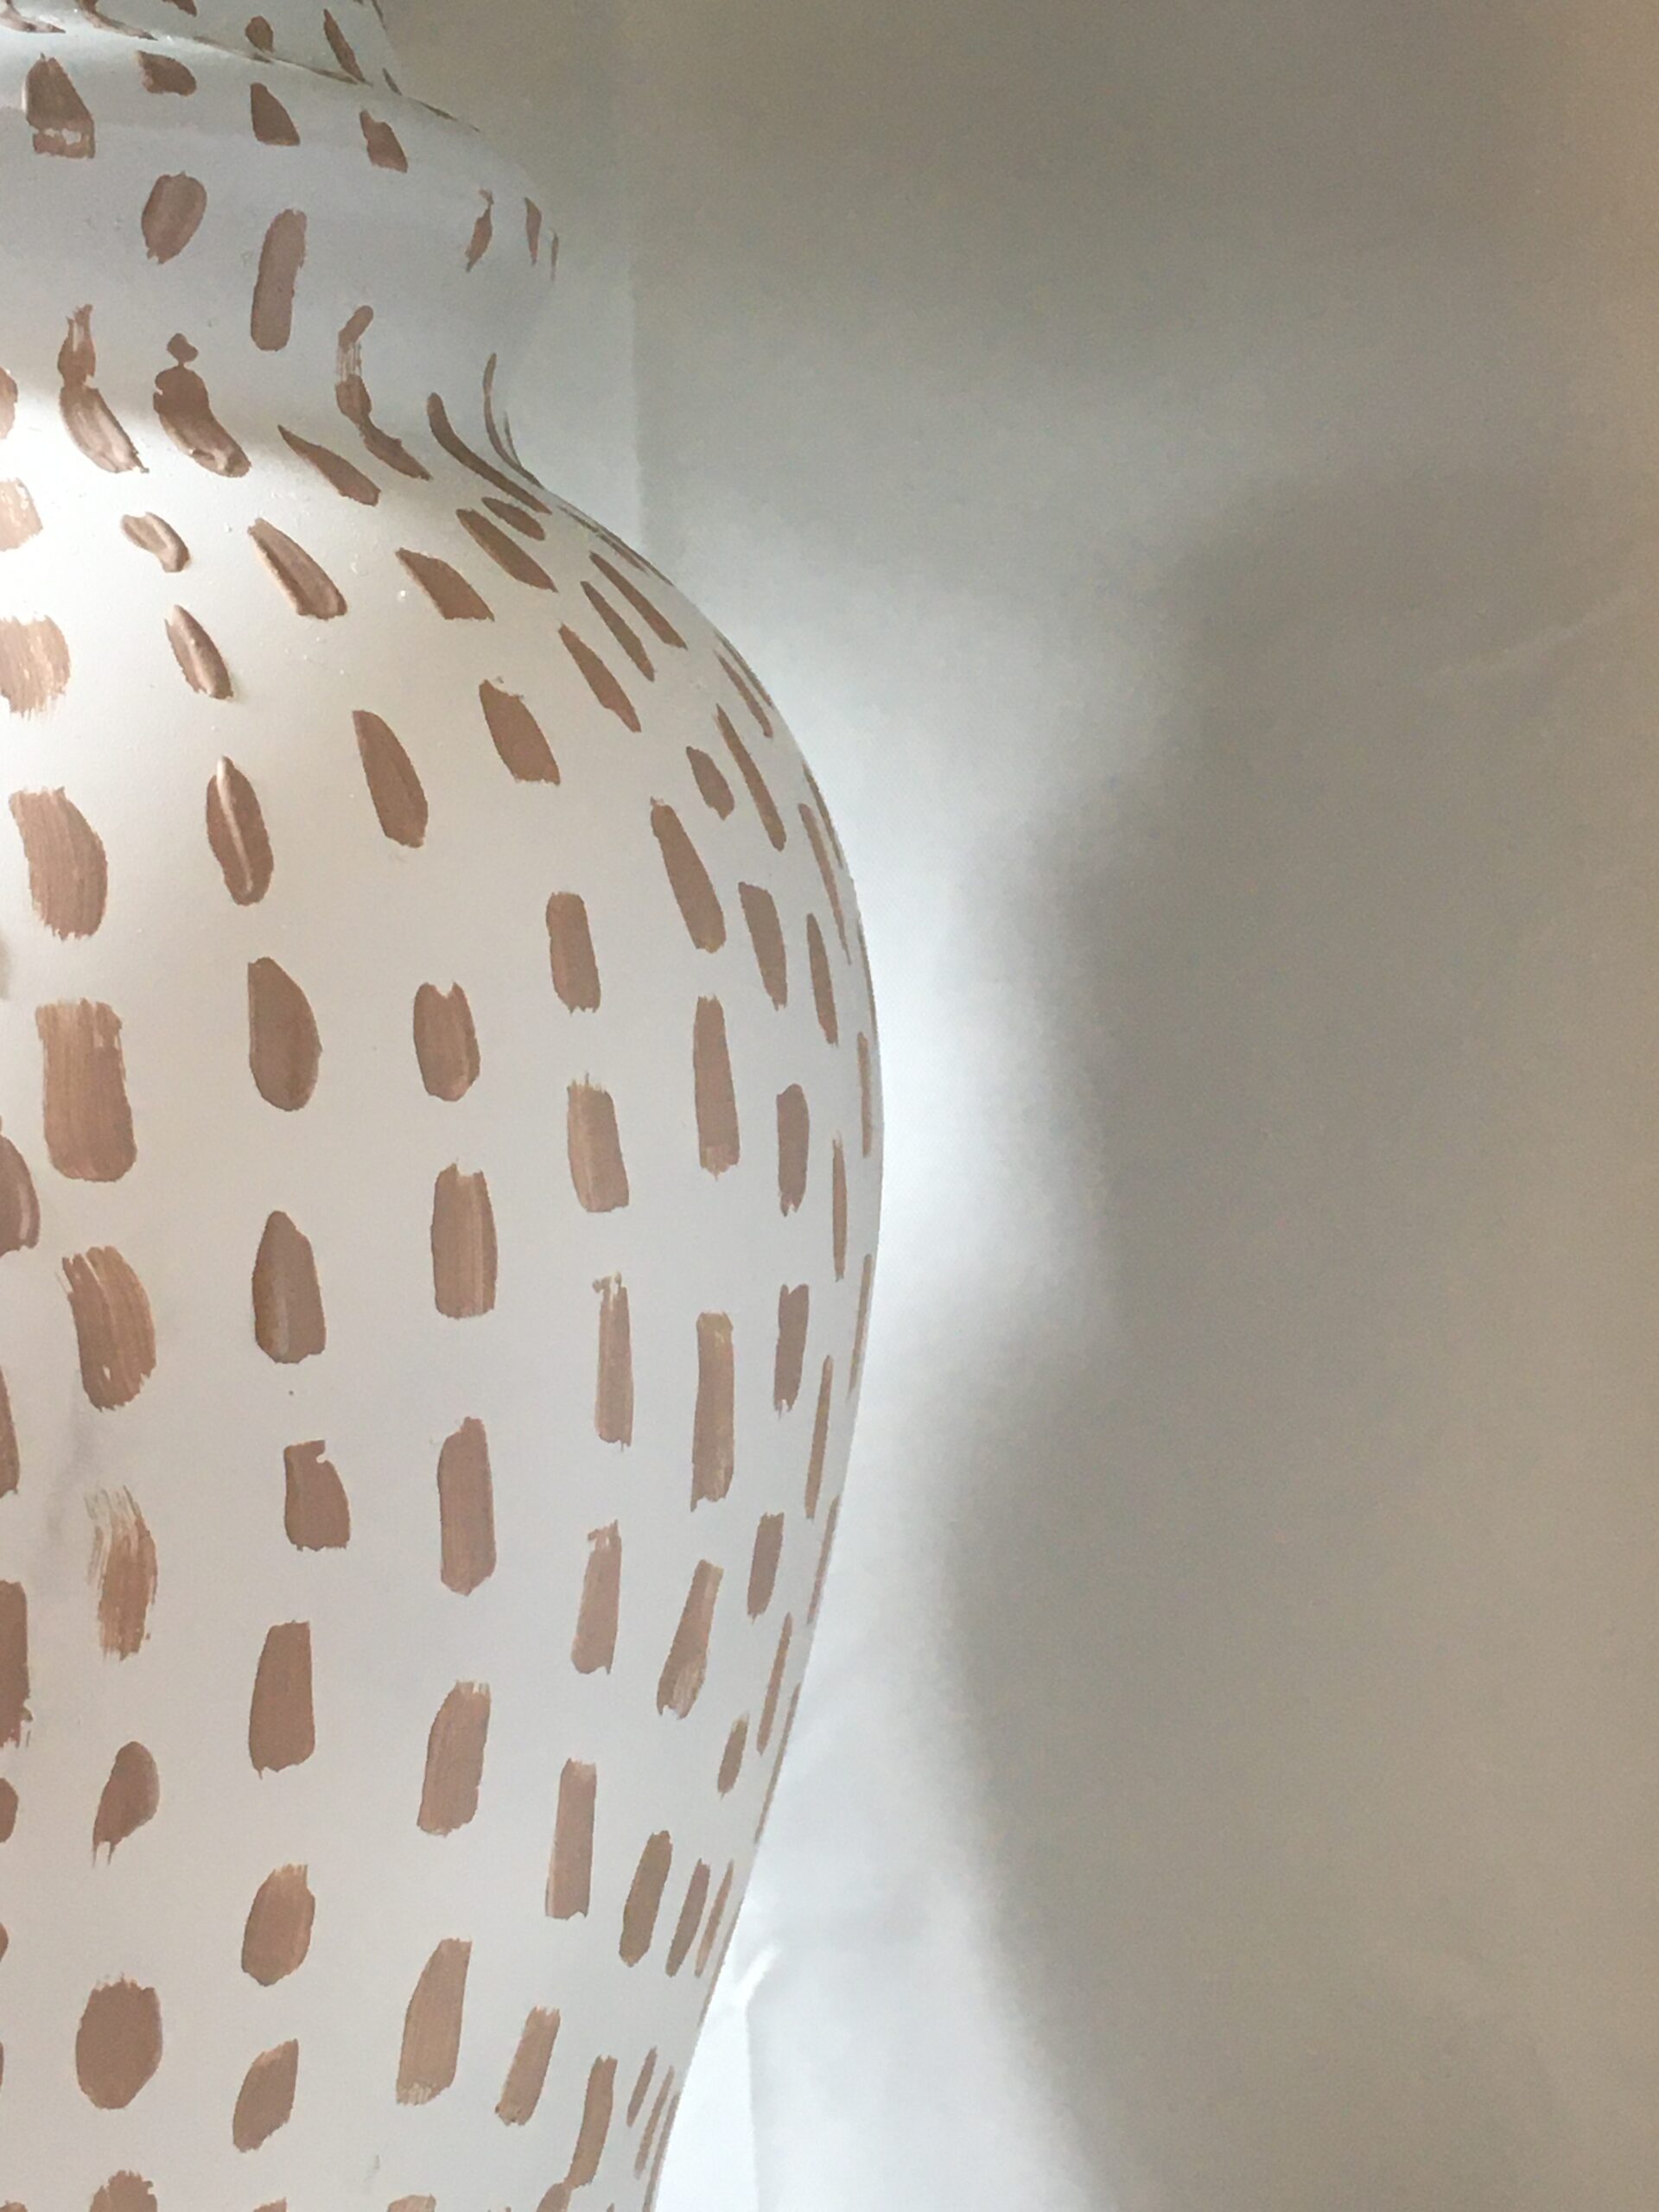
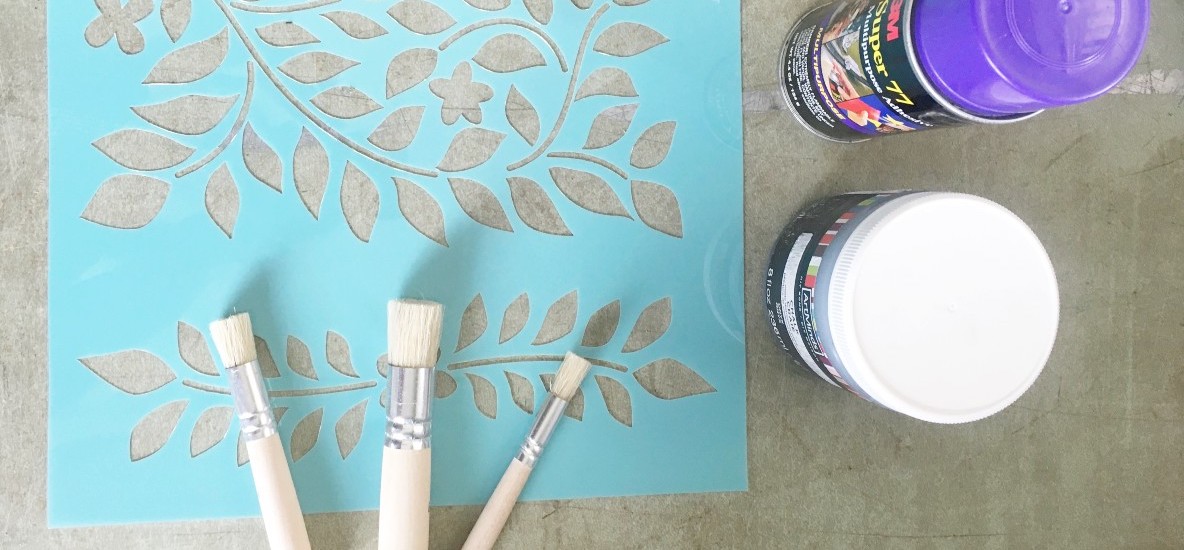
Another trick I recommend when you’re covering a pattern with a white or similar light color, is to add a little pattern on top. This is an insurance policy to make sure the old pattern is nearly undetectable. I really liked how easy this small brush stroke pattern was, and that it didn’t have to look totally perfect.
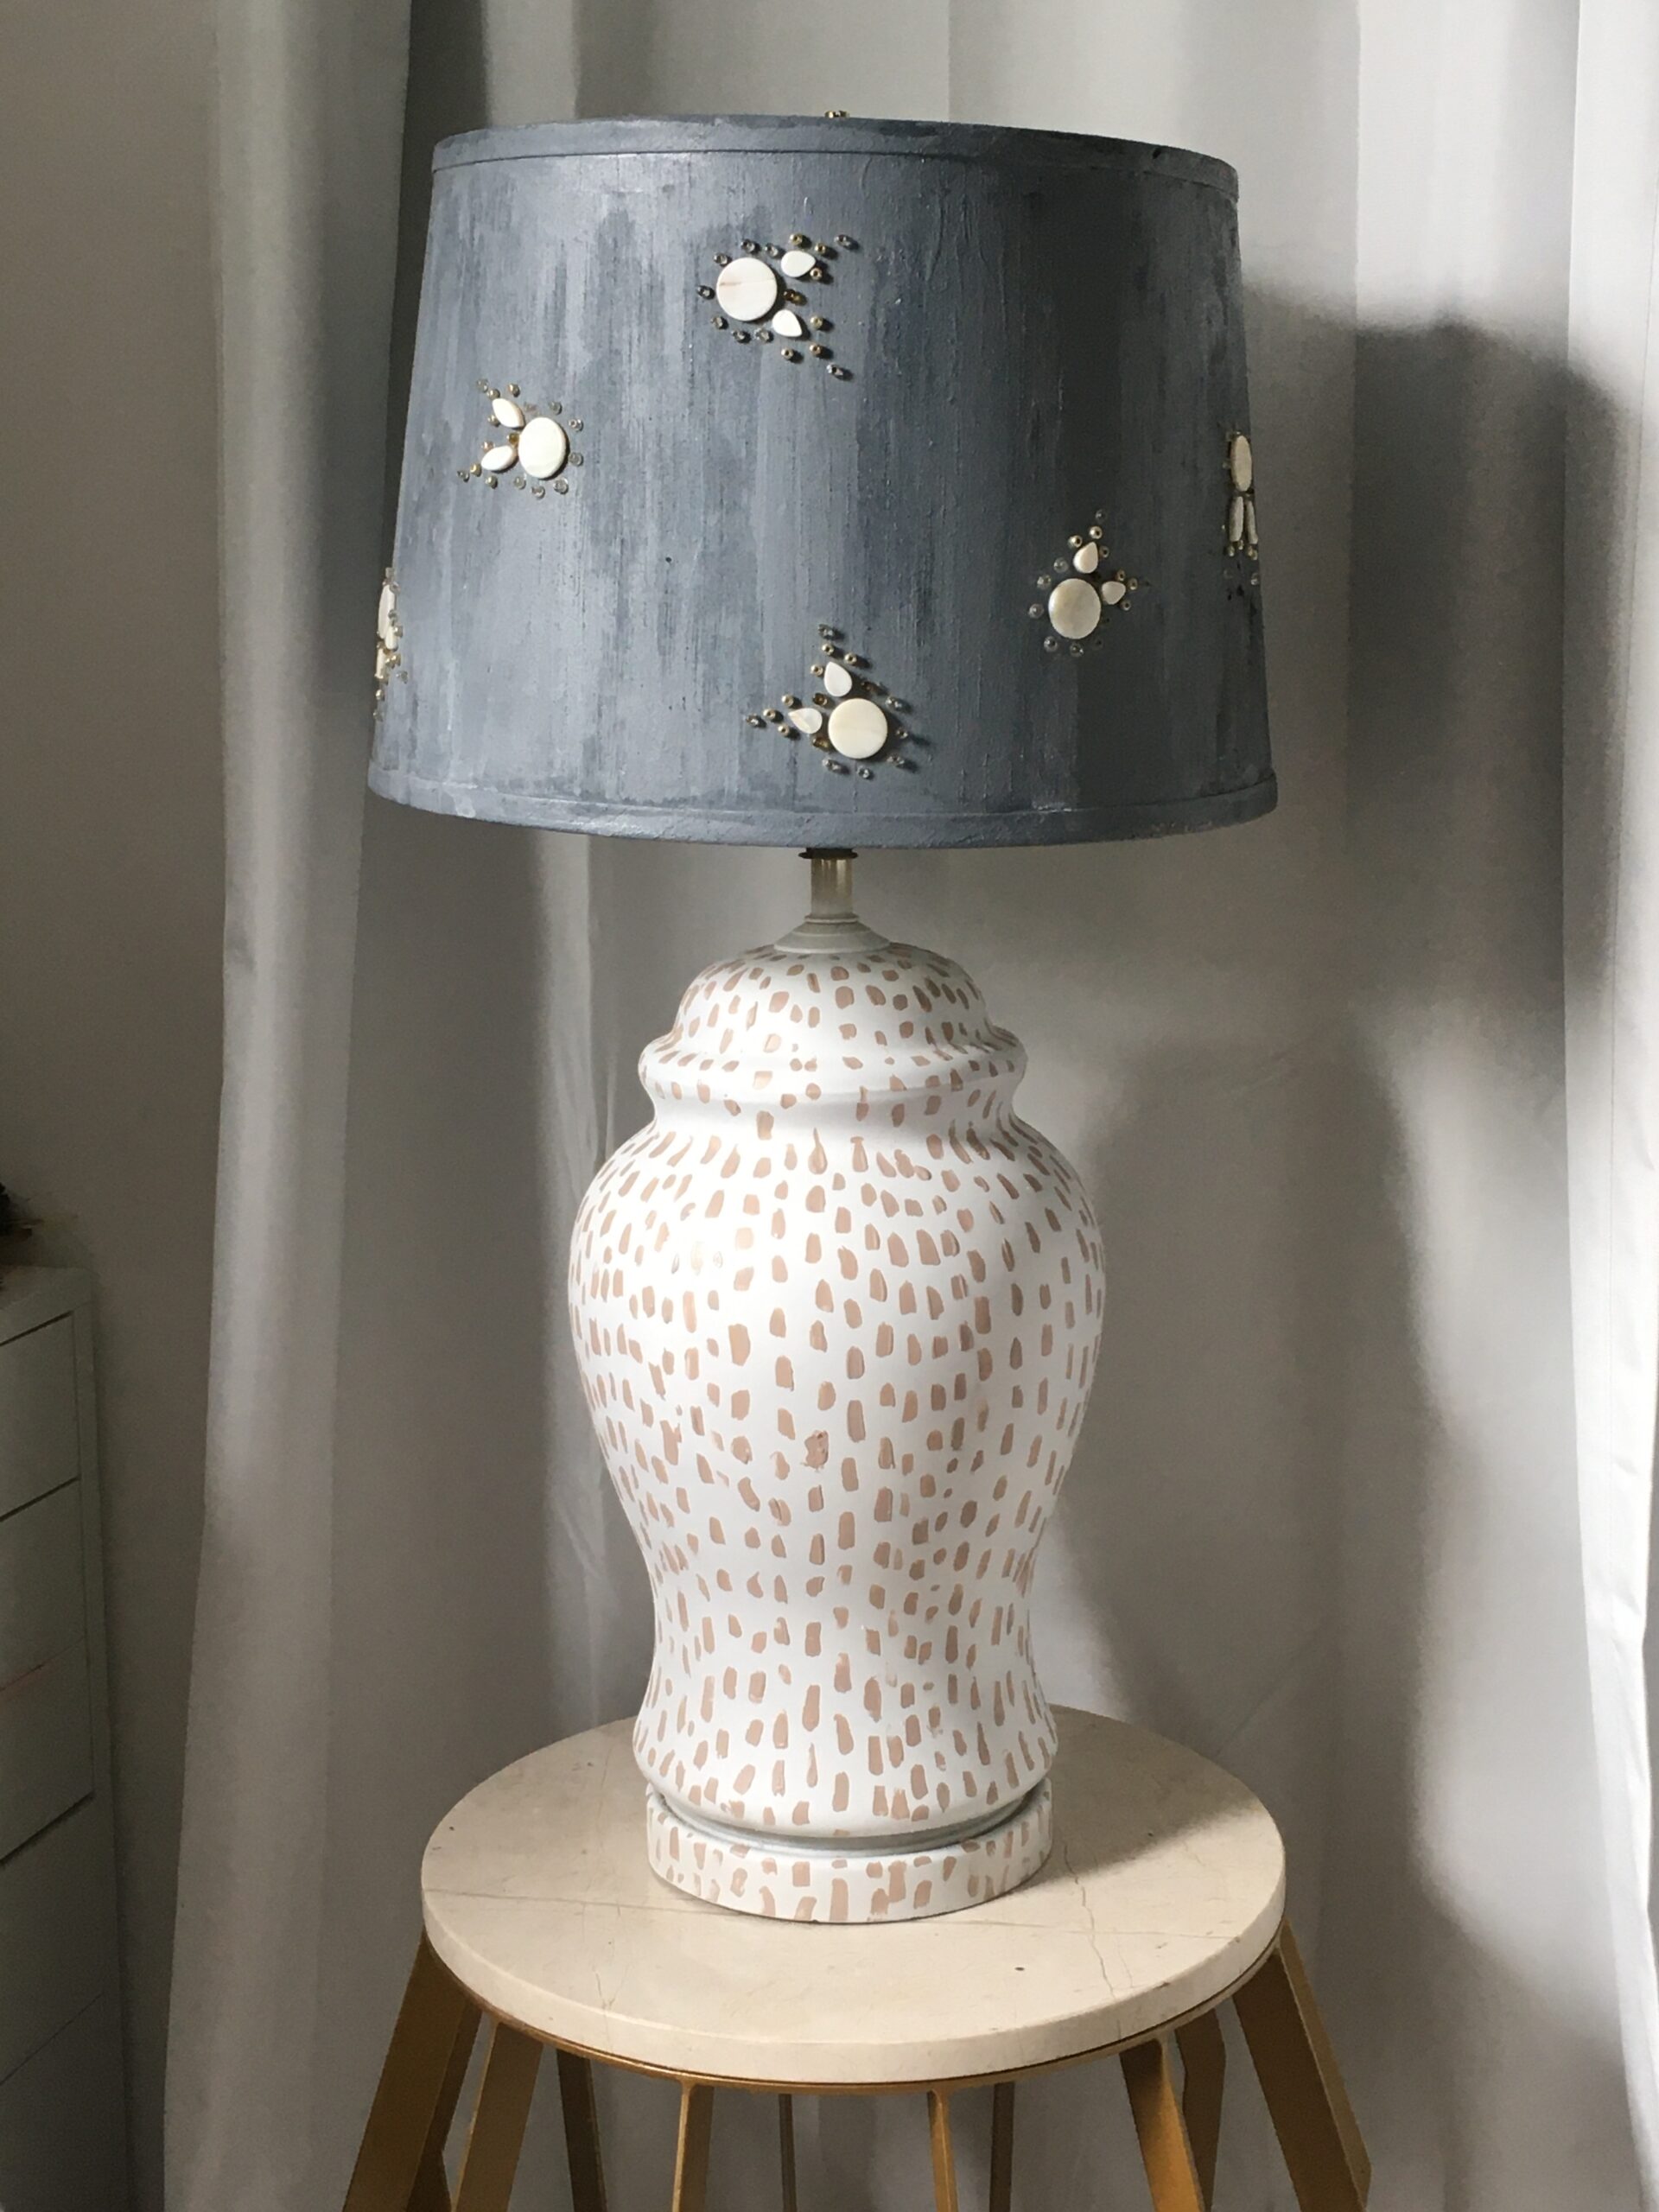
If you caught my Lamps DIY or the 2020 DIY recap, you heard the news that this lamp shade was needing a new base from its tragic fall. I totally love how these two look together in terms of color and overall proportion.
Marbled Terra Cotta Pot
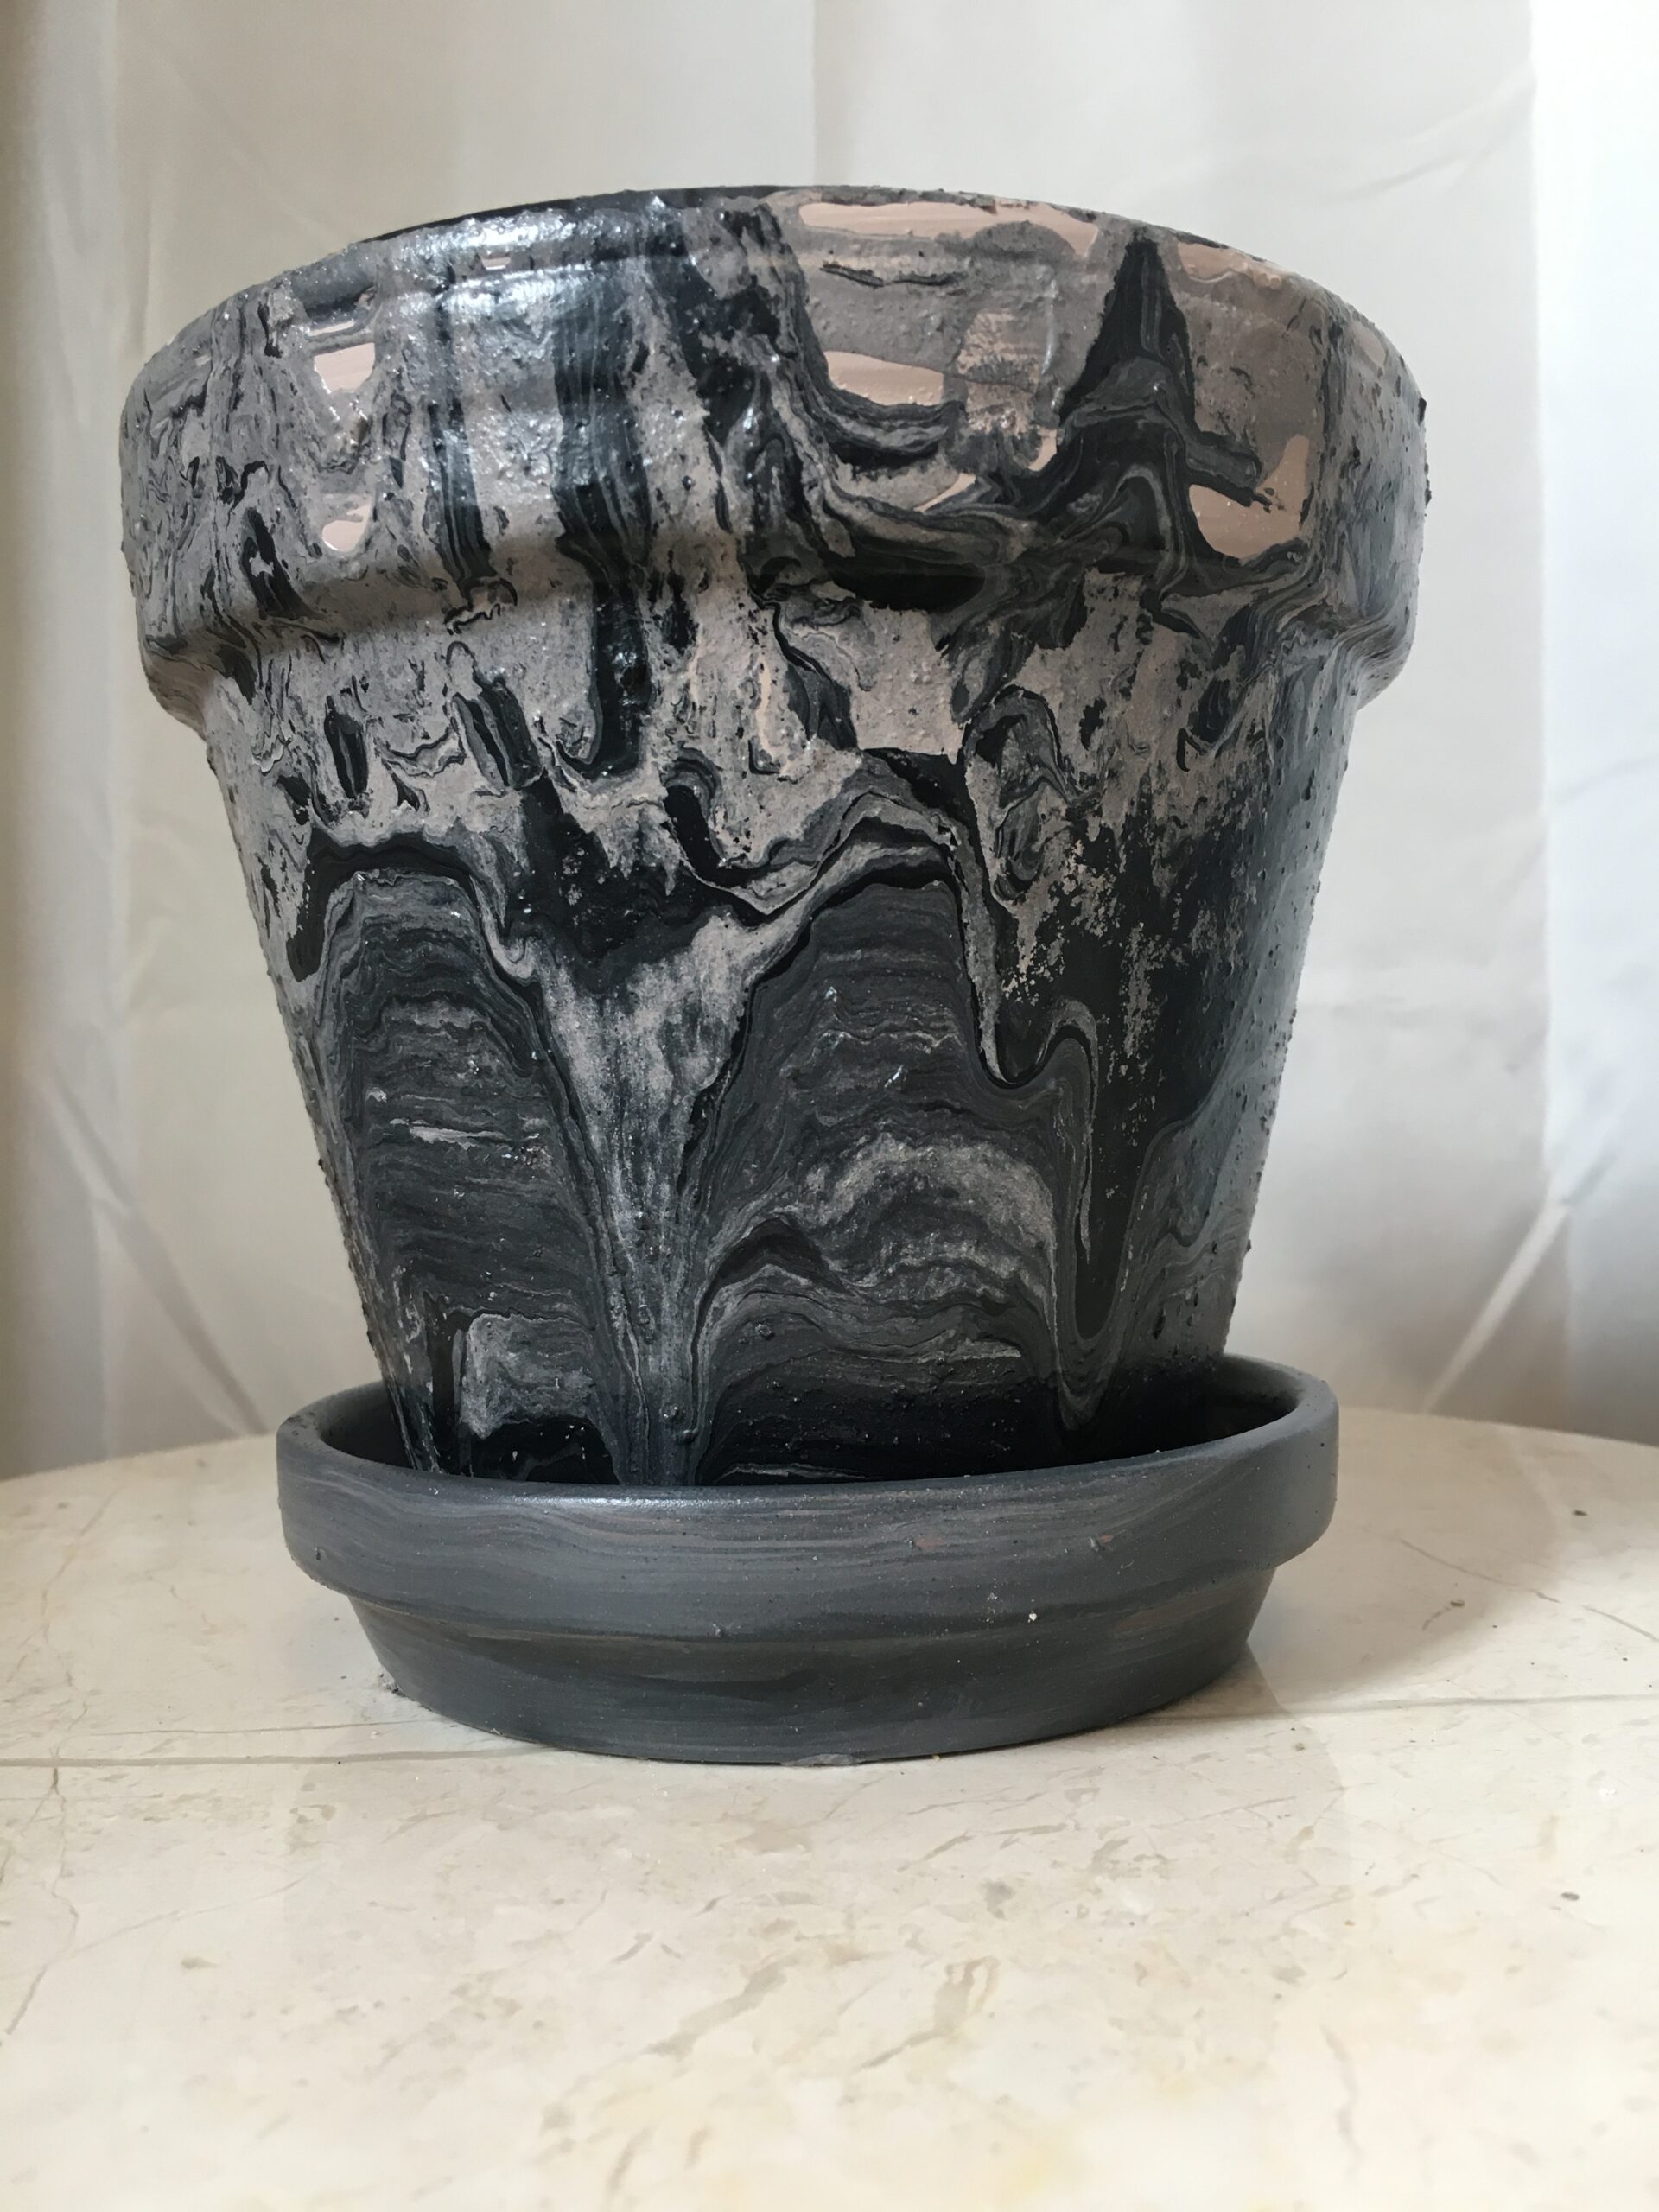
So this is where I nearly had an “I give up” moment. I found this blank canvas terra cotta pot when I went to Michael’s to purchase the supplies. We needed to transition an orchid into bigger pot, so I thought this would be a fun opportunity to paint.
Basically, I originally wanted to do a “dipped” look with some Mod Podge glazing but it all went to heck really fast. In hindsight, I should’ve worked with a deeper, bigger bowl of paint to have more control of the “dip” effect.
So after nearly all of the beautiful terra cotta color was covered, I decided to get really bold and try a marbling technique.
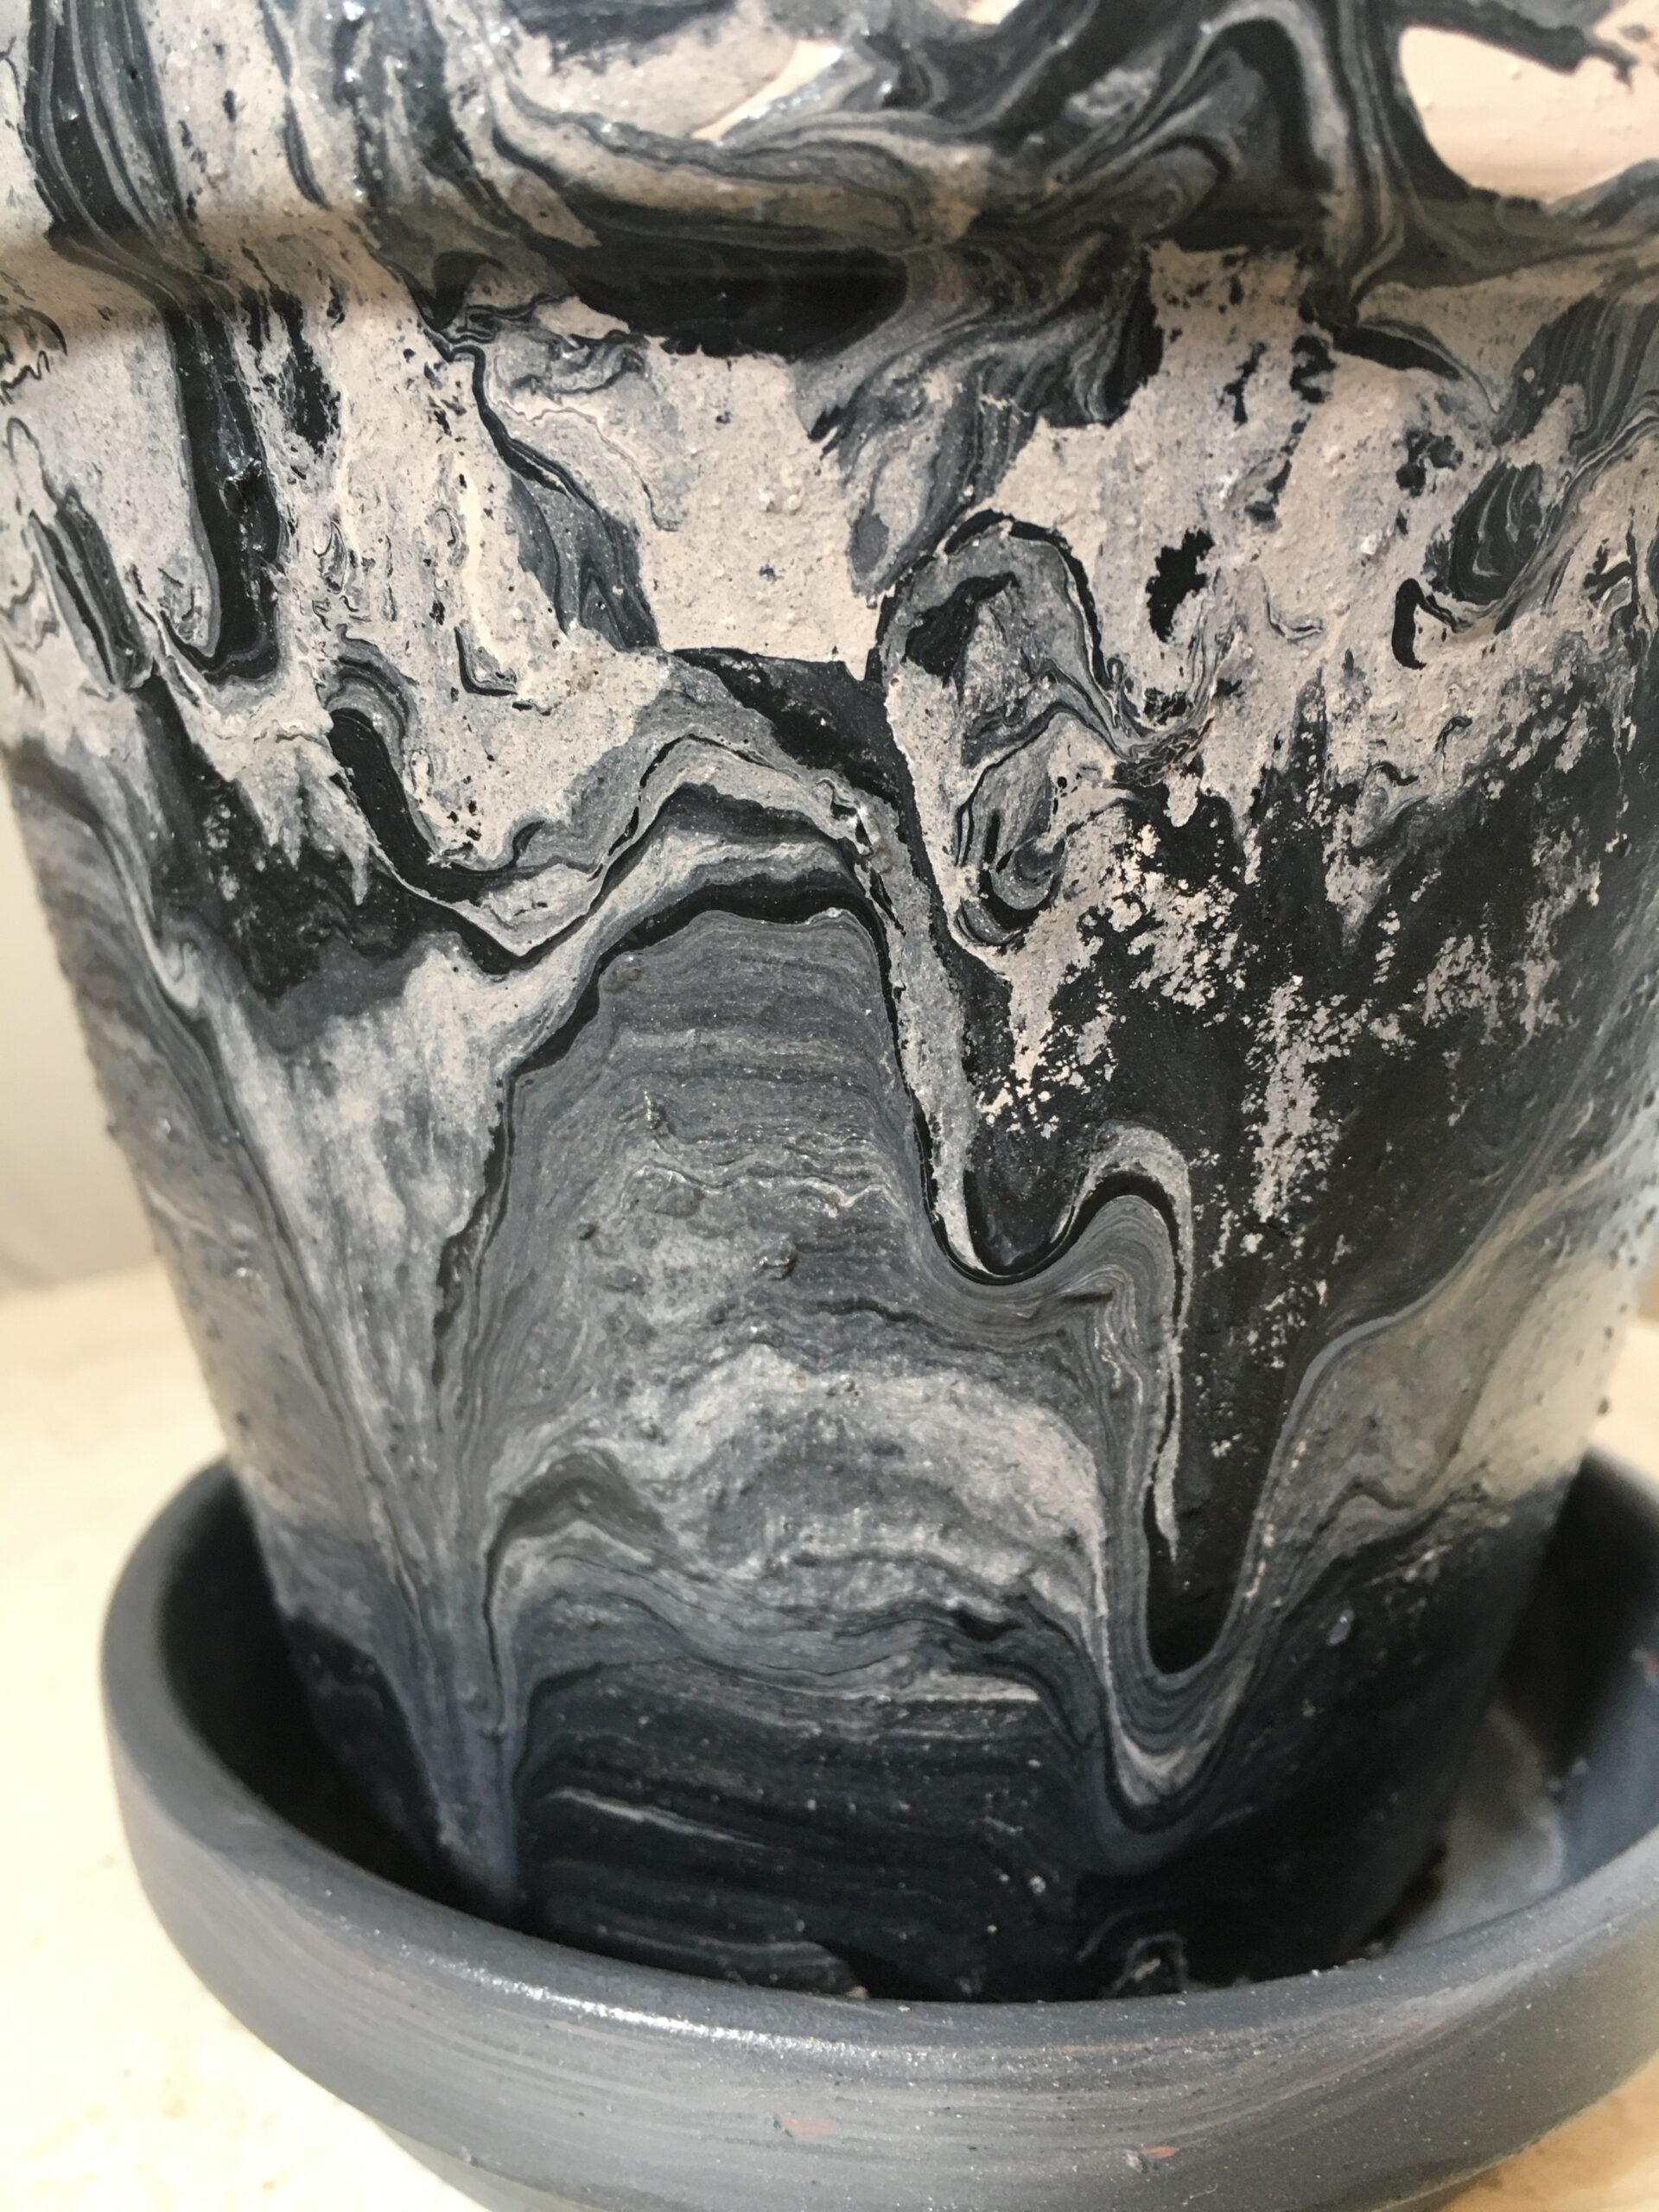
Warning: this was 10 out of 10 on the messy scale! The marbled effect was created by lightly mixing colors with Mod-Podge in a small bowl and basically dripping it on. After all the paint is applied strategically, leave it somewhere safe to dry overnight.
Not sure if I love it, but let me know what YOU think of this finish!
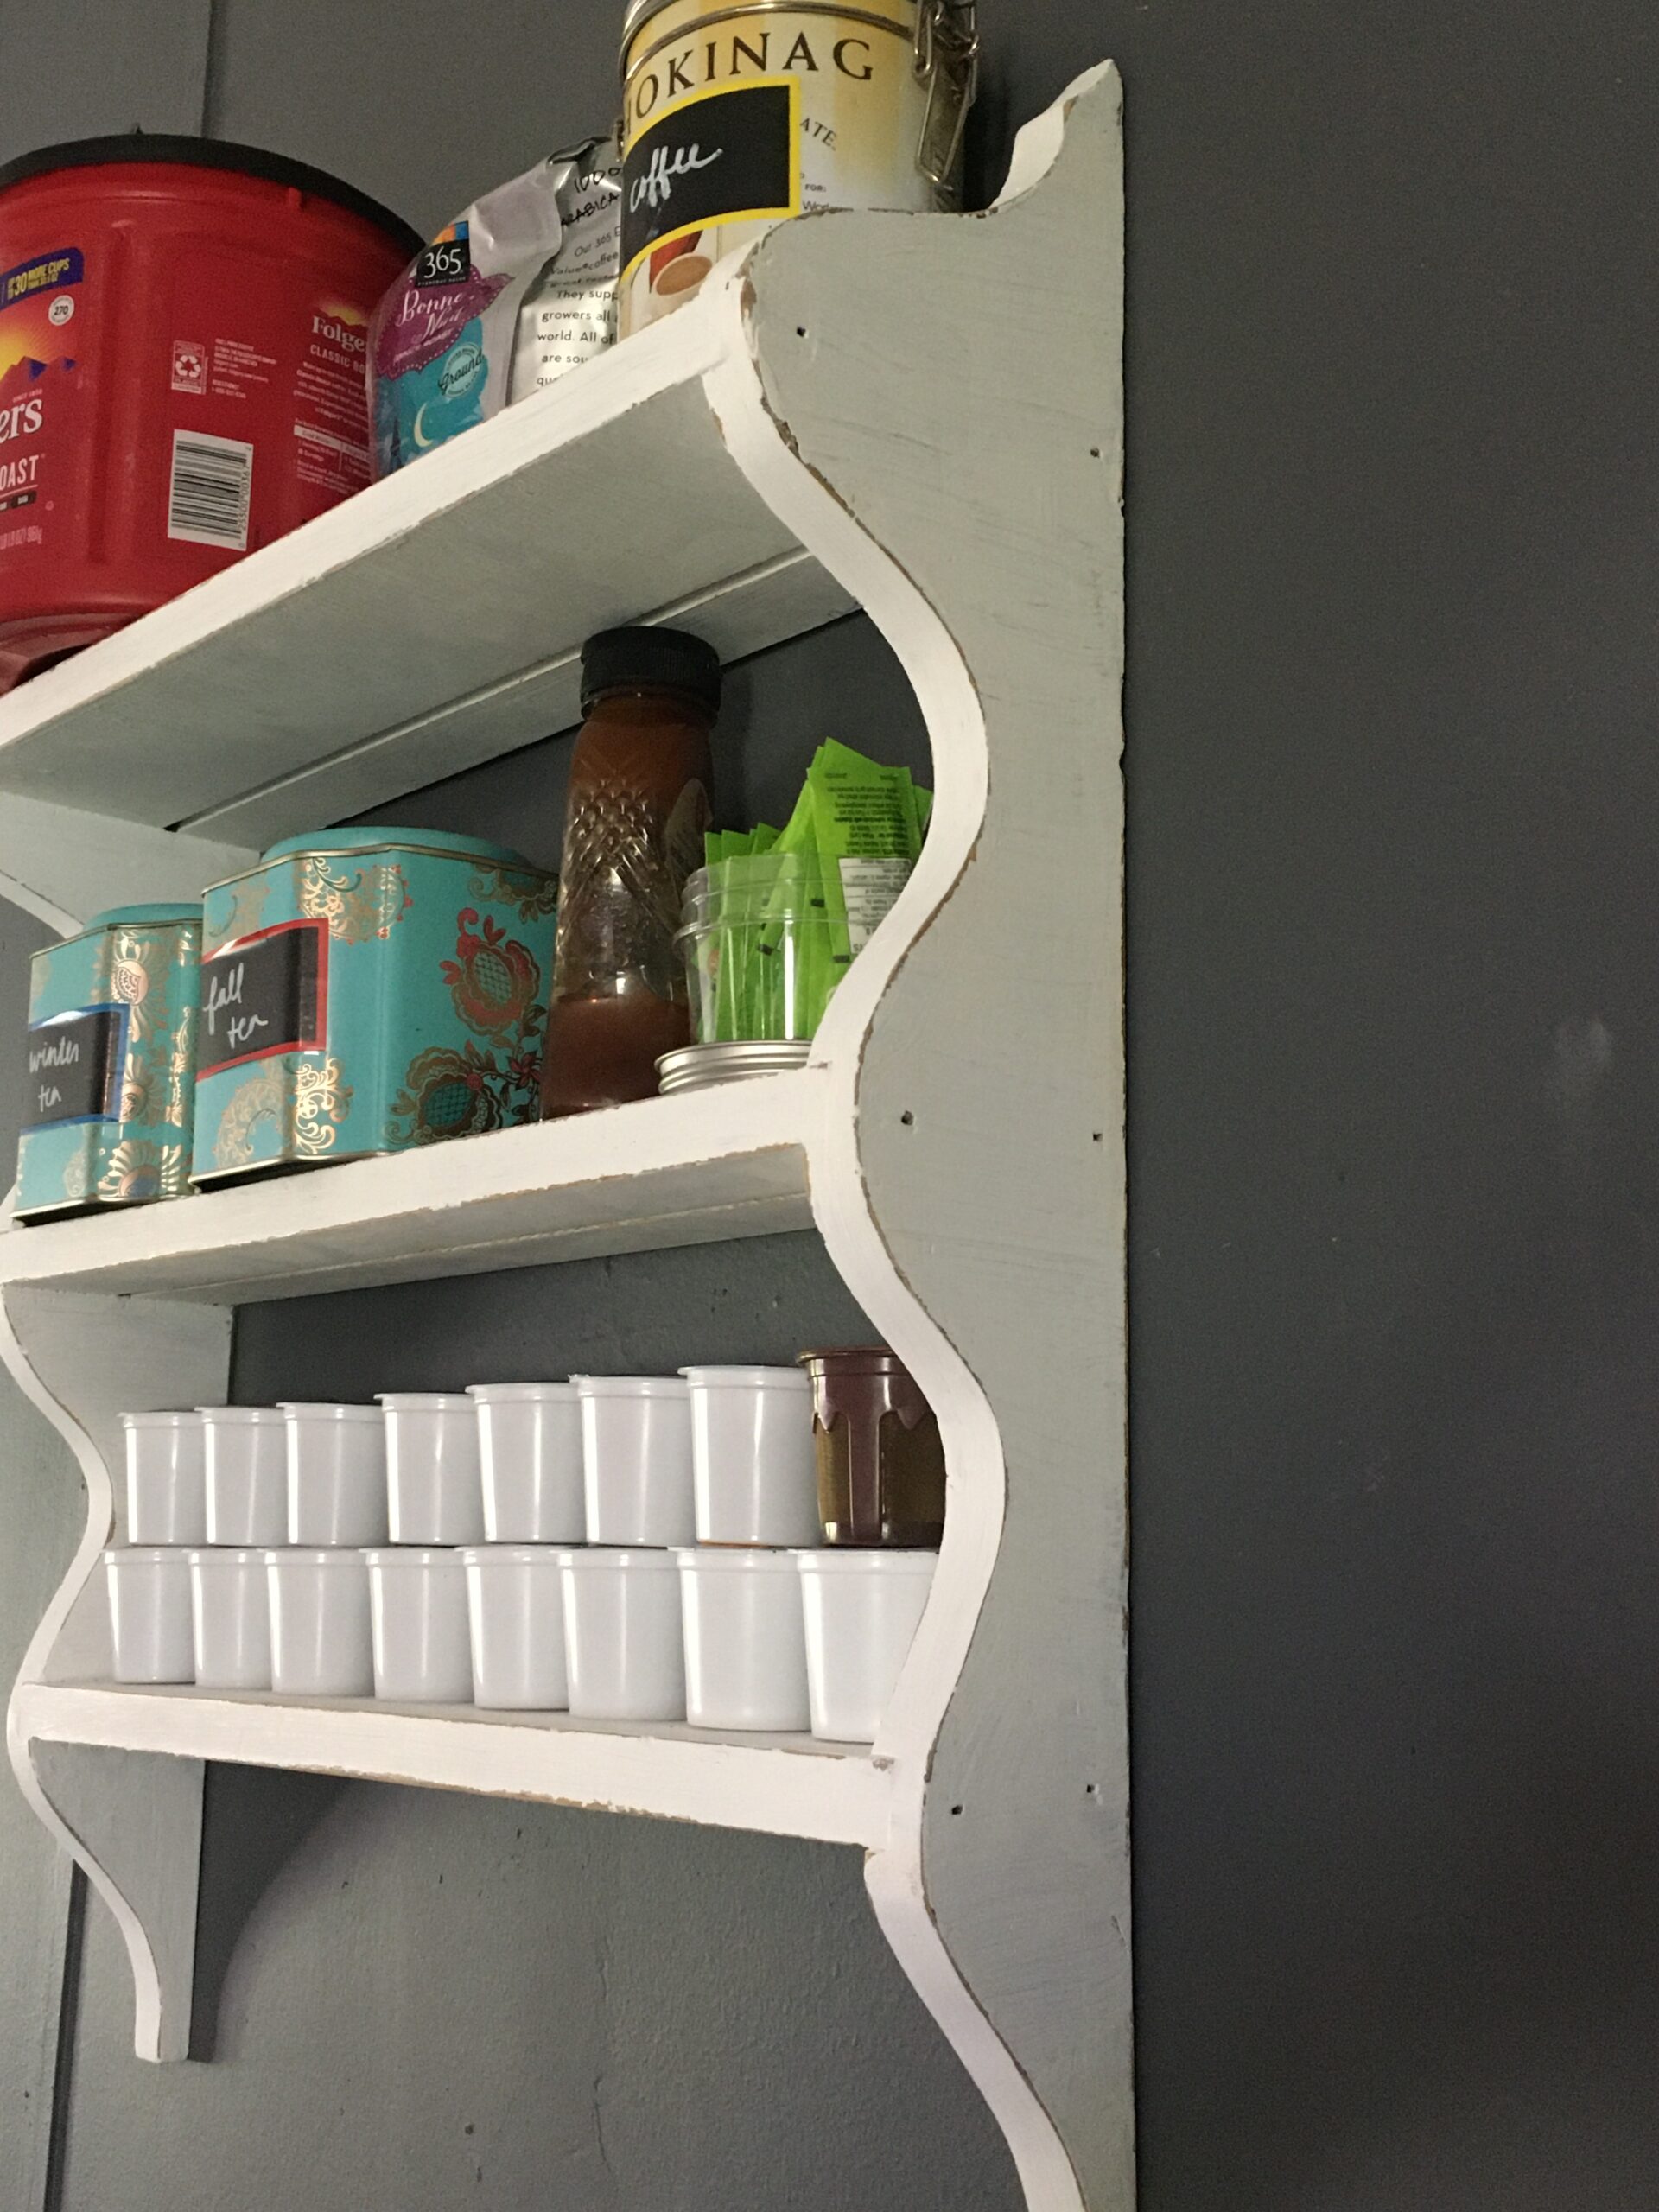
Chalk Painted Coffee Bar Shelf
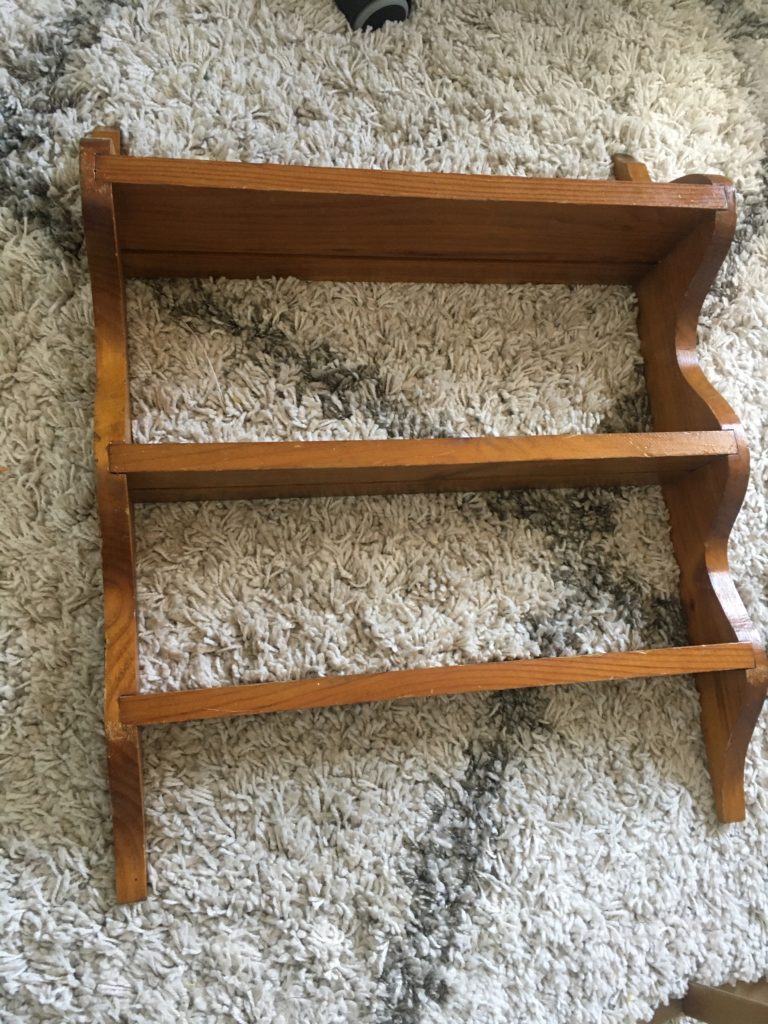
Another one from my recent Thrift Store finds! I bought this shelf for just $3 and envisioned hanging it above our coffee machine to clear some counter. You would think a girl living at a literal mini-farm would have tried chalk paint out sooner, but there’s no time like the present!
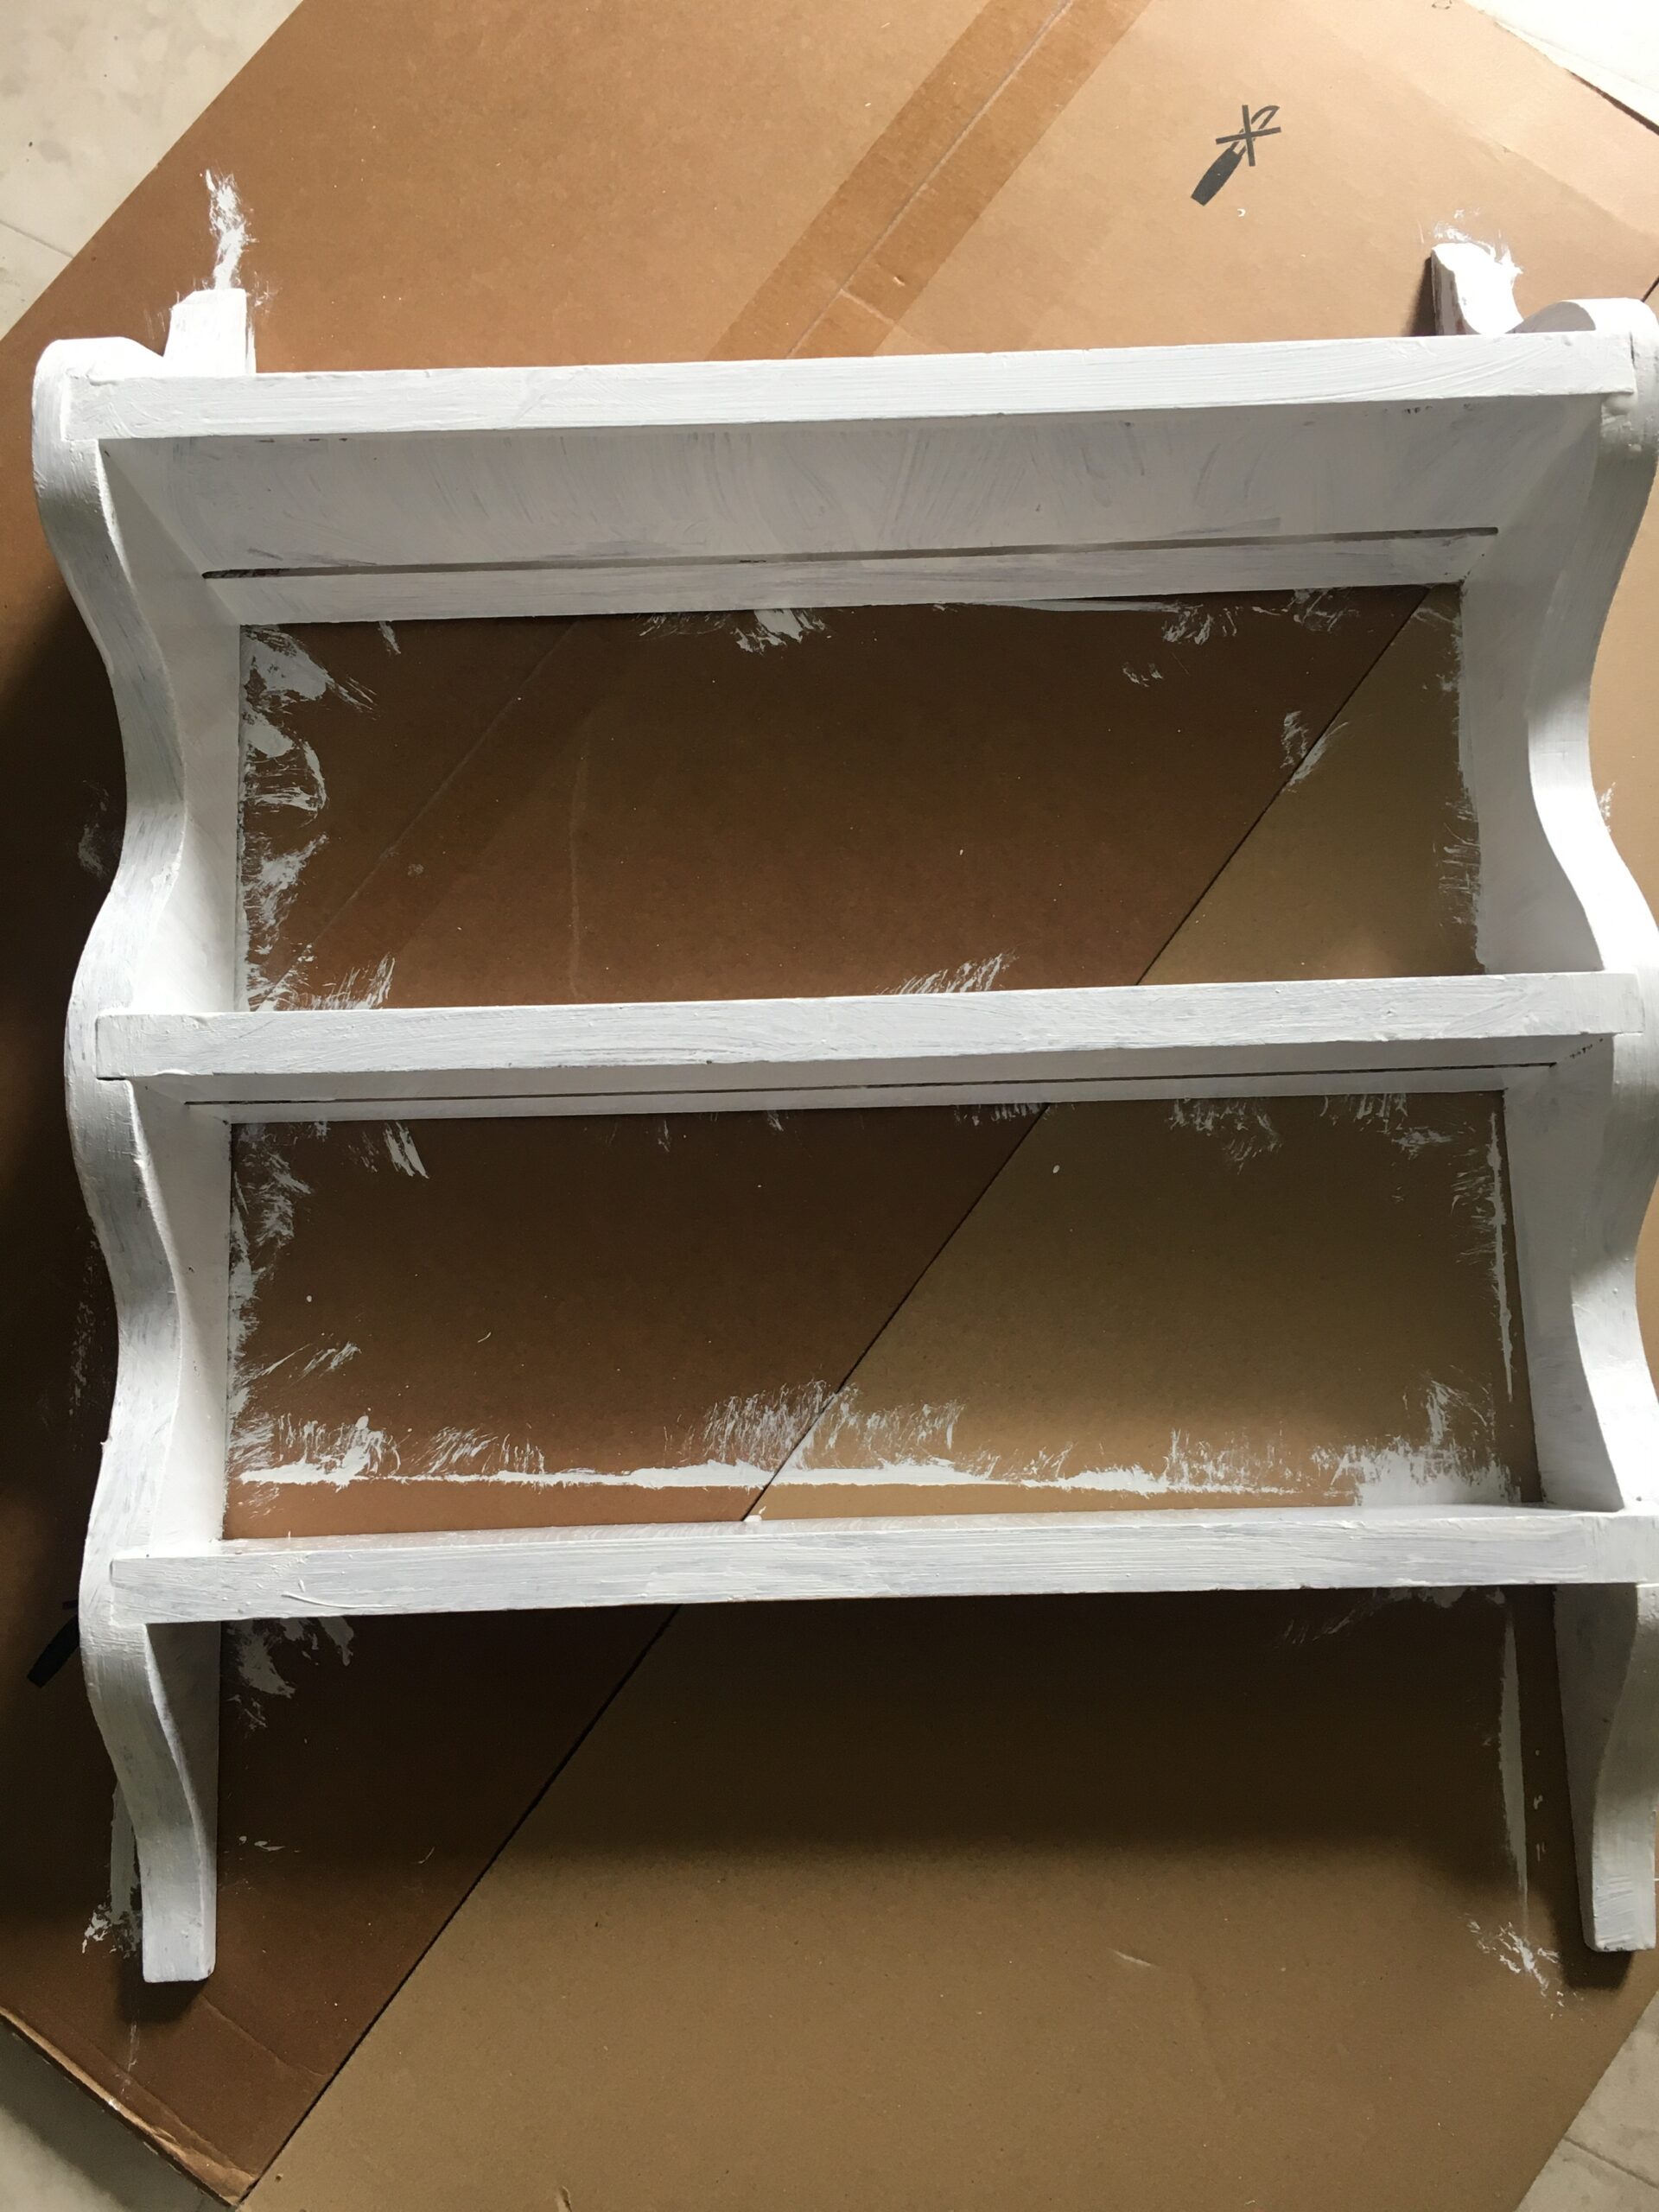
I picked a white chalk paint to update the look of the shelf and pop against our slate blue walls. First I will say, I was super impressed by how far a little chalk paint will go. I did two coats and some touch-ups and I don’t think I used even 4oz.

I watched a Youtube video on chalk paint before this experiment and was excited that it didn’t require prep to get started. However, to give it any sort of style, you basically have to do the work on the back end. To create this finish, I had to vigorously sand down for 10-15 minutes. I may try to use a wax glaze technique on another upcoming chalk paint project. So stay tuned for that if you’re interested!
With chalk paint, I now recommend trying to use a fine, soft, dense brush. (The kind that’s made for chalk paint!) That way it might not leave as many strokes on the finished piece. That definitely added to the sanding time! Overall I like the finish, and that again it doesn’t need to be perfect. Would Joanna Gaines approve my farmhouse style shelf?
So there you have it! Which of these 3 experimental paint techniques have you tried? Let me know what you liked best in the comments below.
About Kaitlyn Loos

Kaitlyn Loos [loh-s] is one of the newest designers for interiors and events in the west-central Florida area. (Tampa, Ocala, Gainesville, and everywhere in between.) She brings over seven years of graphic design, project management, and event planning experience to create amazing spaces and experiences for her clients. She is one of the only interior design companies in her area who offers modern, fresh, pattern and color-savvy designs. From styling an event to designing an entire home, Kaitlyn Loos Design is a full service company that delivers style for nearly any investment level. She also enjoys sharing her ideas and projects through her new blog which reaches over 325 people monthly.
For more information about Kaitlyn, check out: About Kaitlyn: Interior Design, and About Kaitlyn: Event Planning.
You can also subscribe to the blog and contact Kaitlyn directly here.
Disclaimers: a small percentage of purchases from select links will benefit me via an affiliate program. I appreciate anyone who wants to support my blog by shopping the products, but there is no obligation to buy.
All of my DIY blog content is for informational and entertainment purposes only. I share what works for me in my home, but you should consult with professionals/landlords before taking on any construction projects. My blog does not constitute interior design advice for readers. I am not liable or responsible for any damages resulting from or related to your use of this information.
Reading time: 5 min
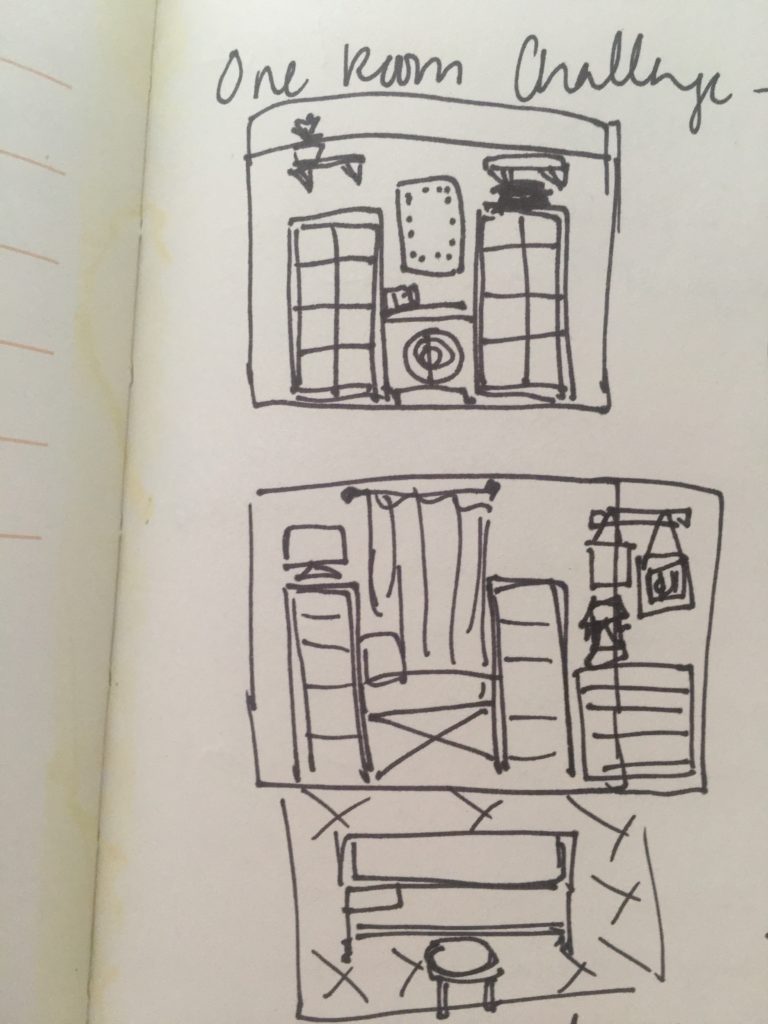
In my daily Pinterest-ing I noticed a few interior design photos with “One Room Challenge” noted in the title, so I looked into it. Turns out it’s a biannual design event over the course of eight weeks that’s open to guest participants. In partnership with Better Home & Gardens, it’s a community event that celebrates the process of completing a room. I’m a little late to the party, as they’re in week six. But I decided I’m all-in for it. I’m trying the One Room Challenge for my office!


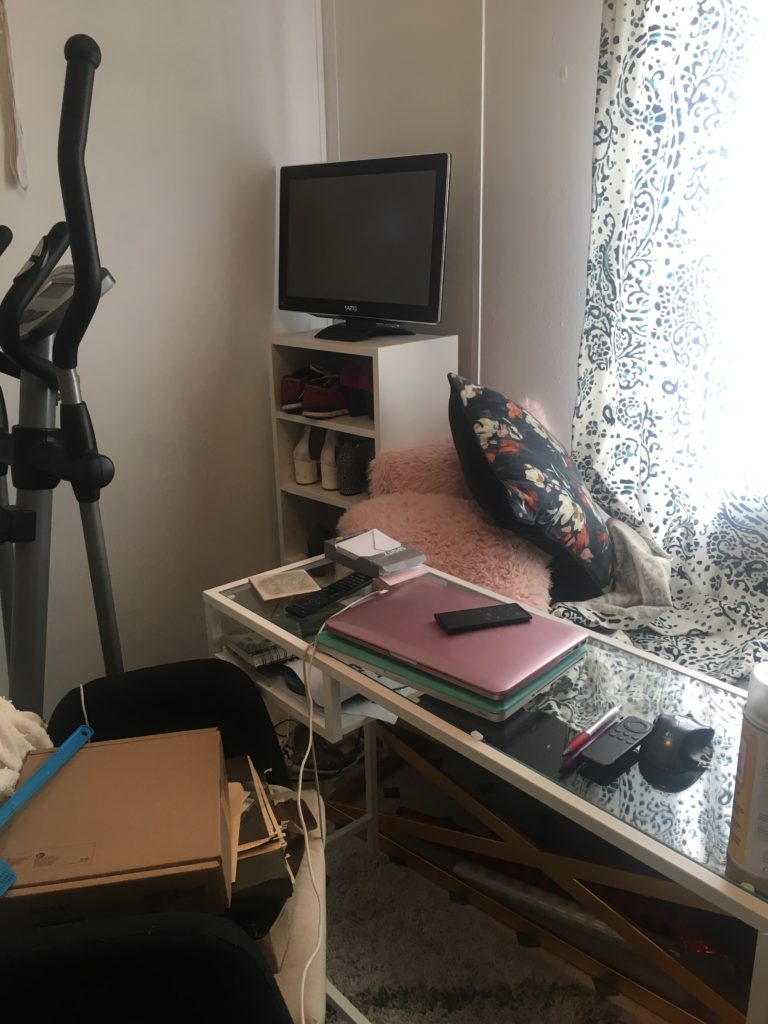
Am I being a little too ambitious? I think we all know the unwavering answer to that is YES. But I’m excited for the challenge. I feel like I totally overthink my own spaces. And this one is exemplary of that! This room has so many uses for me. I use it as an office, extra shoe storage, a cardio fitness zone, a photo studio and a storage unit for over 250 items for sale on Poshmark. Yikes, right?
By the way, if this is your first time reading my blog, I just moved to a mini-farm in a new city a few hours from Tampa. This happened the same time as kicking off my new career, no less! Check out my first blog post for the full back story if you’d like to hear more.

So I hopped to it this week and created a plan for bringing this space to its full potential. After hours of going back and forth about some of the decisions, I finally had to say to myself: “What would you recommend to a client?”
It sounds crazy, but this was a game changer.
I would tell my client not to settle for a plan that they’ll have to change later. If they love something but it costs more than they wanted to spend, look at the scenario 360 degrees and decide what would truly be best. Turns out after taking every role of this office into account, that the Plan A and Plan B that were competing so hard in mind, were both not the answer. Plan C has emerged, and it’s going to take some major decluttering, streamlining and putting together new furniture. But in the end, I think it’ll be worth it.
So here’s the situation!
A lot has happened in this little office in the right direction since moving here, but I think this event is a great push to get it done. Here is where I’m at today!
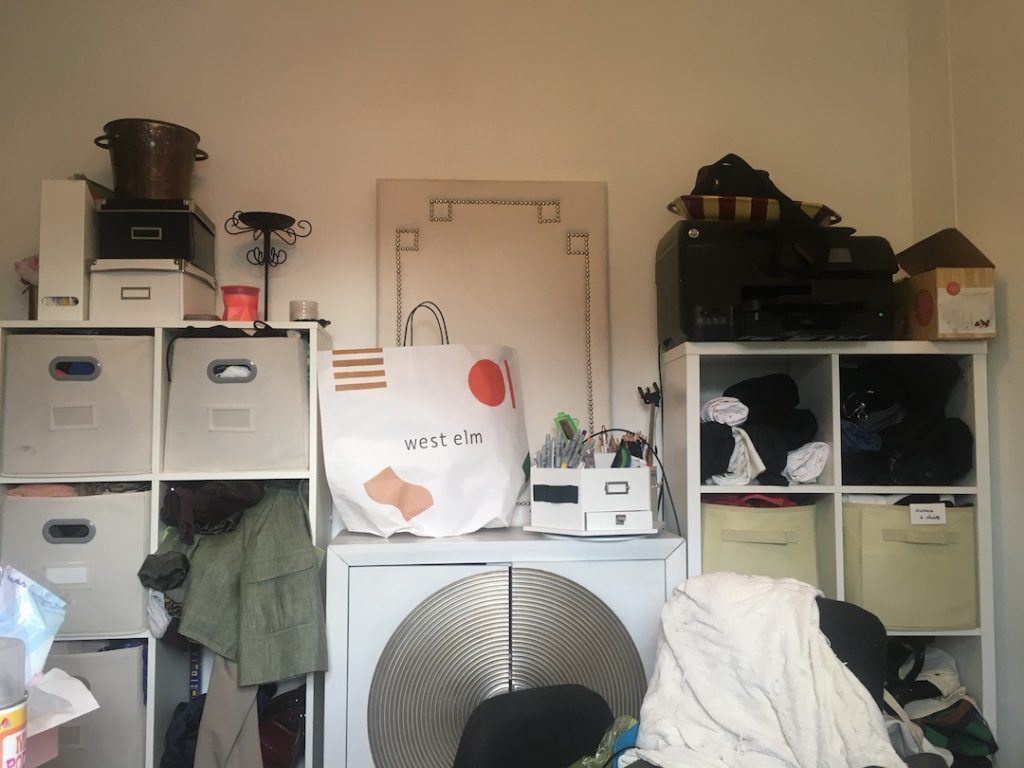
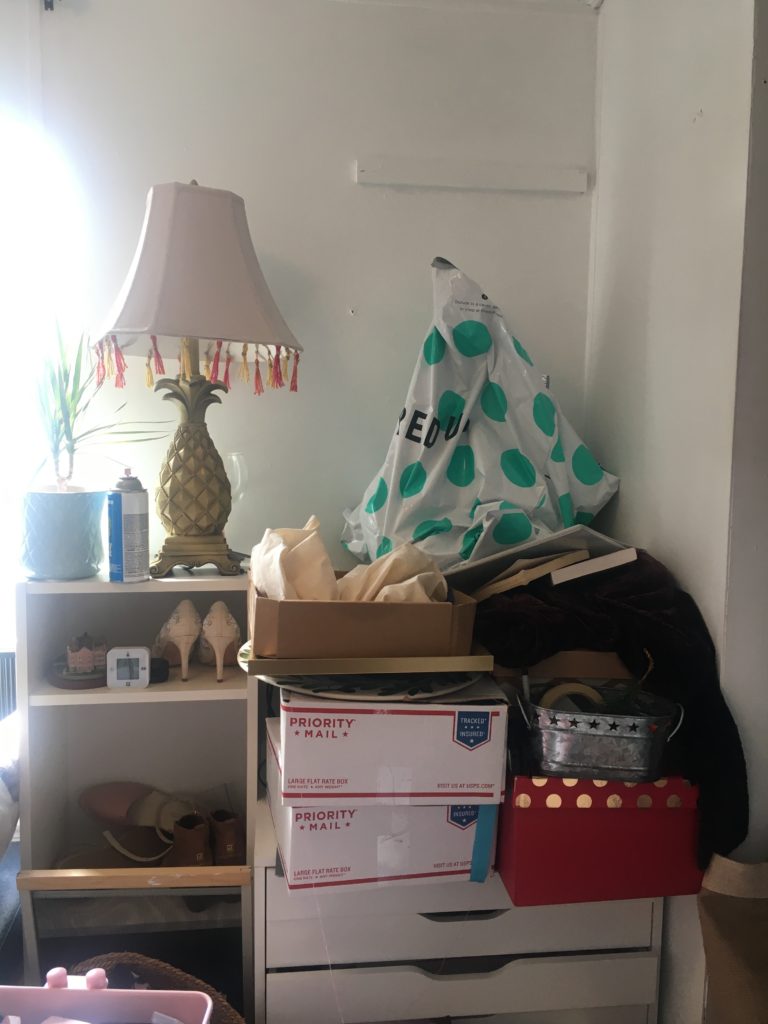
Again, I’m very lucky to have this space in the house. I’ve never had an office before. But with the clutter right now I feel like I don’t even deserve it, and I know that’s not the attitude to have! I’m the type of person who can stay neat-ish if there’s a system and it looks good to me. With the mis-matched fabric storage cubes, it never felt right! And, to top it off, I can’t just order more of the ones on the left because the two shelves from IKEA have different inside cube dimensions! Ugh, you would think they, of all stores, would have this streamlined, but this was not the case. But hey, that’s what I get for buying them piecemeal.
Today, an official plan has been born to finish this project, and you get to watch it all happen, too!
Some Good News This Week!
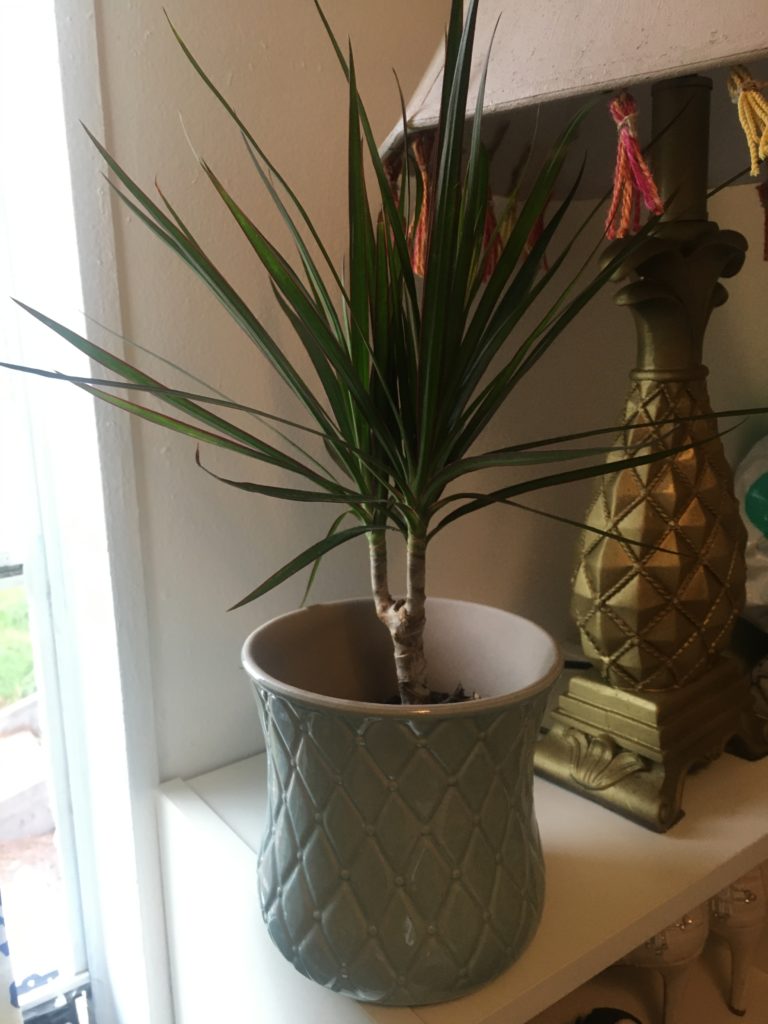
I purchased this cute little plant from our recently reopened IKEA to get my positive Feng Shui going as I dive into finally finishing my office.
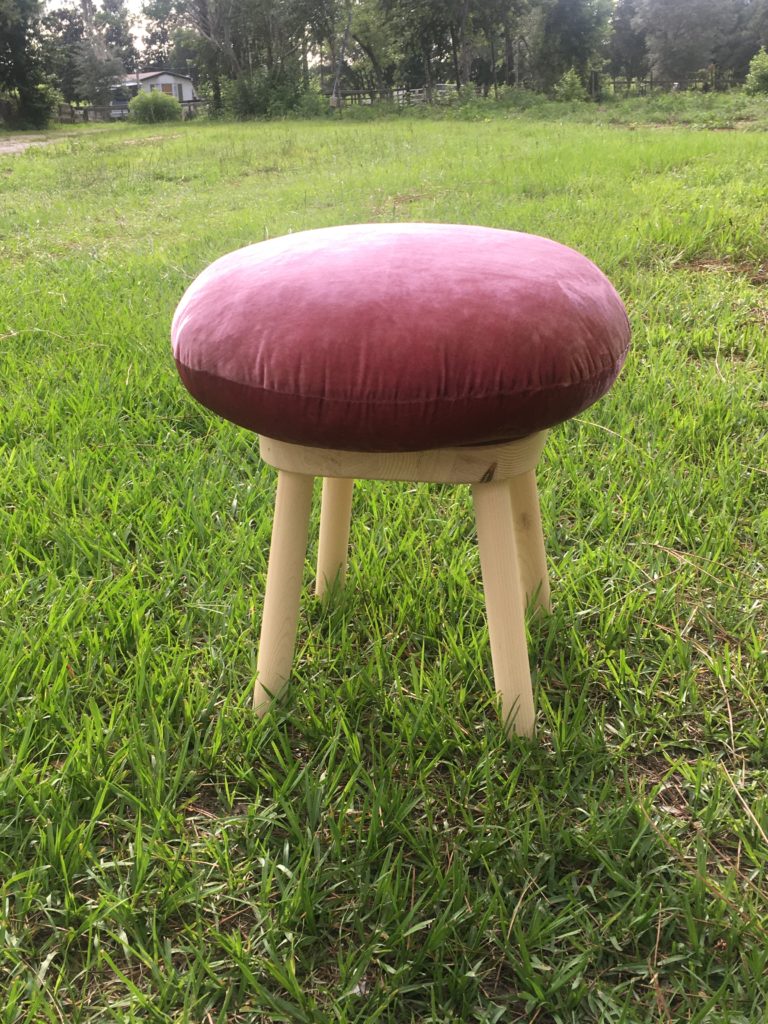
I also had some success creating a little custom foot rest from a West Elm pillow and an IKEA children’s wooden stool. Check out my Instagram stories for the full DIY on that.
My Goals for the Space
Below are the objectives I’m trying to achieve in the process of finishing the work I’ve started on this office. I hope in two weeks I can come back to this and say I’ve got it all down pat!
1. I want to have an office that feels as put together and stylish as the spaces I create for my own clients.
2. I want all of my Poshmark inventory concealed and organized. And I want my packaging products to remain easily accessible when I make sales.
3. I want to better utilize the vertical space of my office for much needed storage.
4. I want to be able to look up from my desk at my pin board hanging on the wall with inspiration images attached.
5. I want a system of organizing paper and tech pieces so that it’s not cluttering my glass desk.
6. I want my elliptical space clear and ready to use at a moment’s notice.
7. I want to create one shelf of interior design references.
8. I want everything in the office to have a place.
This feels so crazy to me to post something that I haven’t finished! I’m excited to see where I can take this space in the next two weeks. Check back on my blog next Thursday for the next progress report.
Thank you for reading and I hope you’ll wish me luck!
Reading time: 5 min
From horrible to habitable!
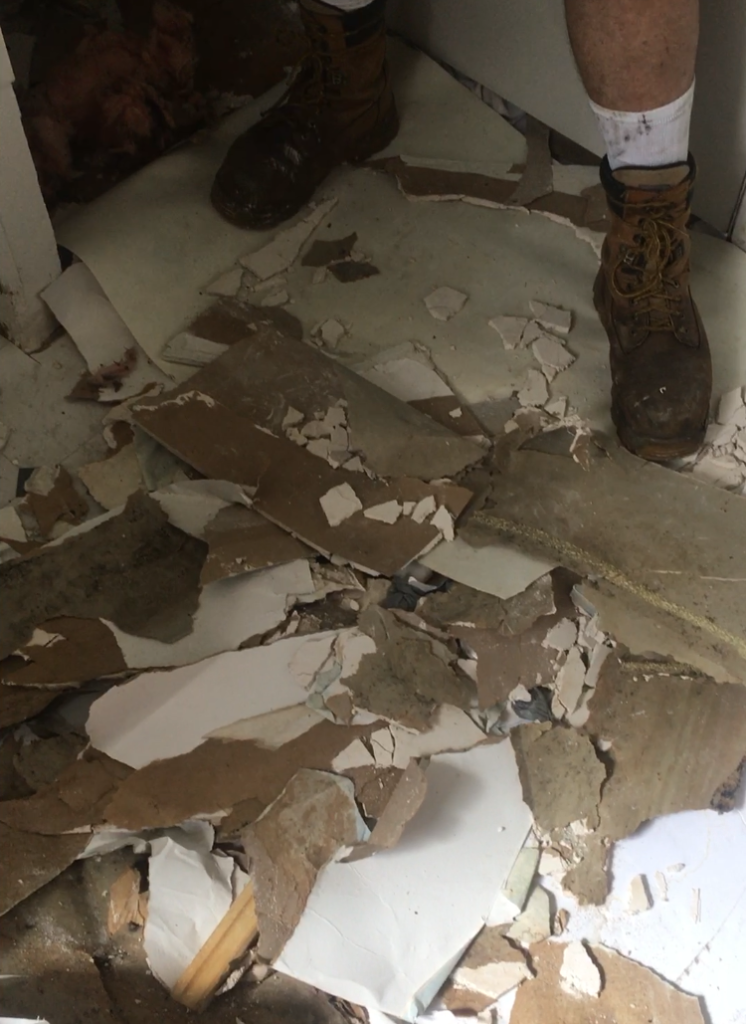
You guys really need to know – when we got to the mini-farm, the bathrooms were rough. The second one didn’t even have a floor as you saw in my first blog post. Renan and I are in an atypical situation since we’re renting at a discount because it was mid-renovation. Basically, we’re allowed to do whatever we want to the space, and I’m thankful! But like many renters out there, we had to make it work on a budget. And while this bathroom may not be the stuff of your “dream house” Pinterest board, the improvement is visible. So this is my magical tale of how we completed our rental bathroom makeover for under $300. I’m sharing EVERYTHING in hopes that it inspires others to make the most of their space, at any budget!
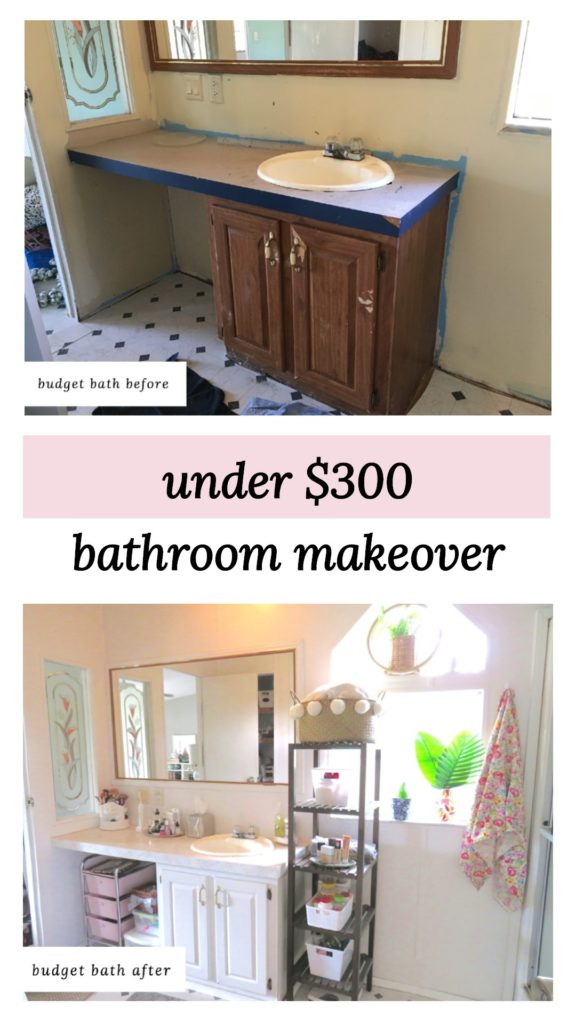
The bottom shows how it looks today.
In a few senses, I’m lucky because we now have two working bathrooms. One for “boys” and the other for “girls” – which Renan and I totally love. We found a lot of supplies on property like vinyl flooring for the house, new sheets of drywall, etc. I’m also lucky to have such a handyman, “Chip Gaines” of a partner. And hey, I get a good amount of counter space to myself! The get-ready surface space is priceless, no matter how expensive your bathroom is, am I right?
So let’s take a virtual walk through the bathroom and chat about the changes made in this DIY makeover.
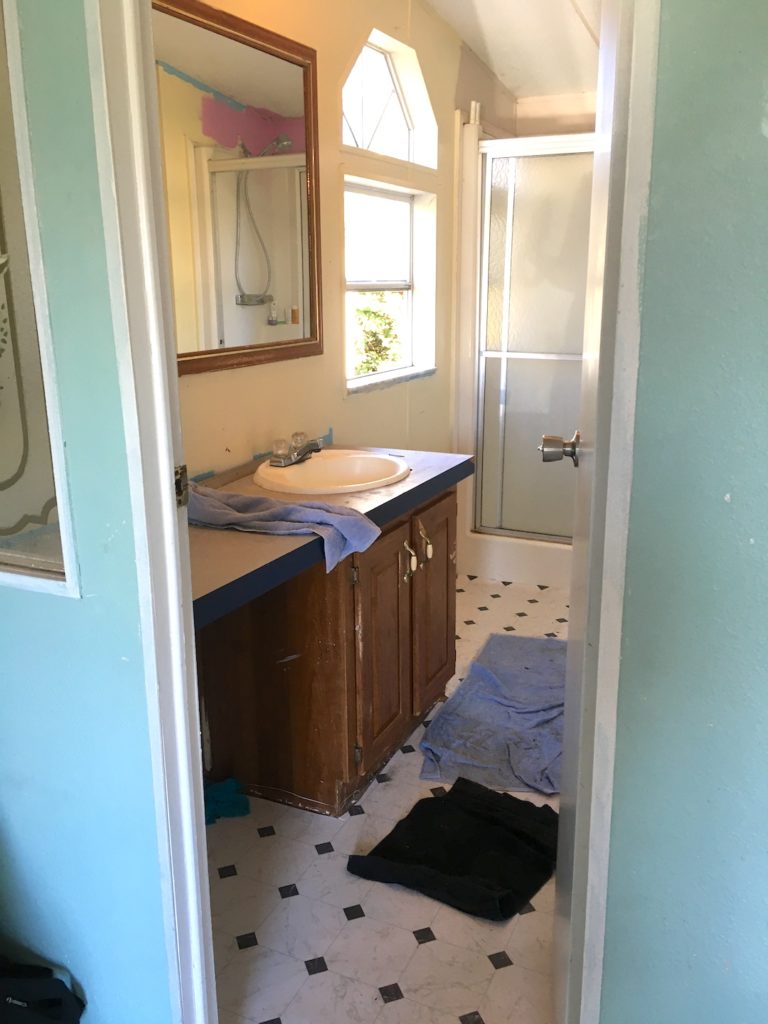
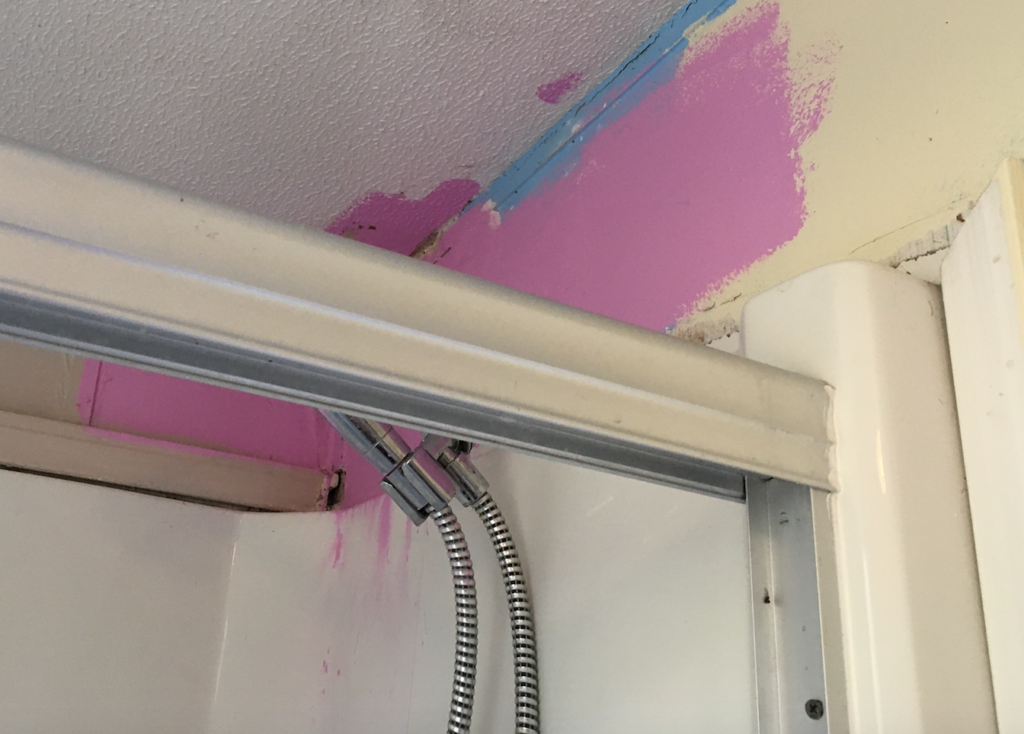
It was awful!
Change #1: Paint it All ONE Color
With my interior design work, I always stress the importance of how a space makes someone feel. Since I’m the client in this scenario, I wanted to attack the the thing that drove me the craziest first. And that was paint! Who in the heck can even live with all these crazy paint colors and water-damaged walls?
I picked up a gallon of Behr Marquee One-Coat Cameo White Semi-Gloss and went to town in one weekend. Spoiler: it took more than one coat to cover the bathroom, but it covered the sins.

Two learning lessons from the painting process:
Say no to semi-gloss. I’ve never liked semi-gloss paint, so I’m not sure why I went with the Home Depot recommendation. I think a satin finish would’ve worked just fine for the bathroom. Semi-gloss has a bit of a latex texture and is sometimes harder to get even coverage, in my opinion.
Prep in one day, paint in one day. Between painting my bathroom and my office, I’ve learned this lesson officially. Use the first day to prep the room to high heaven! Carefully fill holes with a putty kit and use painter’s tape on trim pieces, fixtures, etc. Start with the putty work so you can sand it down later in the day. If you have textured drywall, you may also need a texture spray to help camouflage the repair prior to painting. On painting day, start early so you can run to a Home Depot or Lowe’s if you need more paint. This way you’ll complete the project faster and only have to clean the paint brushes, rollers, and trays once!
Change #2: Paint the Cabinets
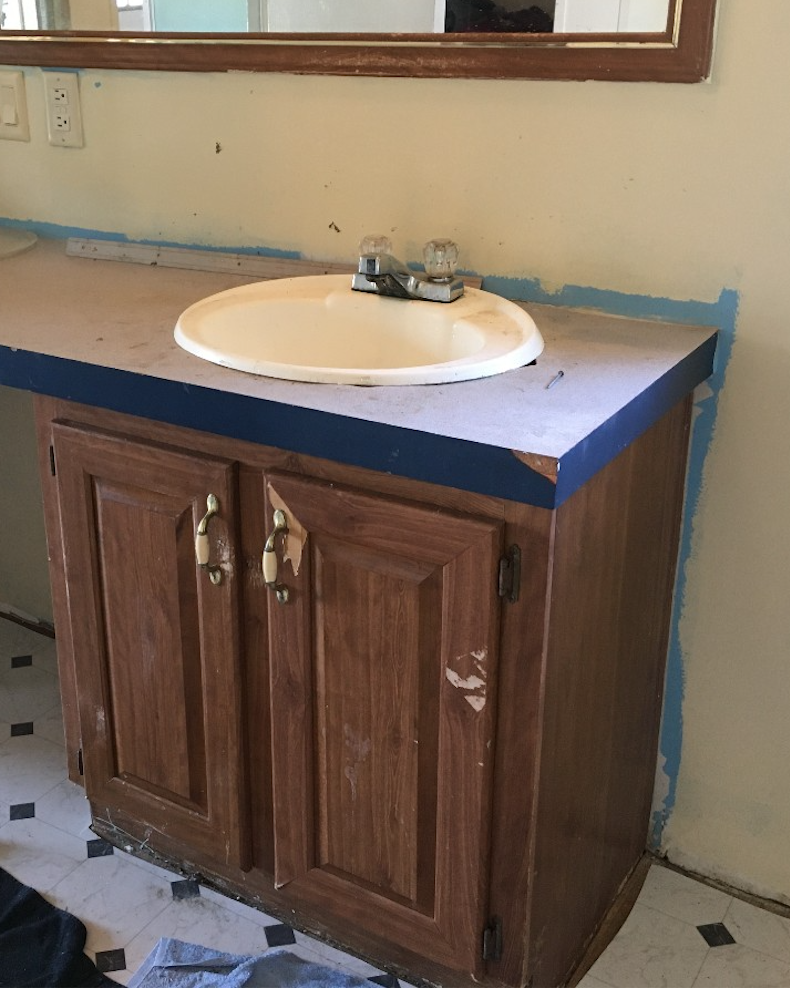
This is where I’ll admit I’m a little braver than most people in the “GSD” department. I literally just took the same house paint to the cabinets. While I wouldn’t do the same for a client, this got the job done for me! The coverage was not great, and it may have taken three coats. It was worth it to save money and work from the same gallon of paint! Frankly anything is better than peeling, fake wood cabinets, so this was a win in my book. If you try this, take your time in prepping.
Change #3: Install Privacy Film
This blog is making me realize how much I did in just one or two weekends before I moved here! Ah, memories.
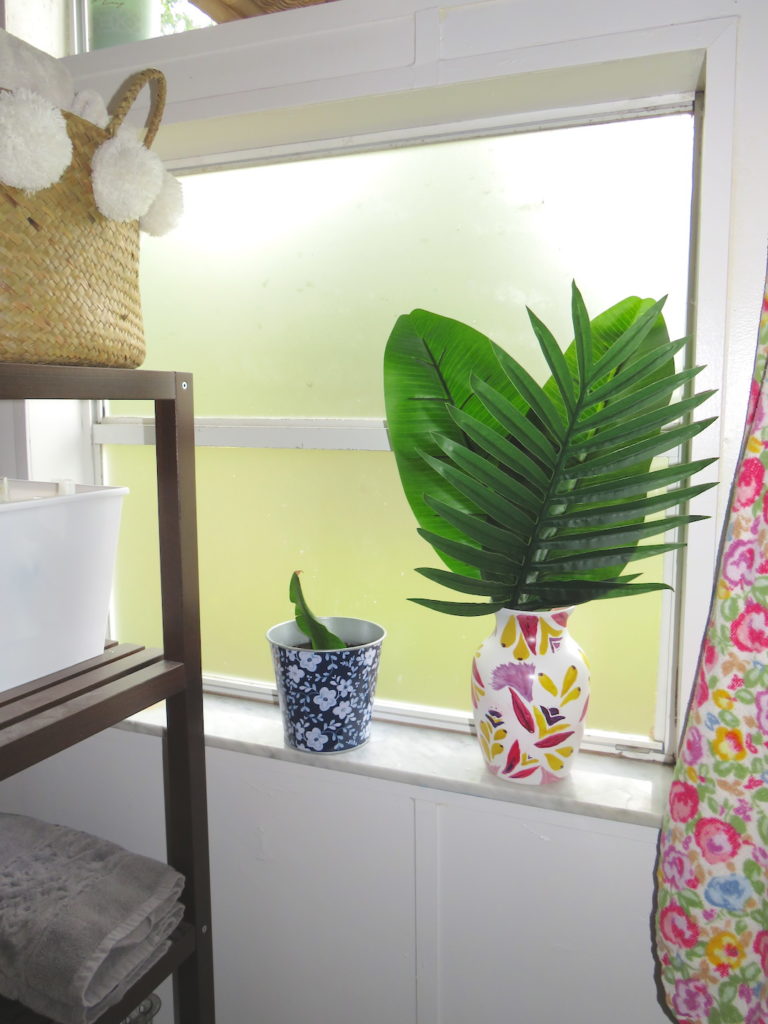
So when we bought the paint, I also had privacy film on my list for the bathroom. I liked the natural light, but having a transparent window in a bathroom was a hard no for me. Renan said “You don’t need this, we live far from neighbors.” But let me tell you, the privacy film was a savior!
There’s also cool rainbow privacy films that would be fun for a kids or teen bathroom. Make sure to buy a wallpaper kit like this to help smooth out and cut.
Change #4: Apply Contact Paper to Countertops
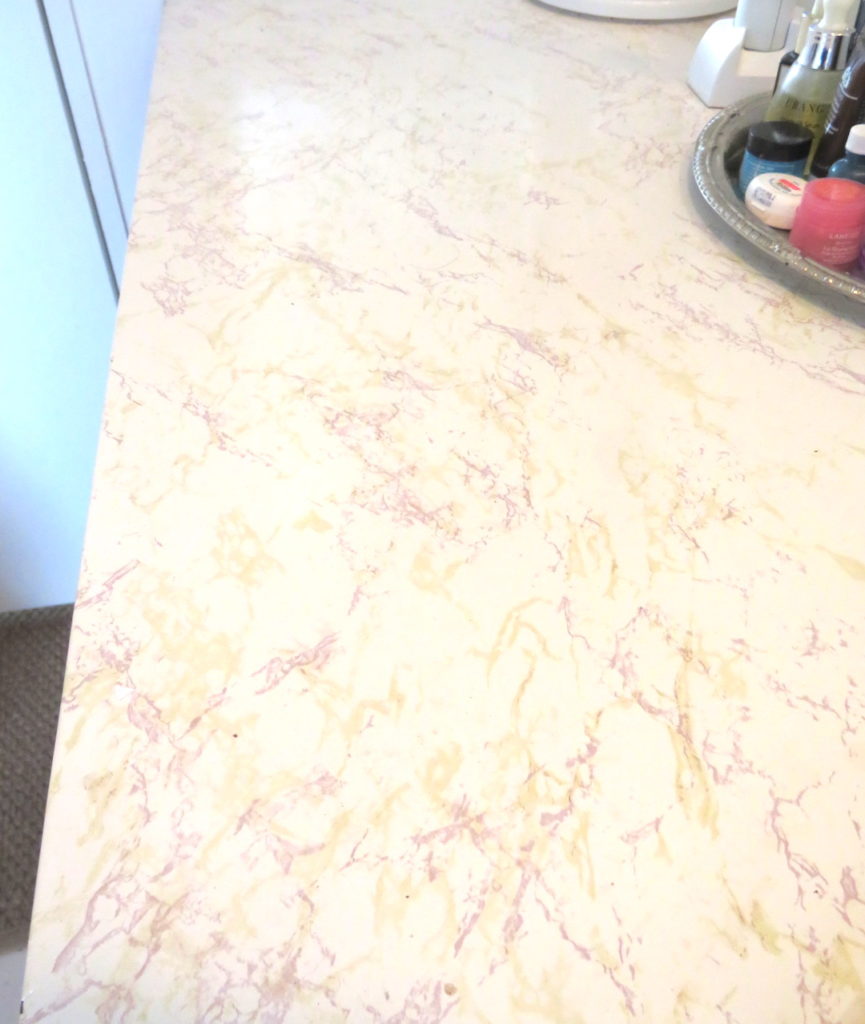
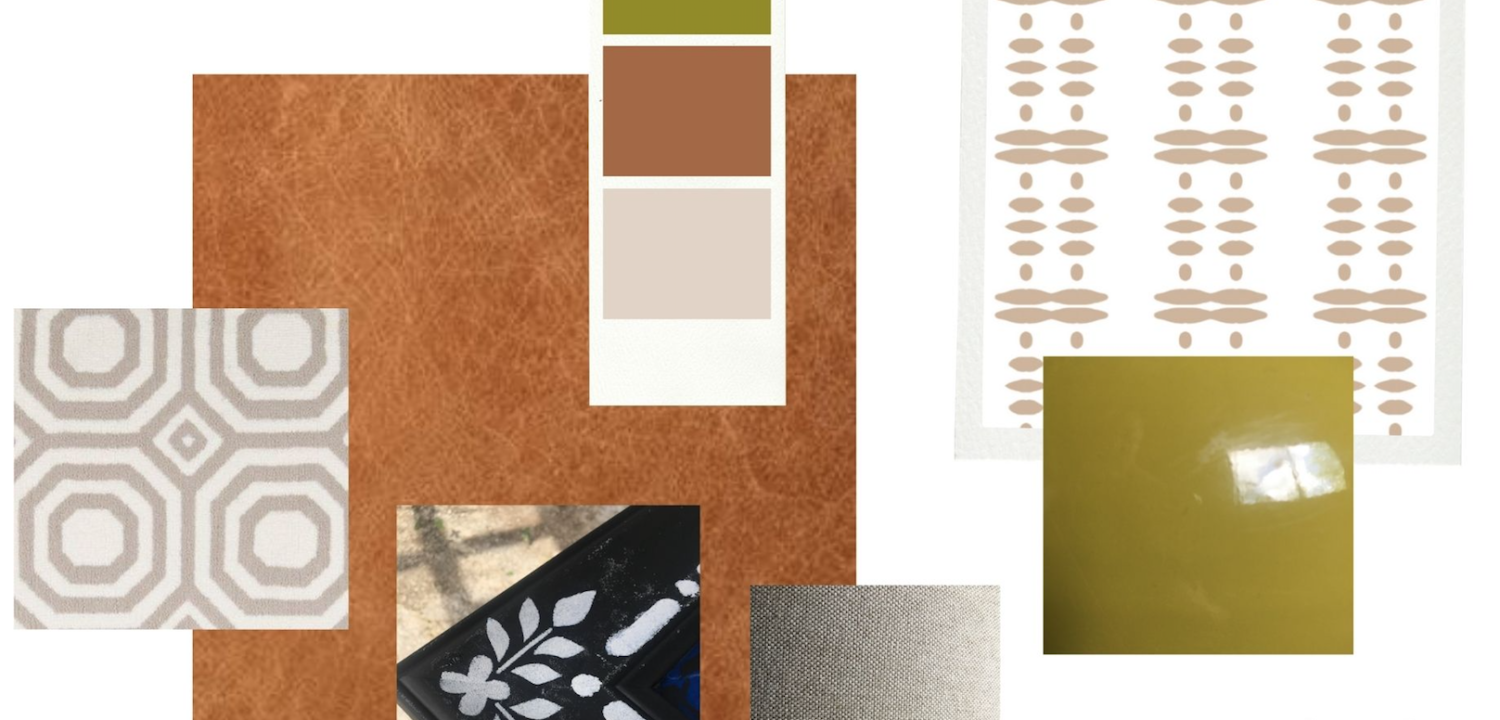
This is the idea I most welcome you to steal! I stole it from Sharrah Stevens who put marble contact paper in her rental kitchen. Though I prefer the gray marble contact paper, I thought the pink/beige went well with the 80s vibe windows.
Look for contact paper that is wide enough to to cover the surface + sides without a seam if you can. Purchase a wallpaper kit to help measure, cut, and smooth out. Be SUPER patient with it and take your time with the cuts. Especially around the sink. When you’re done, use clear or white silicone caulking around the edges to seal down. Props to Renan for his excellent sealing work!
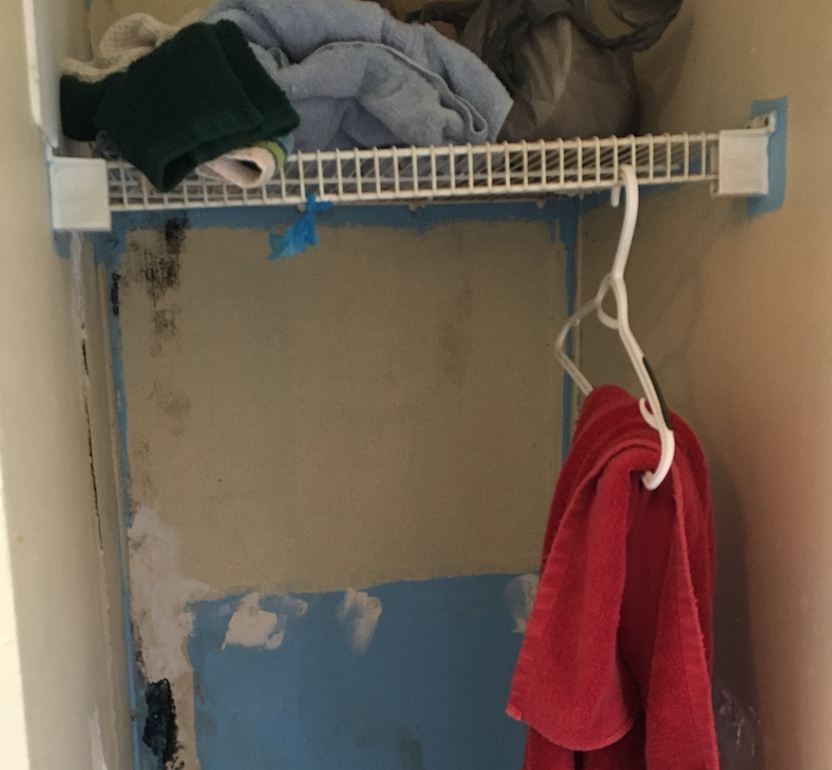
Change #5: Dollar Tree Linen Closet DIY
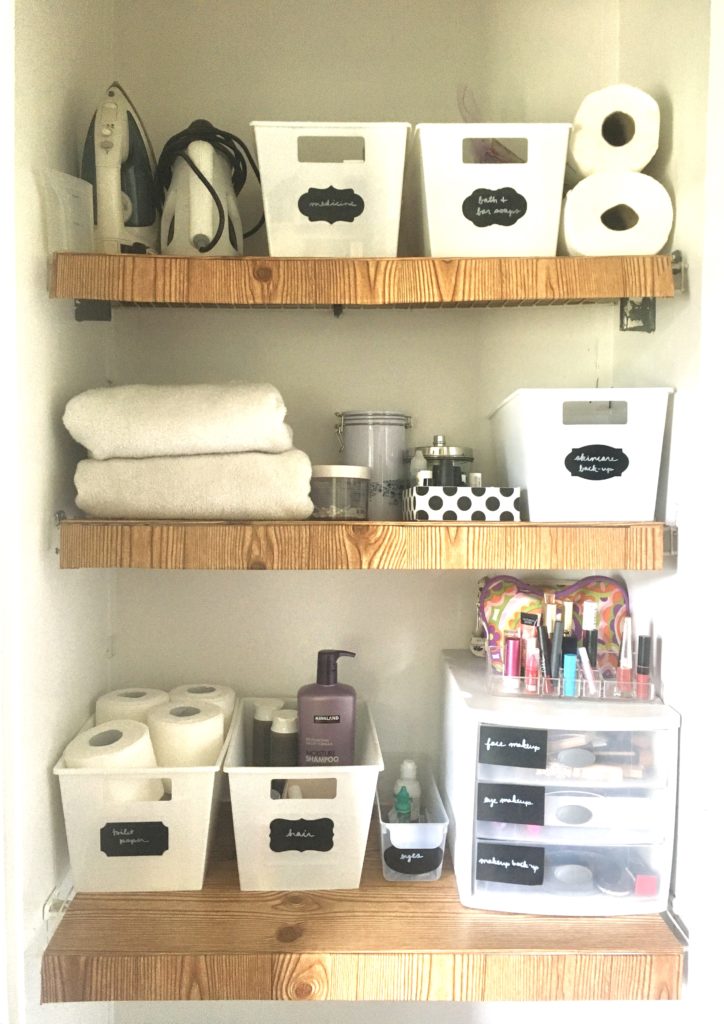
I saw this video and was instantly inspired to cover my wire shelves in the bathroom linen closet. And Do it On a Dime shared my photo on her story, which makes her extra cool in my book!
There was originally just one shelf in the linen closet, so Renan was awesome and added two more for us. Then, I used approximately one roll of contact paper and one foam core board from the Dollar Tree per shelf. I chose the light wood grain option, as you can see above. Although not totally perfect, they make me happier to look at my linen closet with no door. And they’re easier to use! Watch her tutorial video for all the steps. This is a solid half day project, NOT including time to organize your stuff.
Change #6: Purchases for Functionality


Believe it or not, my apartment bathroom was one of the projects I completed the Marie Kondo method on. (Read: The Life-Changing Magic of Tidying Up.) Even so, my hair, skincare, and makeup products bring me a lot of joy apparently! The important thing for someone like me is to have an organization system in place that works in real life. Otherwise, it’s a total clutter mess.
When we moved here, the bathroom storage situation was different, so my system from my apartment didn’t all translate. The bathroom had no drawers and minimal closed storage. This bathroom works extra hard for us since it needs to act as a storage extension for our laundry room. It was a bit of a jigsaw puzzle and I may continue to move some things around. But ultimately for me it takes living life in the space to decide on storage solutions.
I share this because, for me, it’s important to be mindful about how a space is used. By thinking through the functionality and organization, I didn’t need to splurge on all new things for every corner.
What I did buy was this trendy pink rolling drawer cart from Home Goods because I deeply missed having drawers! (Similar one in white on Amazon.) I also bought the oval mirror and placed in a well-lit spot for putting in my contacts and doing makeup. (Similar mirror on Amazon.) I brought in the teak-style IKEA shelf that was from my apartment closet. And basically everything else was brought over from my apartment or repurposed.
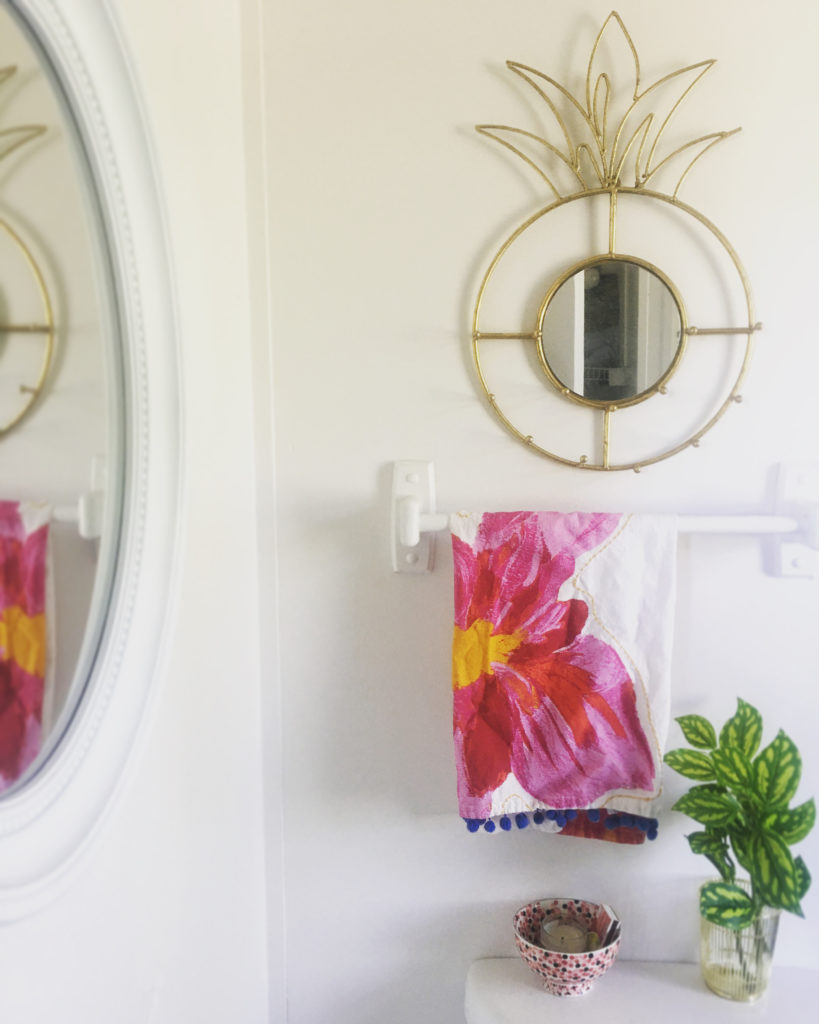
Change #7: Accessories & Styling
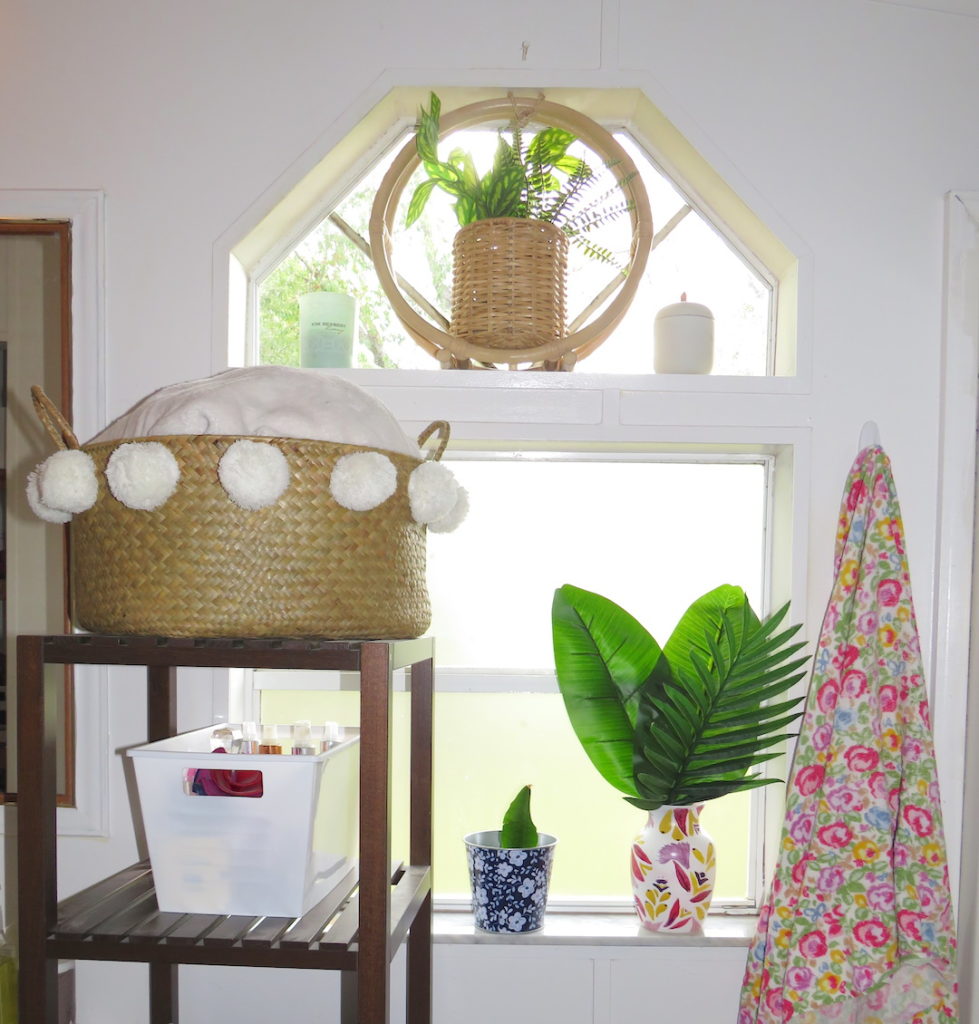
For whatever reason, maybe with the new, all-white canvas I created, I went pretty hard with accessories in the bathroom. It’s all a mix of stuff I had, thrift store finds, Target Opalhouse collection, and my DIY Anthropologie vase knock-off. I can see myself changing this up in the fall, but for now, the color and pattern makes me happy! And that’s the whole point right?
But Wait…There’s More!
Bathrooms are never simple, right? So the last piece is the second closet that had the water damaged wall. Thankfully, Renan has some construction background so he was capable of removing the bad drywall and replacing. We still need to paint it and put shelving in. So I decided we’re going to do a video tour on my Instagram stories in the next week or so. Be sure to follow me to see even more of this bathroom!
What a whirlwind! I hope you enjoyed this Under $300 Rental Bathroom Makeover (in my relentlessly honest style.) Are you planning to try any of these ideas in your home? Let me know in the comments below!
You can also subscribe to my blog here to see more of our rental makeover projects and watch me grow! I absolutely can’t wait until I’m writing about my own bathroom with custom tile, stone surfaces, and built-in everything. I hope you’ll be here for that day, too. ❤️
Disclaimers: a small percentage of purchases from select links will benefit me via an affiliate program. I appreciate anyone who wants to support my blog by shopping the products, but there is no obligation to buy.
All of my DIY blog content is for informational and entertainment purposes only. I share what works for me in my home, but you should consult with professionals/landlords before taking on any construction projects. My blog does not constitute interior design advice for readers. I am not liable or responsible for any damages resulting from or related to your use of this information.
Reading time: 8 min
Start with Your Assessment

Browse Design Services