All of My 2020 DIY Projects – Ranked
Hello again! Another big thank you to my Instagram friends who took my recent blog post topic survey. While the final results were pretty close, the winning topic you all wanted more from me is…DIY projects! This put a big smile on my face because I definitely have a bit of the “maker gene.” In my mind, I keep cutting back to college making a 5 ft hanging birdcage out of cereal box strips and hot glue. I love a good DIY, and this is the first year I’ve had this kind of platform to share them. I’m inspired do more! But I thought this was a great opportunity to recap all of my 2020 DIY projects so far.

I’m including all the related links you could ever want in case you’d like to try any of these yourself. There’s also some new photos of how it looked in the respective space that you may not have seen yet. Oh, and to make it a little more interesting, I’ve created a ranking system! The ranking is based on performance, durability, cost to value ratio, and overall aesthetic appeal. This is like when a beauty Youtuber shares at the end of the year which products they still love, and what they’ve changed their minds about. I’m starting with the highest score to moving down to the lowest. I hope you enjoy!
1. IKEA Fixtures Spray Painted
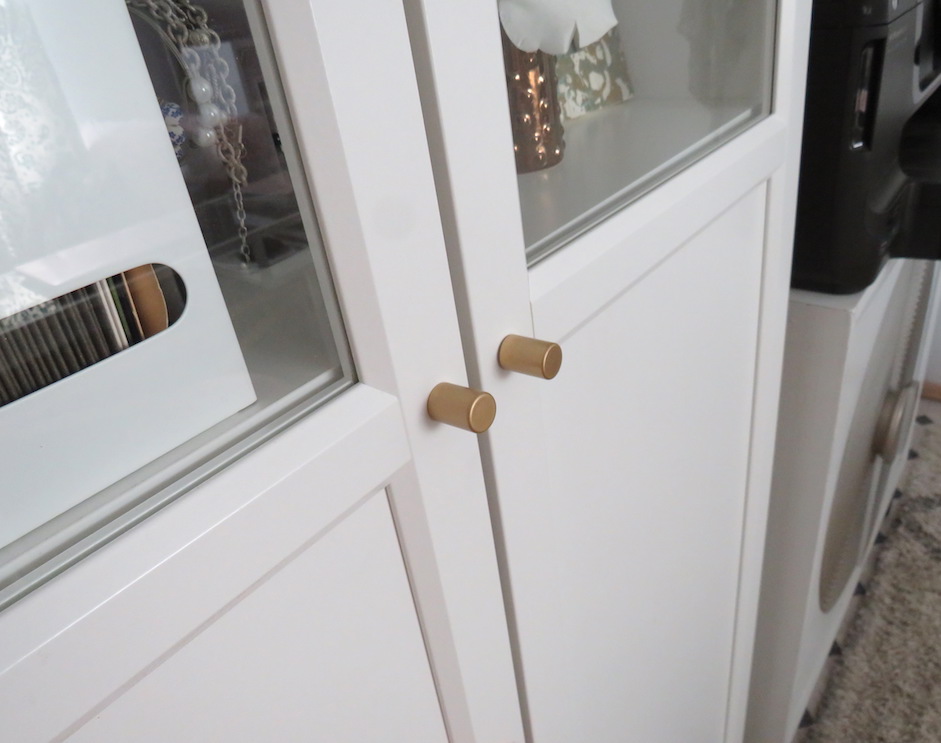

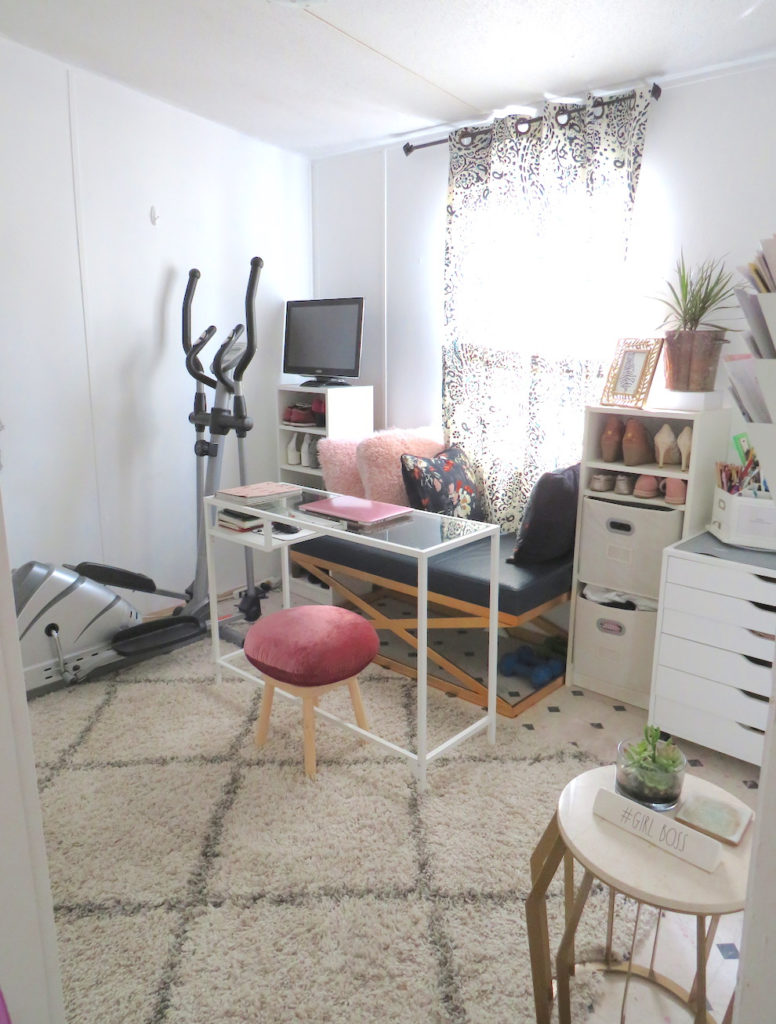
My office has quickly become my favorite room in the whole house since the One Room Challenge. (Check out my office reveal here!) Who knew a project from the last day of the challenge would make the number one spot? It was so simple! This was gold spray paint (this one specifically) to the knobs that came with my Billy Oxberg doors and wall hook set.
The inspiration photo I had of the Billy Oxberg pieces used custom pulls like you would find at Anthropologie. While I liked that, the spray painted hardware also has the elevated look I was going after. These two quick projects are highest on the list because the were very easy to do, low investment, and they’re ridiculously pretty IMO.
2. Mini Water Painting

This was another project from the last 24 hours of the One Room Challenge, though it was part of a set plan. I knew that I wanted a small pool water painting and I knew it would be a fun thing to try to DIY for the challenge. But on the day-of, it honestly took a little bit of experimentation and I picked the best of three. My arts background helped!
This painting was created by coloring a coffee filter with a water-based marker, dampening the filter, and pressing to print onto a piece of water color paper. Repeated a few times to create the desired pattern.
3. Dollar Tree Anthropologie Vase
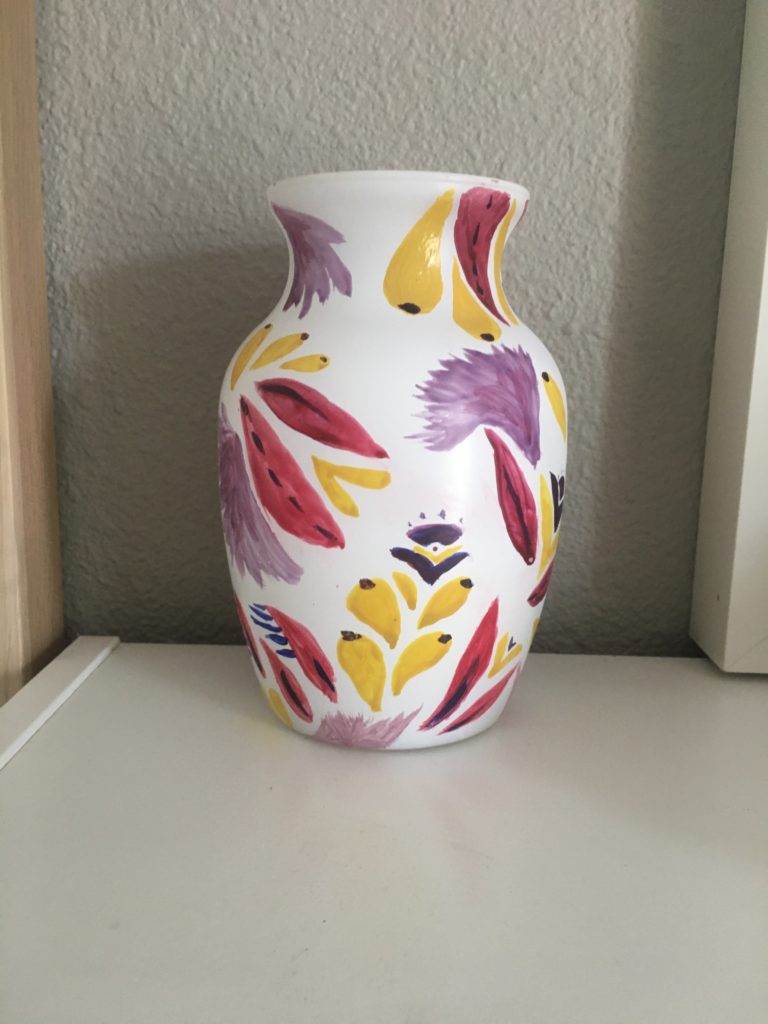
If you are crafty or interested in this project at all, you absolutely must try it! I’m so happy with how this Anthropologie-inspired vase came out. You can see more details in this Instagram story highlight.
4. Spray Painted Coat Rack
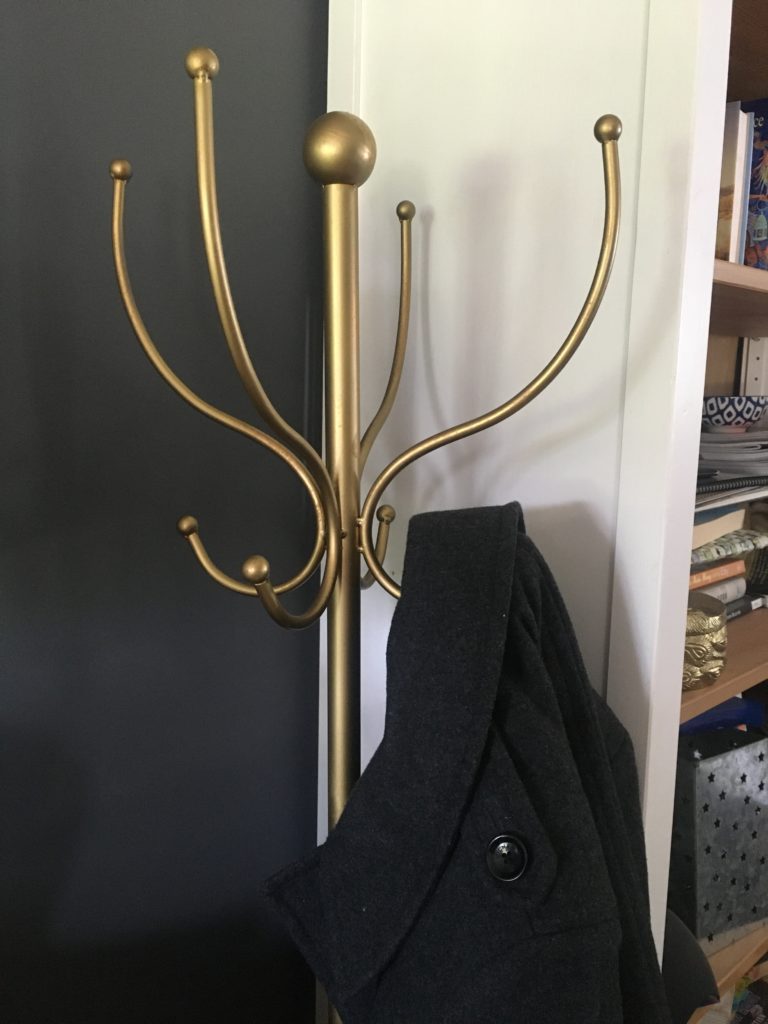
Another DIY project that is very simple to do is my spray painted coat rack. This coat rack needed to move rooms after the One Room Challenge happened in my office and I loved the idea of finally getting around to spray painting it gold. I love how it looks against our slate blue walls in the living room. Get my favorite spray paint here!
5. The Dollar Tree Gallery Wall
The Dollar Tree Gallery Wall was a bit of a runaway hit compared to my other projects and posts on social at that time. And, I documented basically the whole process on my Instagram Story highlights, if you want to check it out! While I’m happy with the look and the low investment cost of this project, I don’t have the highest expectations for how long these Dollar Tree frames will last. You could achieve a similar look using a set like this one from Amazon for $43.
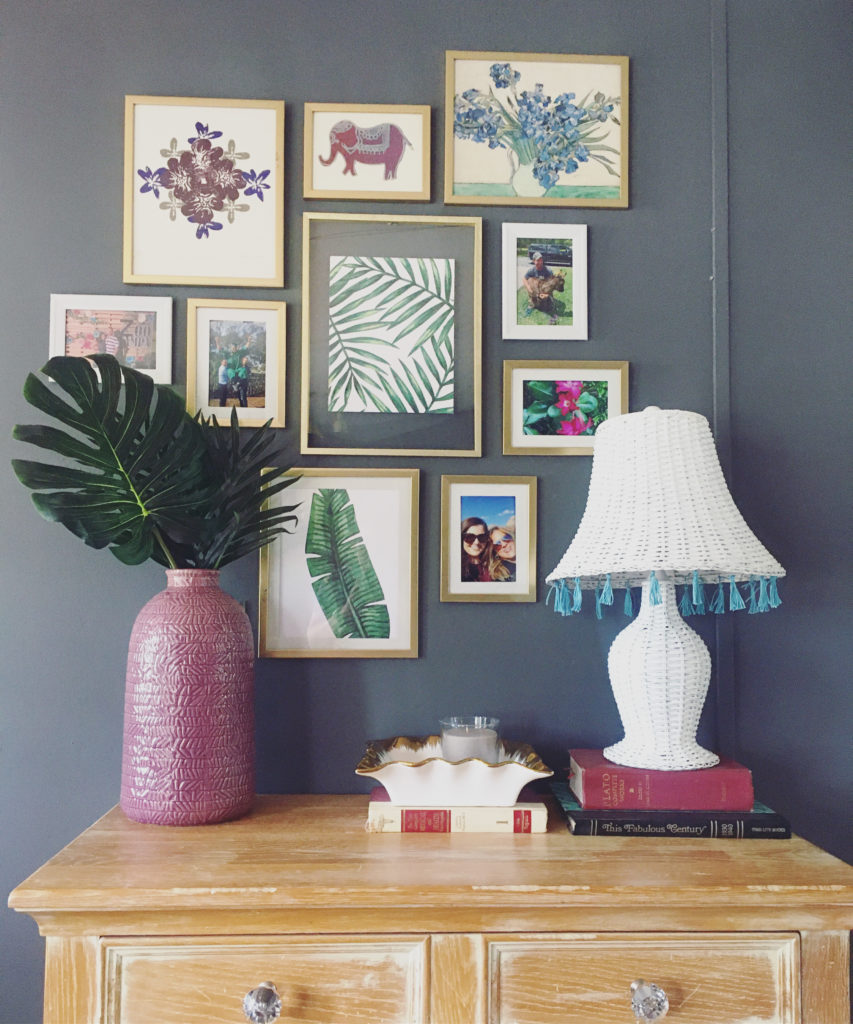
6. The Upcycled Wicker Lamp
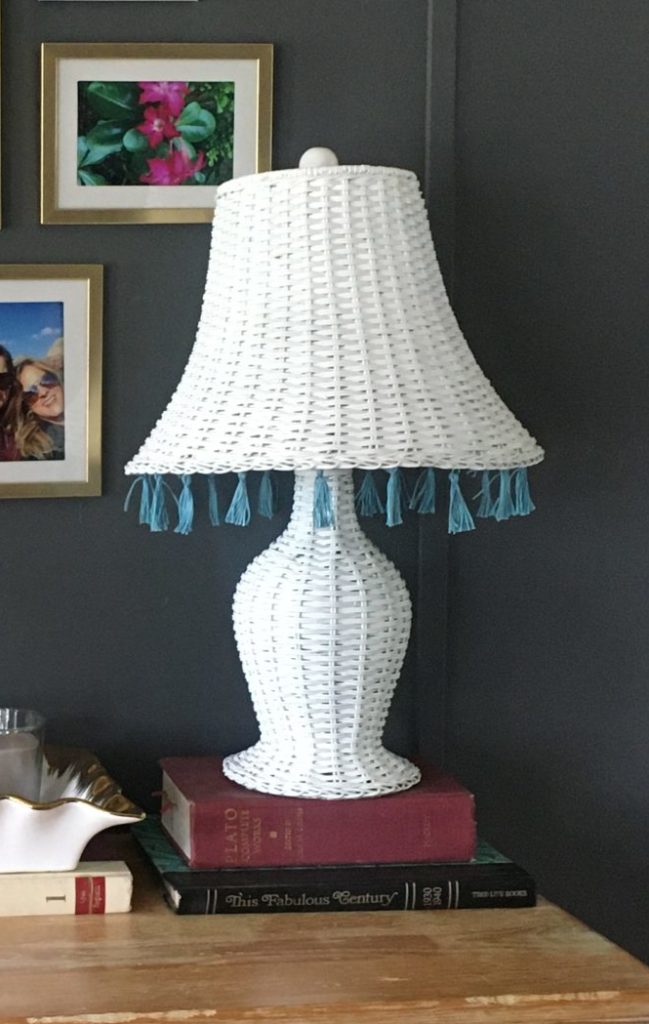
I think all of my best DIY projects are when I have the opportunity to be brave and have some fun. I took this thrifted lamp from looking like it was ready to go to the dump, to looking like it’s ready for the pages of PB Teen magazine. All I used was a can (or two) of white spray paint and some embroidery thread. You can watch the full upcycled lamps saga, including this one, on this Instagram Highlight.
7. The Upcycled Pineapple Lamp

The pineapple lamp was basically tied with the wicker lamp because the overall improvement was huge. However, the “extra” level of this lamp makes it a bit limiting for where you can style it in the home. I think it would look better with the gold spray paint from #1. Again, you can watch the full upcycled lamps saga, including this pineapple lamp, on this Instagram Highlight.
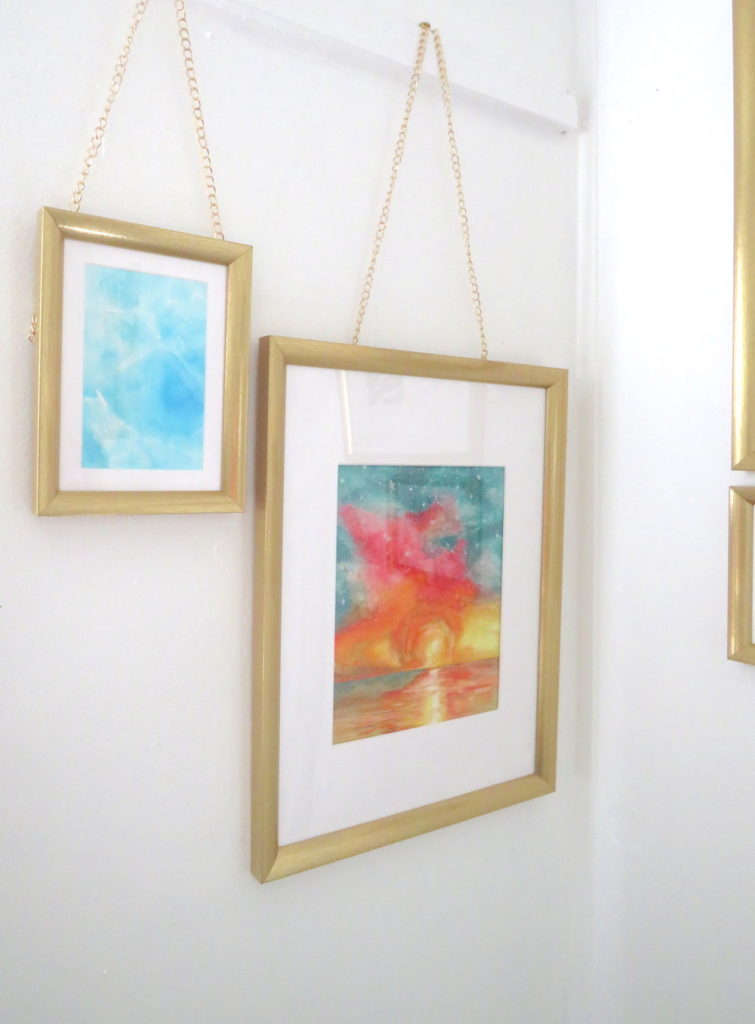
8. Chains on Frames
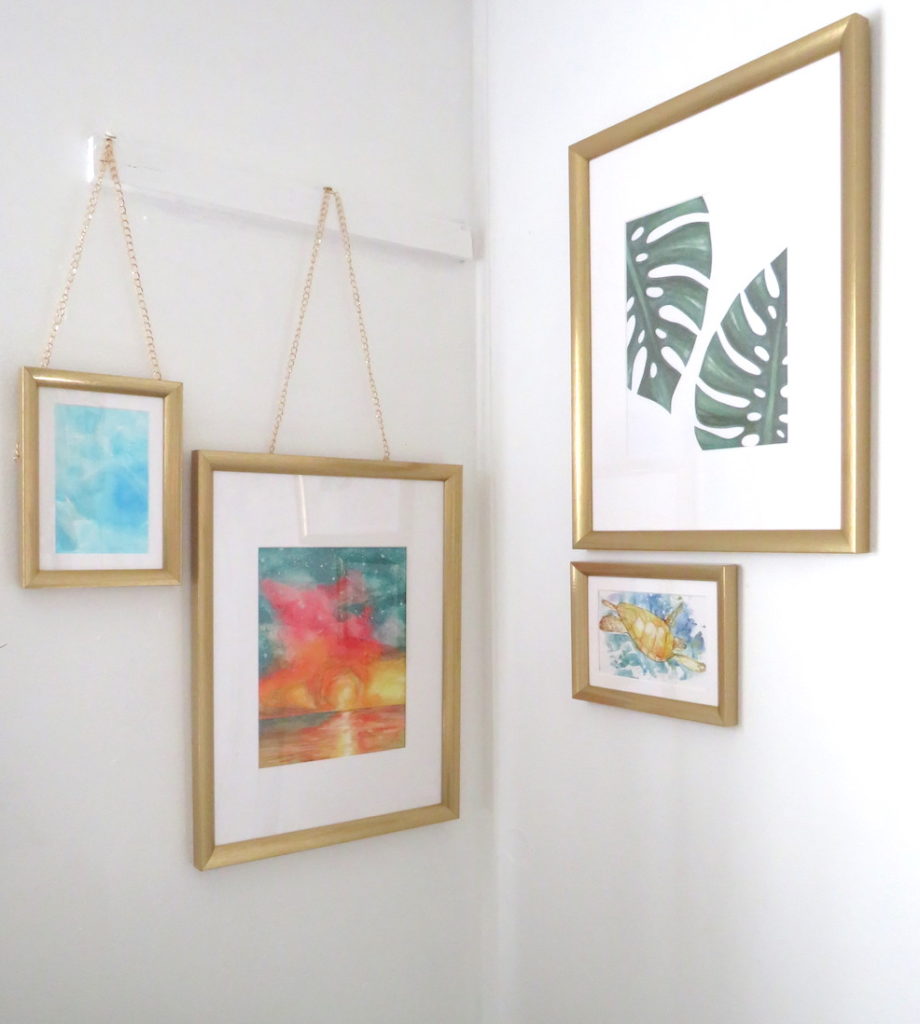
The chains on frames DIY from my corner gallery in my new office to me is absolutely beautiful. (Check out my office reveal here.) I’m so happy with my decision to go with the very delicate jewelry chain. (Similar chain here.) However, it was a bit tricky, and maybe not beginner-craft-level to hot glue the chains and do the faux/double “hang” like I did to protect the art from falling. It’s also a bit risky because the jewelry chain may discolor over time and not match the frames as well. For now, I absolutely love this detail in my new office and I would recommend this project.
9. Bathroom Vanity Update
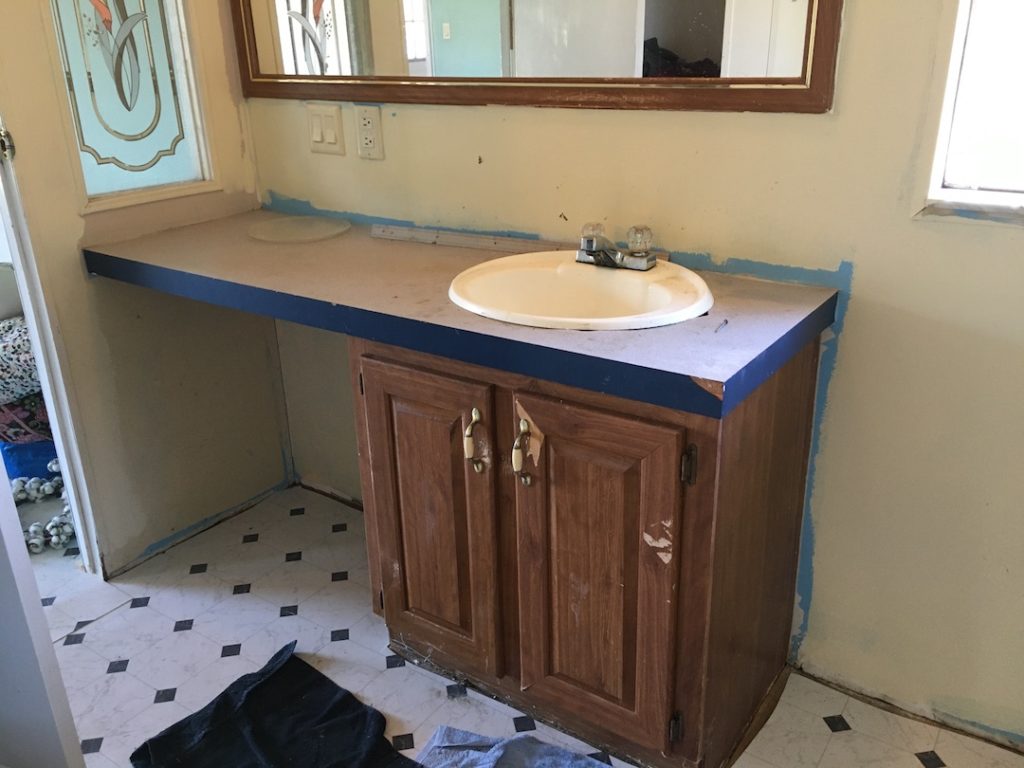
And now this DIY countdown has taken us to the bathroom! Check out the details from my bathroom vanity makeover in my Under $300 Bathroom Makeover blog post.
10. Dollar Tree Linen Closet Shelves
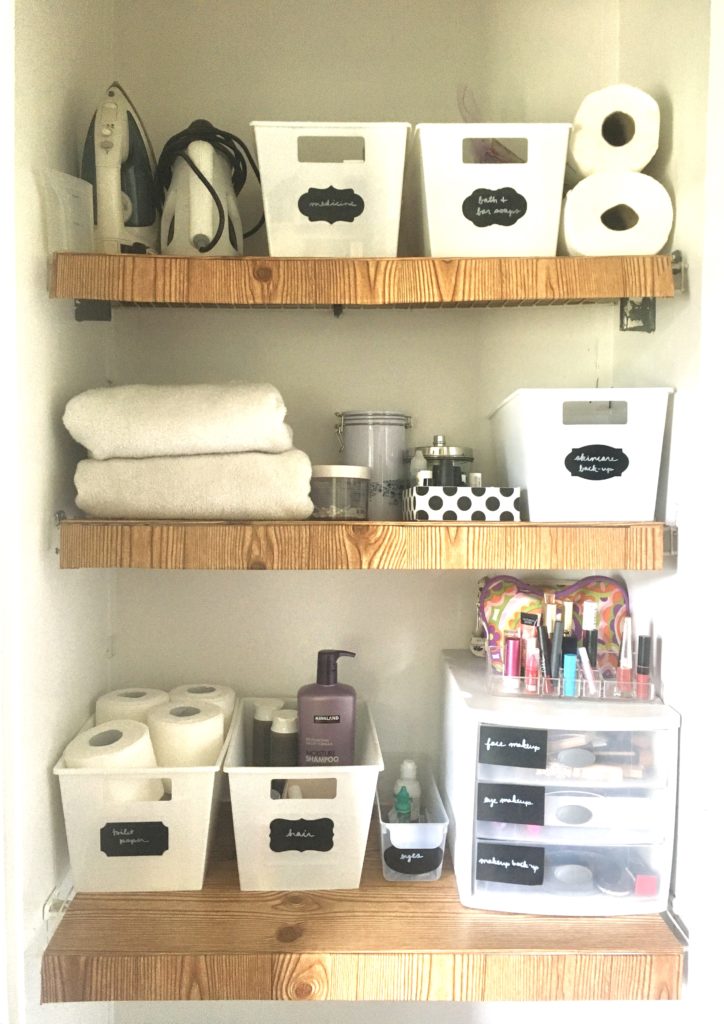
I’ve gotten a few compliments on these Dollar Tree DIY shelf coverings in my bathroom linen closet. You can check out the full details and find the Youtuber who inspired me, by checking out the Under $300 Bathroom Makeover blog post.
11. DIY Window A/C Unit Filler Inserts
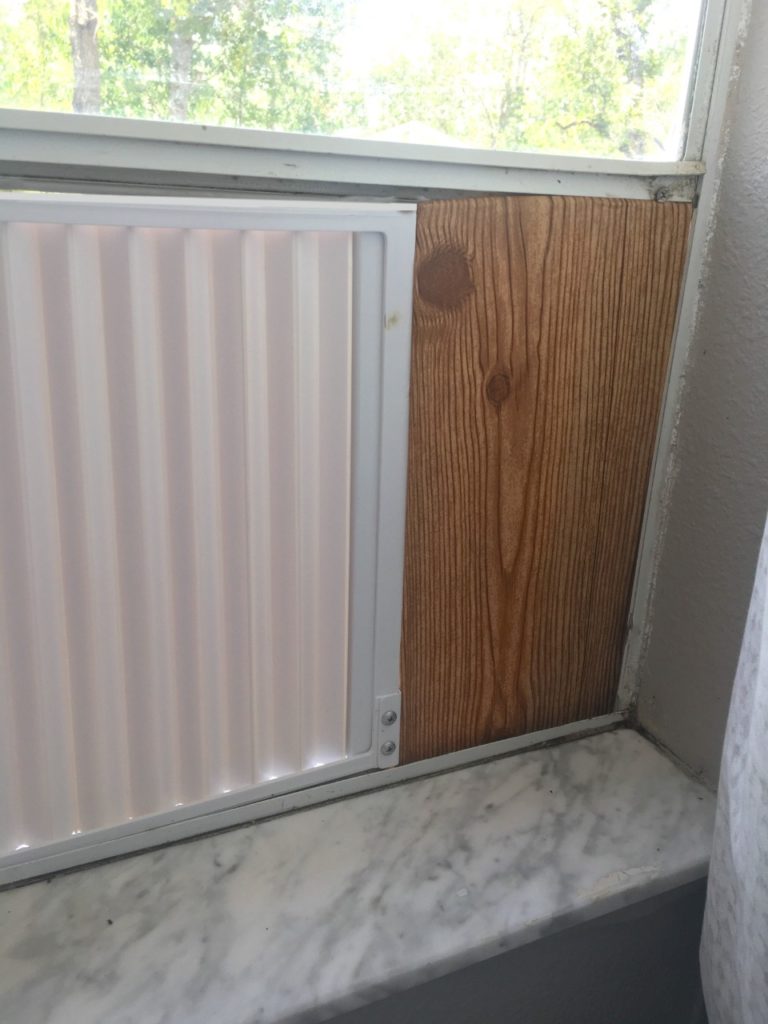
Not to toot my own horn, but I thought I was a frickin’ genius when I thought of these! If you’ve ever lived somewhere without central air conditioning (yes, hello from the mini-farm) you might like this DIY idea!
If you have a window A/C unit without the adjustable accordion attachments OR a large window, try this DIY. This was totally inspired by the linen closet DIY! I measured the opening and used extra foam core to cut out the perfect shape to fill it. Then, for both aesthetic and water proofing purposes, I covered in the faux wood contact paper. We’ve had several of these in use for months and they help keep bugs out. Even in this rainy season, and I have not yet had to replace them. And when I do, it’s less than $2 worth of supplies!
12. DIY Hem Taped Curtains
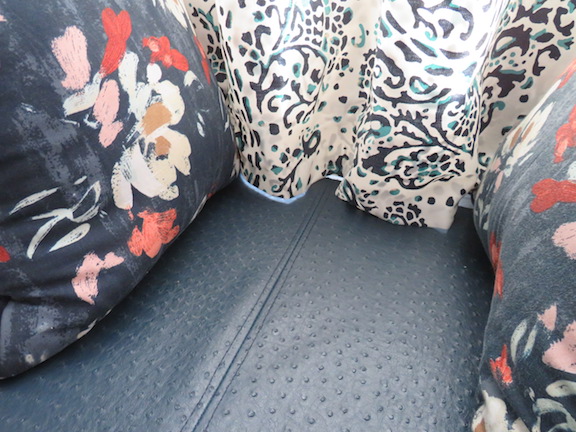
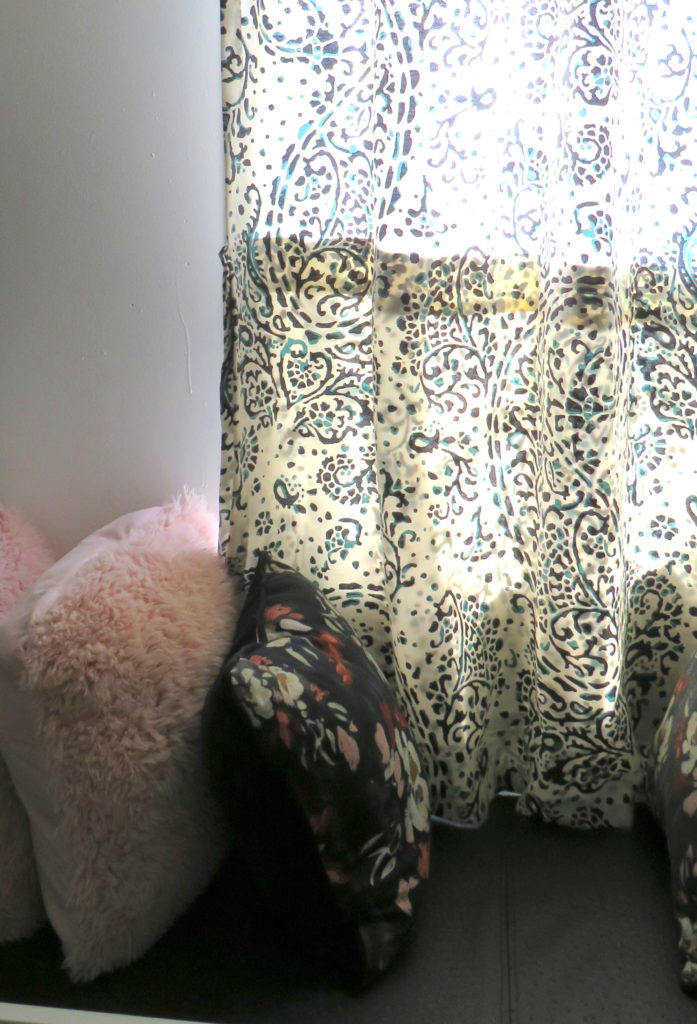
You can see more of this and before/after photos in my One Room Challenge Office Reveal. But basically I tried iron-on hem tape on my curtains and it worked! I love how this makes my space feel more put together and that I can always let the hem out if we move.
The one downside to this project is that sunlight may show your hem-tape work, as pictured above. It’s worth it for me, but if you do this project for a more permanent space, my advice is to cut them and keep the hem tape within about two inches of the bottom.
13. The Velvet Foot Stool
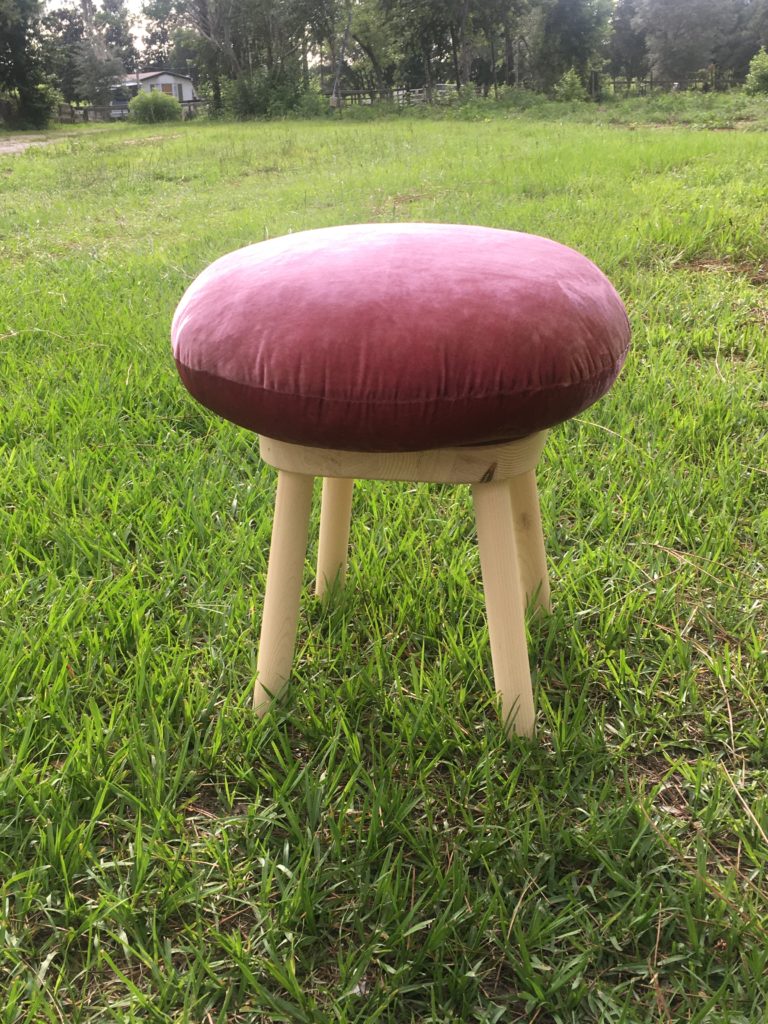
I still LOVE this foot stool, but I totally admit that the pillow is a bit delicately placed and can come off easily. In an office space I think this is fine, but it’s probably not going to stay if you have kids or house pets. Check out this DIY in my Instagram Story Highlights.
14. The Blue Bedazzled Upcycled Lamp
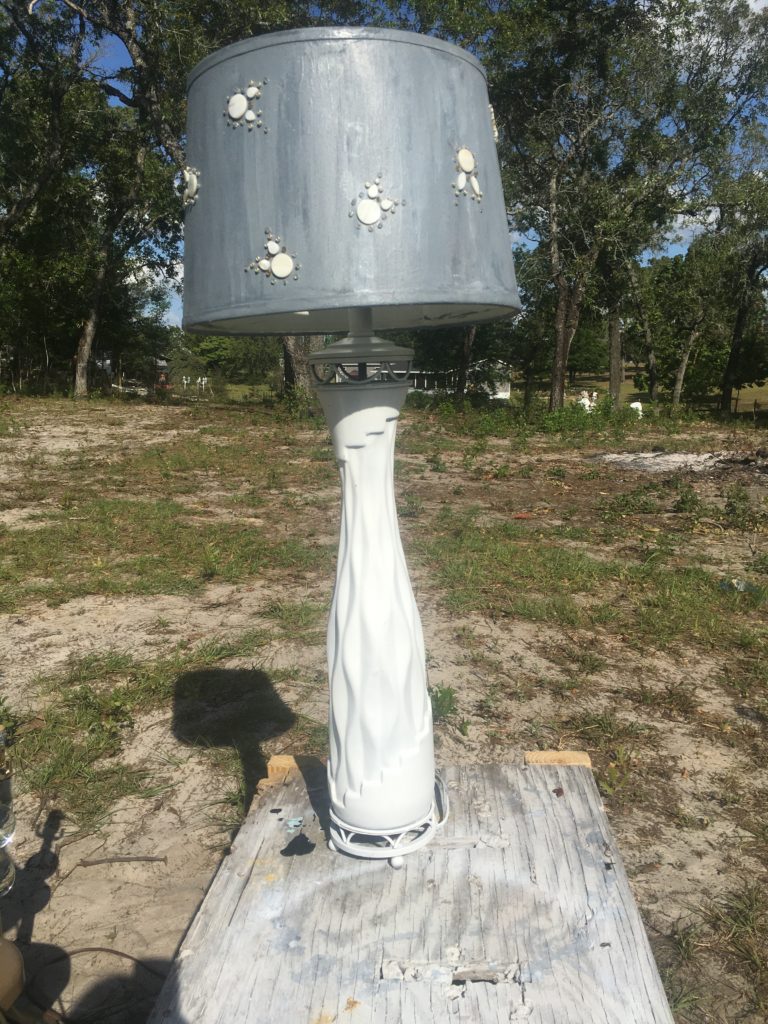
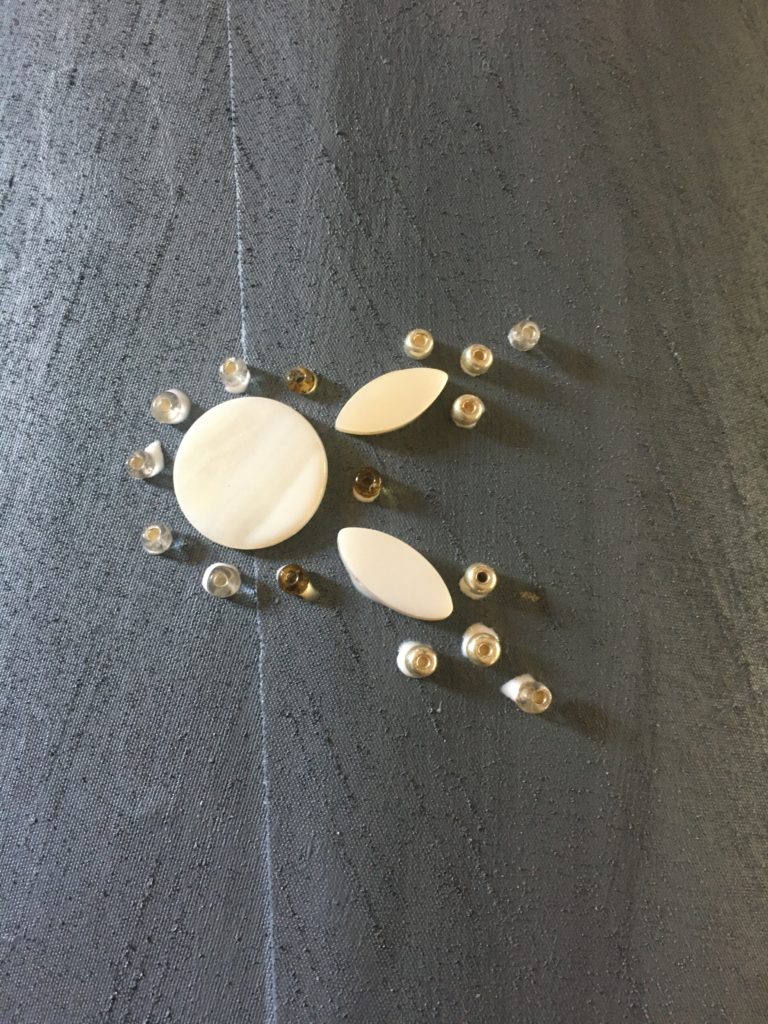
There may be a few of you scratching your heads as to why this lamp is so low on the list, and that is because it has broken! The tall lamp had taken many tumbles from its precarious side table, and the base has officially broken and the inside part of the shade has come out. However, I deeply love this lamp shade and I’m setting out to try to fix it and put it on a new base.
The tip to gain here is not to spend a lot of time/energy/resources on a lamp that is so easy to fall over/break. There are other fish in the sea! You can watch the full upcycled lamps saga, including this one (before its RIP), on this Instagram Highlight.
15. The 70s Upcycled Lamp
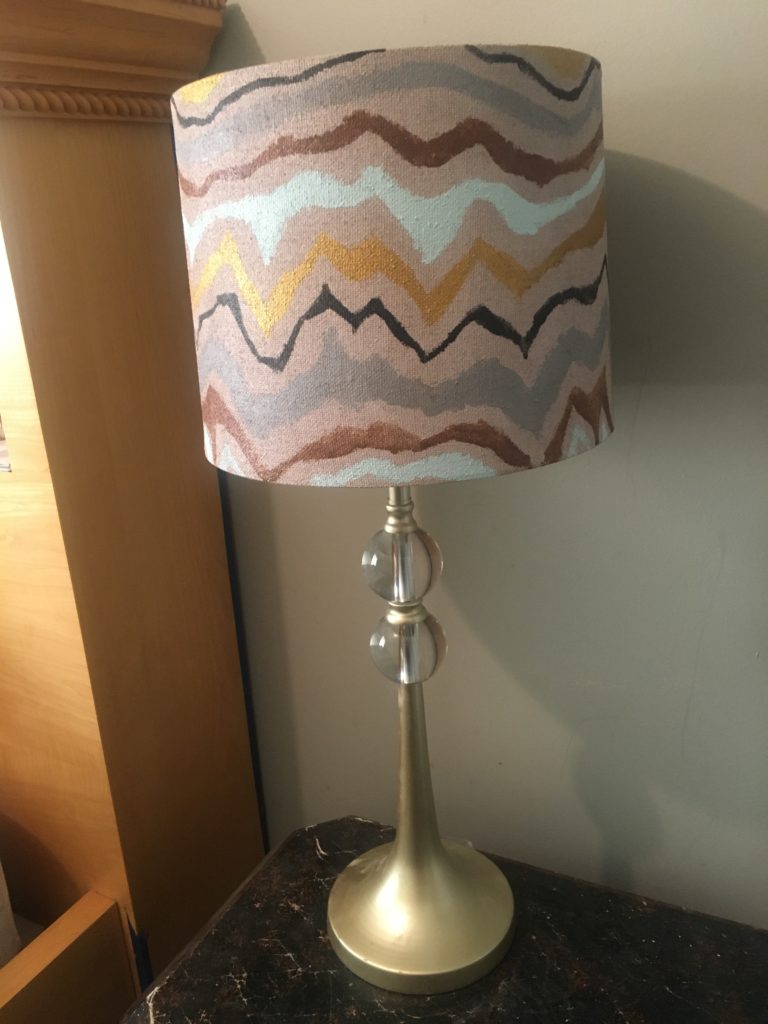
While I don’t want ANY of my DIYs to be at the bottom, our list has come to an end… I specifically have very positive memories painting this one during a beautiful sunset. I love how the painted lampshade gives a moody effect when the light is on. But I think it would look better one day on a more mid-century inspired base. If I painted something like this again, I would do slightly finer lines and more of them. You can watch the full upcycled lamps saga, including the 70s lamp shade, on this Instagram Highlight.
So this was a fun trip down recent memory lane for me! What did you think? Let me know your favorite DIY in the comments down below.
Be sure to subscribe here because more DIYs are on the way!
About Kaitlyn Loos

Kaitlyn Loos [loh-s] is one of the newest designers for interiors and events in the Tampa, Ocala, and Gainesville area. She brings over seven years of graphic design, project management, and event planning experience to create amazing spaces and experiences for her clients. She is one of the only interior design companies in her area who offers modern, fresh, pattern and color-savvy designs. From styling an event to designing an entire home, Kaitlyn Loos Design is a full service company that delivers style for nearly any investment level. She also enjoys sharing her ideas and projects through her new blog which reaches over 325 people monthly.
For more information about Kaitlyn, check out: About Kaitlyn: Interior Design, and About Kaitlyn: Event Planning.
You can also subscribe to the blog and contact Kaitlyn directly here.
Disclaimers: a small percentage of purchases from select links will benefit me via an affiliate program. I appreciate anyone who wants to support my blog by shopping the products, but there is no obligation to buy.
All of my DIY blog content is for informational and entertainment purposes only. I share what works for me in my home, but you should consult with professionals/landlords before taking on any construction projects. My blog does not constitute interior design advice for readers. I am not liable or responsible for any damages resulting from or related to your use of this information.


Leave a Comment